I remember spending hours tinkering with my microphone and trying to get that perfect sound, only to end up frustrated by buzzing noises and muffled audio. One day, I realized that my setup was missing two crucial pieces: a quality audio interface and the right studio headphones. It was like trying to paint with a dull brush—no matter how talented I am, the results just don’t shine through.
The Power of Good Gear for Your Voice
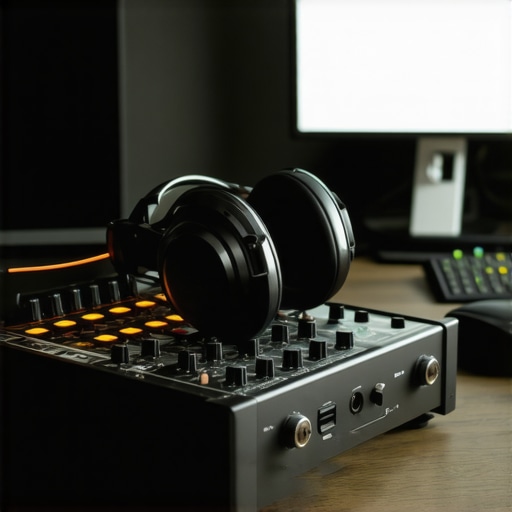
If you’re serious about making your podcast sound professional, you’ve probably felt the sting of poor audio quality. It’s not just about having a good mic; the gear that connects and monitors your sound makes all the difference. I used to think I could get away with cheap equipment, but I learned the hard way that investing in a high-quality audio interface and studio headphones transformed my recordings from amateurish to broadcast-worthy.
Today, I’ll share how you can avoid the common pitfalls and choose gear that elevates your podcast to the next level. Whether you’re just starting out or looking to upgrade, these insights will help you make smarter decisions and save money in the long run.
Is All the Hype About Premium Audio Equipment Actually Worth It?
Early on, I bought a fancy microphone without considering the interface or headphones. Guess what? My recordings sounded terrible because I overlooked the importance of proper monitoring and clean audio conversion. That mistake taught me that even the best mic can’t shine if it’s not connected through a good interface or listened to with accurate headphones. So, if you’re wondering whether investing in quality gear is really necessary, just ask yourself: Do you want your audience to hear your message clearly or struggle with distracting noise? The answer is obvious—and supported by studies showing that listeners are more engaged with clear, professional audio.
If you’ve faced this problem—bad sound, frustration, and wasted time—know that the solution is within your reach. I’ll guide you through selecting the right audio interface and studio headphones that suit your needs and budget, so your voice can truly stand out. Ready to upgrade your podcast setup? Let’s get started!
Choosing the Right Audio Interface for Crystal-Clear Sound
Start by selecting an audio interface that matches your recording needs. I remember the first time I plugged in a cheap interface, and my recordings were riddled with background noise. I quickly realized that a quality audio interface is the backbone of professional sound. Look for models with good preamps and low latency, like those recommended in our audio interface setup guide. Connect your mic via XLR, and configure your levels to avoid clipping or distortion. Use the DAW’s input monitoring features to check your sound in real-time and make adjustments accordingly.
Fine-Tuning Your Audio Interface Settings
When I upgraded my interface, I spent a morning tweaking the gain knobs, ensuring I didn’t overload the inputs. Proper gain staging is crucial — too high causes distortion, too low results in noisy recordings. Consult your interface’s manual for optimal settings, and consider recording a test clip to verify clarity. Remember, the goal is to capture your voice naturally without unwanted noise or artifacts.
Selecting Studio Headphones for Accurate Monitoring
Invest in a pair of studio headphones that offer flat frequency response. I initially used consumer headphones, which exaggerated bass and muffled mids, making editing a nightmare. The studio headphones buying guide helped me find models like the Audio-Technica ATH-M50x, which reveal every nuance of my voice. When monitoring, keep headphones at a consistent volume, and avoid listening to music simultaneously — this keeps your ears trained to your vocal recordings.
Testing and Calibrating Your Headphones
I spent an afternoon testing different headphone positions and volume levels, making sure I wasn’t listening to exaggerated bass or shrill treble. Use reference tracks to calibrate your ears, ensuring your mix sounds good on other systems. Regularly check for headphone comfort, as long sessions demand a snug, comfortable fit to prevent fatigue and maintain focus.
Integrating Your Gear with Your DAW Software
Link all your equipment to your Digital Audio Workstation (DAW). I recommend the best DAW software for voiceovers, which offers intuitive routing options and plugin compatibility. Set your input and output devices correctly within the DAW’s preferences. Test your setup by recording a short clip and playing it back through your headphones, ensuring latency is minimal and sound quality is pristine.
Optimizing Your Workflow for Efficiency
Once connected, streamline your workflow by creating dedicated tracks, labeling inputs, and setting up shortcuts. I also use workflow hacks to speed up editing, like batch processing noise reduction and leveling. An organized setup reduces frustration and lets you focus on your content quality, not technical glitches.
Final Checks Before Recording
Before hitting record, do a quick test: speak into your mic, listen through your headphones, and watch your input levels. Make sure there’s no unwanted hum or hiss, and your voice is clear and natural. Remember, your gear isn’t just equipment — it’s your voice’s best friend, so treat it well and keep everything calibrated for the best results.
Many creators fall into traps of believing they understand the nuances of audio interfaces, studio headphones, and DAW software — but the truth is, there are often overlooked details that can sabotage your sound quality. Let’s dig deeper into what most people get wrong and how to avoid those pitfalls, so your podcast or voiceover project sounds truly professional.
Why Your Choice of Equipment Might Be Working Against You
One common myth is that buying the most expensive gear automatically guarantees top-tier sound. While high-end equipment can offer advantages, it’s often the setup and calibration that make the real difference. For instance, an expensive microphone paired with a poor audio interface or misconfigured DAW settings can lead to distorted or noisy recordings. It’s a mistake to assume that gear alone will resolve issues; proper setup, like following our audio interface setup guide, is crucial.
Similarly, many neglect the importance of accurate monitoring. Using consumer-grade headphones can mislead your perception of sound, leading to mixes that sound good on your speakers but terrible elsewhere. That’s why investing in quality, flat-response studio headphones is essential. They reveal the true nuances of your voice, helping you catch issues before publishing.
Beware of the Oversimplified View of DAW Software
A widespread misconception is that all DAWs are equal, or that mastering the software is enough to produce professional results. The reality is, many creators overlook how critical proper routing, plugin use, and latency management are. For example, not configuring buffer sizes correctly can cause distracting delays during recording or editing. The DAW setup needs to be tailored to your specific hardware and workflow to achieve optimal results.
Moreover, many underestimate the importance of workflow hacks, like batch processing and organizing tracks. These efficiencies can dramatically improve your editing speed and quality. Check out our podcast editing tips to refine your process.
Advanced Question: How Can I Ensure My Voice Sounds Consistent Across Different Listening Devices?
This is a question that trips up even seasoned creators. Achieving a consistent sound across various systems requires mastering the art of calibration and referencing. Use reference tracks and listen on different devices — from earbuds to high-end speakers — to identify discrepancies. Additionally, applying subtle EQ adjustments and normalization within your DAW can help maintain consistency. This level of nuance is often overlooked but is key to sounding professional on all platforms. Experts recommend regularly revisiting your mix on multiple devices, as supported by recent studies on audio perception (see research on audio perception).
Maintain Your Setup for Consistent Quality
Once you’ve assembled a professional-grade podcasting setup, the key to long-term success lies in regular maintenance and choosing tools that last. I personally swear by a routine check every three months—cleaning connectors, updating firmware, and recalibrating your equipment ensures everything runs smoothly. For example, regularly updating your audio interface’s firmware can fix bugs and improve compatibility, preventing unexpected glitches during recording sessions.
Invest in Durable Cables and Connectors
Cheap cables are tempting, but they often cause intermittent noise or signal loss over time. I’ve learned that investing in high-quality XLR and USB cables significantly reduces maintenance headaches. I prefer brands like Mogami or Canare because they’re built to withstand the rigors of daily use, maintaining pristine signal integrity. When you keep your cables organized and inspect them for wear, you minimize downtime and ensure your recordings stay clean and professional.
Tracking Software Updates and Plugin Management
Keeping your DAW and plugins up to date is crucial. Software developers frequently release updates that patch bugs, add features, or improve performance. I’ve found that subscribing to update notifications from my DAW provider and regularly verifying plugin compatibility prevents crashes and latency issues. A good habit is to back up your plugin settings and presets before updating, so you can quickly revert if needed. This proactive approach keeps your editing process efficient and your sound consistent.
Tools I Recommend to Simplify Maintenance
For routine cleanup, I rely on tools like Blue Cat’s Audio Plug-ins for phase correction and noise reduction, which are invaluable during editing. Additionally, a portable compressed air duster helps me remove dust from connectors and ports without risking damage. Maintaining a dedicated workspace with anti-static mats and proper ventilation extends the lifespan of sensitive gear. When it comes to hardware, I always use a surge protector with EMI filtering—this prevents voltage spikes and electromagnetic interference that could degrade your equipment over time.
Plan for Future Upgrades and Scalability
Looking ahead, automation and remote collaboration tools are evolving quickly. As your setup matures, consider integrating networked audio interfaces that support multi-user sessions, like the latest models with Dante or AVB support. These allow seamless expansion without replacing your core gear, saving you money in the long run. Predicting where this trend is heading, I believe wireless audio transmission will become more robust and secure, reducing cable clutter and increasing flexibility. Embracing these advancements now can future-proof your setup.
How do I maintain my audio gear over time?
The best way to keep your equipment performing at its peak is to develop a routine: regularly clean connectors with contact cleaner, keep firmware and software updated, and store your gear in a controlled environment. Scheduling quarterly checks and investing in quality accessories like durable cables can prevent many issues before they arise. Remember, a little preventative care today saves hours of troubleshooting tomorrow. For detailed tips on creating a professional voiceover environment, check out our voiceover setup guide. Now, try implementing one of these maintenance habits and enjoy consistently stellar recordings.
The Hardest Lesson I Learned About audio interface, studio headphones, DAW software, podcast editing, and voiceover setup
One of my biggest lightbulb moments was realizing that investing in high-end gear isn’t enough; proper setup and calibration are what truly make a difference. I once bought a top-tier microphone but overlooked the importance of a quality audio interface and accurate monitoring, which led to poor sound quality despite my investments. This taught me that even the best microphone needs a solid foundation—like a well-configured audio interface and flat-response studio headphones—to deliver professional results.
My Essential Toolkit for Creating Podcast Gold
Over the years, I’ve relied on a few trusted tools that consistently elevate my work. The audio interface setup guide helped me understand how to optimize my hardware, while the studio headphones buying guide ensured I was monitoring my recordings accurately. For editing, I trust the best DAW software that streamlines my workflow and minimizes latency issues. These resources have become my go-to arsenal for consistent, professional-sounding podcasts and voiceovers.
Your Next Step is Embracing the Future of Audio
Now it’s your turn to take action. Remember, the right gear combined with proper setup is the secret sauce to a captivating podcast or voiceover. Don’t let technical hurdles hold you back; invest in quality equipment, follow expert setup tips, and maintain your gear regularly. The journey to stellar audio is within your reach—start today and watch your content stand out in a crowded digital world.
What has been your biggest challenge when setting up your podcast gear? Let me know below!