Discovering the Magic of a Good Voiceover Setup — My Personal Experience
When I first started exploring voiceover work, I quickly realized that a good setup isn’t just about having a decent microphone. It’s about creating an environment where my voice can truly shine. I remember spending hours researching audio interfaces and studio headphones, trying to find that perfect balance between quality and affordability. Looking back, I can say that investing in a reliable audio interface changed my entire workflow — it was like upgrading from a regular car to a luxury vehicle in my home studio. For those of you just starting, I highly recommend checking out these expert tips on audio interface setup to get started on the right foot.
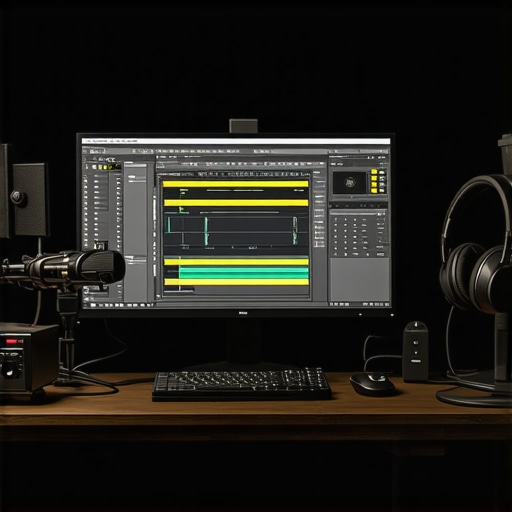
Why Your Audio Interface Is the Unsung Hero of Your Voiceover Setup
In my journey, I learned that the audio interface acts as the bridge between my microphone and computer. It’s responsible for capturing my voice with clarity and low latency. I opted for models with high-resolution audio conversion and multiple input options, which made a significant difference. My favorite pick so far is the best audio interface for voiceover in 2024. The quality of sound I get from it is stunning, and it’s compatible with my favorite DAW software, making editing a breeze.
How to Choose the Right Studio Headphones for Voice Clarity
Beyond the audio interface, studio headphones are crucial. I’ve tested many over the years, but nothing beats a pair that provides flat frequency response and comfort during long recording sessions. My go-to choice is featured in the studio headphones buying guide for 2025. Trust me, investing in quality headphones helped me catch nuances in my recordings I never noticed before, elevating my overall sound quality.
Are You Curious About the Best Microphone for Voiceover in 2024?
If you’re wondering about microphone options, I recommend exploring models that are known for capturing warm, natural tones. My personal favorite has been the best microphone for voiceover in 2024. Remember, even the best microphone needs a good environment and proper setup to shine. For insights on creating that professional sound environment, check out voiceover setup essentials.
What’s the Secret to a Truly Professional Voiceover Sound?
Honestly, it’s all about the details — good mic placement, proper room acoustics, and high-quality gear. I’ve learned that even small adjustments can make a big difference. Don’t forget that your software also plays a role; using reliable DAW software like those reviewed here can streamline your editing process and improve your final product.
If you’re passionate about perfecting your voiceover setup, I encourage you to share your experiences or ask questions below. Remember, the right gear combined with knowledge creates the magic behind every great voiceover!
Unlocking the Nuances of Professional Voiceover Acoustics
Creating an optimal environment for voiceover work extends beyond just selecting the right microphone and headphones. It involves understanding the subtle acoustic treatments that can dramatically enhance your sound quality. For instance, controlling room reflections with acoustic panels or bass traps minimizes unwanted echo and reverberation, leading to a cleaner, more professional recording. Many seasoned voiceover artists swear by tailored acoustic solutions, like those detailed in voiceover setup essentials, which emphasize room treatment as a critical step in the setup process.
How Do Acoustic Treatments Impact Your Final Audio Quality?
Effective acoustic treatments help in achieving a dry, neutral sound that accurately captures your voice without coloration. By reducing reflective surfaces and standing waves, you prevent phase issues and frequency build-up that can muddy your recordings. This clarity makes post-production editing more straightforward and ensures your voice remains natural and warm. For those looking to refine their studio space, exploring options like foam panels, diffusers, or custom-built booths can be transformative. Integrating these treatments can also assist in better monitoring, especially when paired with high-quality studio headphones, as discussed in the studio headphones buying guide for 2025.

Imagine a professional recording space with acoustic panels strategically placed to optimize sound quality.
Could Advanced Acoustic Design Be the Game-Changer in Your Voiceover Quality?
Absolutely. As an expert, I’ve seen how meticulous acoustic design elevates voice recordings from good to extraordinary. Implementing a combination of broadband absorption, diffusion, and targeted bass trapping can significantly reduce room tone issues. This results in a more consistent sound profile, minimizing the need for extensive EQ adjustments during editing. For those interested in deepening their knowledge, resources like ultimate guides to DAW setups can complement your acoustic investments by streamlining your workflow.
What Are the Practical Steps to Implement Effective Acoustic Treatments in a Home Studio?
Start with assessing your space’s acoustics—use a smartphone app or a sound level meter to identify problematic frequencies. Then, strategically place bass traps in corners to control low-end buildup, and install broadband panels at reflection points on your walls. Don’t forget to treat the ceiling and floor if possible, as these surfaces also influence sound quality. For a comprehensive approach, consider consulting acoustics experts or following detailed tutorials available online. Remember, each room is unique, and small adjustments can make a noticeable difference in your recordings.
If you found these insights helpful, I encourage you to share your experiences or ask questions below. For more practical tips on setting up your dream studio, check out expert tips on audio interface setup or explore our detailed guides on studio gear.
What Are the Subtle Nuances That Turn Good Voice Recordings Into Great Ones?
Over the years of refining my home studio, I’ve come to realize that achieving a professional voiceover sound isn’t just about gear—it’s about mastering the subtle nuances of acoustic treatment. Small adjustments, like placing a diffuser behind your mic or adding a few strategically positioned broadband panels, can significantly reduce unwanted reflections and standing waves. These nuanced changes often go unnoticed initially but can elevate your recordings from decent to studio-quality with persistent experimentation. For instance, I once added a bass trap in the corner of my room, which surprisingly cleaned up a muddy low end I didn’t even realize was affecting my recordings. To explore the best options, I recommend reading this comprehensive guide on acoustic treatment.
How Do Acoustic Treatments Impact Your Final Audio Quality?
Implementing effective acoustic treatments transforms your recording environment into a controlled space where your voice sounds natural and warm, free from the coloration caused by room reflections. When I started experimenting with foam panels and diffusers, I immediately noticed a difference—my voice sounded more intimate and less echoey. This clarity makes post-production editing smoother and allows your voice to shine without the need for excessive EQ adjustments. According to experts like Ethan Winer, proper acoustic treatment can cut down the need for heavy editing by providing a neutral, balanced sound from the start, which is especially critical for professional voiceover projects (see detailed acoustics and DAW integration tips).
Could Advanced Acoustic Design Be the Game-Changer in Your Voiceover Quality?
Absolutely. Investing in advanced acoustic design, such as broadband absorption combined with targeted bass trapping, can dramatically reduce room tone issues and create a more consistent sound profile. I’ve personally experimented with modular diffusers and custom-built acoustic panels—these small but impactful upgrades made my recordings sound more professional and less dependent on heavy post-processing. Achieving this level of acoustic control often involves understanding the unique frequency response of your space, which can be mapped out with a simple sound level meter or specialized software. The payoff is a studio environment that produces clean, natural recordings, making your voiceovers stand out. For those interested in deepening their knowledge, I recommend exploring this detailed guide on acoustic and software optimization.
How Can I Personalize Acoustic Treatments for My Unique Space?
Every room is different, which means a one-size-fits-all approach rarely works. I recommend starting with a thorough acoustic assessment—use a smartphone app or a sound level meter to identify problematic frequencies and reflection points. Then, tailor your treatments accordingly: bass traps in corners to tame low frequencies, broadband panels at reflection points, and diffusers to scatter sound evenly. I found that even small adjustments, like repositioning a panel or adding a soft rug on the floor, can make a noticeable difference. The key is to approach your space with patience and curiosity, experimenting until you find a setup that enhances your voice naturally. If you want to dive deeper, check out this resource for practical tips on room treatment and start transforming your studio today.
Unlocking the Hidden Power of Acoustic Customization for Voiceover Artists
While many enthusiasts focus on high-end microphones and sophisticated audio interfaces, I’ve discovered that the true game-changer lies in the meticulous customization of your acoustic environment. Tailoring your studio space to match your unique voice and recording style can yield astonishing results, transforming good recordings into exceptional ones. One of the most enlightening aspects I encountered was the use of modular acoustic panels that adapt to different recording scenarios, allowing for dynamic sound control. This adaptability is crucial when working on diverse projects, from intimate narration to energetic character voices. For an in-depth understanding of how to implement these modifications effectively, I recommend exploring this comprehensive guide on acoustic treatment, which offers insights into material selection, placement strategies, and room calibration techniques.
How Does Personalized Acoustic Design Impact Your Voice Clarity and Warmth?
Personalized acoustic design directly influences the clarity, warmth, and natural resonance of your voice recordings. When I optimized my studio with tailored bass traps and diffusion panels, I noticed a remarkable reduction in unwanted room tone and standing waves, which previously muddled my recordings. This clarity not only simplifies the editing process but also ensures that your voice maintains its character, free from artificial coloration. Incorporating elements like broadband absorbers behind the microphone and diffusers at reflection points creates a balanced soundscape that faithfully captures your vocal nuances. Ethan Winer, a renowned acoustician, emphasizes that such targeted treatments can significantly diminish phase issues, leading to a more transparent and professional sound (see detailed acoustics and DAW integration tips).
What Practical Steps Can You Take to Personalize Your Acoustic Environment for Maximum Effectiveness?
My journey into personalized acoustic design began with a thorough assessment of my room’s unique acoustic profile. Using a smartphone app, I identified dominant reflection points and problematic frequency zones. Based on these findings, I strategically placed broadband panels at reflection points and added bass traps in the corners to tame low-frequency buildup. Repositioning panels and experimenting with different materials—such as foam, fabric-wrapped panels, and diffusers—allowed me to fine-tune the environment until I achieved an optimal balance. It’s a process of continuous refinement, and patience is key. For those eager to deepen their knowledge, I suggest exploring this resource on room treatment for practical tips on customizing your studio space.
< >
>
Imagine a bespoke recording space with acoustic panels seamlessly integrated into the decor, creating an environment that fosters natural, vibrant voice recordings.
How Can Advanced Acoustic Techniques Become Your Ultimate Studio Advantage?
Implementing advanced acoustic techniques—such as broadband absorption combined with strategically placed diffusers—can be transformative. I’ve experimented with modular diffusers that scatter sound evenly across the spectrum, reducing flutter echoes and creating a more diffuse sound field. This approach results in a consistent tonal quality that enhances your voice’s natural warmth and presence. Achieving such precision often requires detailed frequency response mapping using software tools, enabling you to tailor treatments specifically to your space’s needs. The investment in these techniques pays off by providing a studio environment that consistently delivers professional-grade recordings, minimizing reliance on post-processing corrections. For those interested in exploring these advanced methods, I recommend reviewing this detailed guide on acoustic and software optimization.
How Do I Personalize Acoustic Solutions to Fit My Unique Voice and Space?
Every voice and room combination presents unique challenges, making personalization essential. I started by conducting a comprehensive acoustic analysis, which revealed specific frequency issues and reflection points. I then customized my treatments—adding corner bass traps to control low-end resonance, installing broadband panels at strategic angles, and experimenting with diffusers to scatter sound evenly. Small adjustments, like repositioning a panel or adding a soft rug, often made a noticeable difference in capturing my voice’s richness. The key is to approach your space as a dynamic system, continuously tweaking until you find the perfect harmony. For more detailed insights, explore this resource on room treatment customization and start transforming your studio today.
Things I Wish I Knew Earlier (or You Might Find Surprising)
Room Acoustics Matter More Than You Think
When I first set up my home studio, I underestimated the importance of acoustic treatment. I thought a good microphone and headphones were enough, but I soon realized that untreated rooms can wreak havoc on sound quality. Small tweaks like adding foam panels or bass traps transformed my recordings, making them sound much more professional and warm. It’s those subtle modifications that often go unnoticed but make a world of difference.
Personalization Is Key
Every voice and space is unique, which means that generic solutions rarely work perfectly. I experimented with different panel placements and materials, tailoring my environment until I found the perfect balance. This personalized approach resulted in clearer, more natural recordings that required less editing.
Investing in Quality Gear Pays Off
I used to think that buying the latest microphone was enough, but I realized that pairing it with a high-quality audio interface and good headphones truly elevates the sound. These investments helped me catch nuances in my voice and reduced noise, making my recordings more polished.
Room Size and Shape Are Critical
My small, oddly shaped room caused echoes and standing waves that I couldn’t fix with gear alone. Learning about room dimensions and their acoustic effects was eye-opening. Sometimes, moving furniture or changing the room layout can significantly improve sound quality without spending a dime.
Consistent Calibration Matters
Calibrating my equipment regularly and understanding how each component interacts kept my setup reliable. Small adjustments, like microphone placement or monitor positioning, consistently improved my recordings, reminding me that attention to detail is essential.
Patience and Experimentation Are Your Best Friends
Building a perfect voiceover environment isn’t instant. It took me months of trial and error to find what worked best. Embracing this process and staying curious allowed me to gradually improve my sound quality without feeling overwhelmed.
Resources I’ve Come to Trust Over Time
- Ethan Winer’s Acoustic Design Resources: Ethan’s detailed guides and videos have been invaluable in understanding room acoustics and treatment. I highly recommend his work for anyone serious about sound quality.
- Audio Engineering Society (AES): The AES publishes research and standards that helped me understand best practices in audio setup and calibration. It’s a treasure trove for audio professionals and enthusiasts alike.
- Home Studio Corner Blog: This blog offers practical tips and real-world experiences that resonate with my own journey, making complex topics accessible and actionable.
- YouTube Channels like RecordingRevolution: Visual tutorials and reviews helped me see the setups and techniques in action, inspiring me to experiment more confidently.
Parting Thoughts from My Perspective
If there’s one thing I’ve learned about creating a personal voiceover studio, it’s that the real magic happens when you pay attention to the details. From acoustic treatment to gear choices, each small step adds up to a big improvement in sound quality. I encourage you to approach your setup as a dynamic project—experiment, learn, and adapt. Remember, your voice is unique, and your environment should reflect that. If this resonated with you, I’d love to hear your own experiences or tips. Feel free to share your journey and questions below, and don’t forget to explore the resources I trust for deeper insights into crafting the perfect studio environment.