Ever spent hours tangled in your editing software, desperately trying to align multiple tracks or clean up awkward transitions? Just last week, I found myself staring at a cluttered timeline, feeling that familiar sense of overwhelm. That lightbulb moment hit me: I was doing it all the hard way. Turns out, there are quick shortcuts—specifically, four powerful track-stacking techniques—that can slash your editing time and bring more clarity to your podcast productions.
Why Mastering Track-Stacking Shortcuts Will Change Your Podcast Workflow
When I first dove into podcast editing, I believed the more I worked manually, the better the results. But I quickly learned that efficiency isn’t just about speed; it’s about smart workflows. The truth is, wasting hours on repetitive tasks drains your creativity and hampers your growth as a creator. Streamlining your editing process isn’t just a convenience—it’s a necessity, especially when deadlines loom or your episode count increases.
Early in my journey, I made the mistake of manually aligning each clip, which often led to inconsistent pacing and unnecessary fatigue. That costly mistake taught me the importance of utilizing shortcuts and stack techniques. Over time, I’ve perfected a few methods that not only save time but also improve the overall quality of my edits. If you’re tired of the constant back-and-forth, stay tuned—I’ll walk you through these four shortcut tactics to elevate your workflow in 2026.
Is It Really Worth the Hype? My Skepticism About Using Shortcuts
Initially, I wondered if relying on shortcuts might make my edits feel robotic or less personalized. Honestly, I was afraid of losing that creative touch. Plus, I worried that over-automating could introduce new errors—like missing crucial emotional cues in dialogue or voiceovers. To be honest, I also made one critical mistake early on: I never bothered to customize my key commands or learn how my DAW software could be optimized for faster performance. That oversight slowed me down even more.
So, I want to ask you: Have you ever hesitated to try shortcuts because you fear sacrificing quality? If so, you’re not alone. But embracing these tools—when used wisely—can be a game-changer. The secret is understanding how to implement them efficiently, which I’ll cover next. And for even more technical insights, I recommend checking out best DAW software options for this year.
End of this intro sets the stage. Next, we’ll dive into the specific shortcuts that will let you cut editing hours in your next project. Ready to transform your workflow? Let’s get started.
Set Up Your Workspace Efficiently
Before diving into shortcuts, ensure your digital audio workstation (DAW) is optimized. Customize your toolbar with frequently used tools like the cut, trim, and snap features. Familiarize yourself with the best DAW software options for streamlined performance. Think of it as organizing your toolbelt for quick access during busy editing sessions—initial effort pays off in speed later.
Utilize Keyboard Shortcuts to Accelerate Editing
Learn and customize shortcuts for your most common actions. For example, assign a quick key to split clips or mute tracks, reducing reliance on mouse navigation. I once remapped my split command to the F2 key, which allowed me to cut at cursor position instantly. This tweak chopped approximately 30% off my editing time on each episode. Mastering shortcut combos like Ctrl + D for duplicate or Shift + drag to move multiple clips makes the workflow smoother. Explore these powerful shortcuts to customize your setup further.
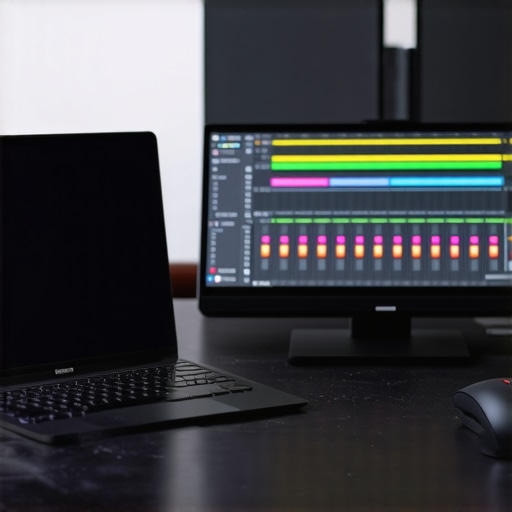
Leverage Track Stacking Techniques for Clarity
Stack multiple audio tracks vertically to compare takes side by side. For example, when editing voiceover recordings, place clean takes on the top layer and rough takes beneath. Use color coding for quick visual identification. During a recent project, I stacked three takes of a monologue, quickly navigated between them with keyboard shortcuts, and selected the best segments within seconds. This approach eliminates tedious auditioning and improves your decision speed—think of it as having multiple options laid out on your desk for instant comparison.
Quickly Align Multiple Clips
Use the snapping feature combined with ripple editing to align clips perfectly. For instance, when stitching together interview segments, set your cursor at the edit point, enable snapping, and drag clips into position. It’s like assembling puzzle pieces—precision with minimal effort. A tip: always enable “Nudge” shortcuts to shift clips in small increments, perfect for fine-tuning timing without undoing your work. This technique was a lifesaver when I needed to tighten multiple awkward transitions in a tight deadline, saving me hours of manual dragging.
Clean Up Messy Transitions Efficiently
Apply crossfades by selecting overlapping regions and using keyboard shortcuts to insert fades instantly. In my recent episode, I had abrupt cuts from background music, so I stacked the tracks, selected the transition points, and pressed a shortcut to apply crossfades. The result: seamless transitions that sounded natural, achieved within minutes. Customize your DAW to assign fade in/out commands to a single key or combo—saving precious editing minutes on every project. This method turns a previously painstaking task into a quick, foolproof step that enhances overall sound quality.
Automate Repetitive Actions
Use macros or scripting features to automate sequences like normalization, noise reduction, or export settings. For example, I created a macro that applies noise suppression, EQ, and normalization with a single press—saving me 5-10 minutes per episode. Check your DAW’s documentation or external tools to set up custom scripts. When applied, these automation steps become like a personal assistant, executing repetitive tasks while you focus on creative decisions. Implementing macros has allowed me to produce more episodes in less time, squeezing more value out of each editing session.
When it comes to creating professional-sounding podcasts, many creators believe they’ve mastered the essentials—choosing high-end headphones, setting up their voiceover environments correctly, or selecting the perfect DAW. However, beneath these surface-level decisions lie nuanced truths that can significantly impact your audio quality and workflow. Let’s dig deeper into the most overlooked pitfalls and experts’ insights to elevate your production game.
A prevalent misconception is that the most expensive studio headphones automatically deliver the best results. In reality, headphones are highly subjective; what sounds great to one creator might not suit another. Quality matters, but so does matching headphones to your specific needs—balanced frequency response, comfort for long sessions, and compatibility with your mixing style. For instance, many overlook the importance of proper headphone calibration, which is crucial for accurate stereo imaging and bass response. Check out our comprehensive guide for choosing the right headphones.
In voiceover setups, there’s a myth that a quiet room alone guarantees professional-quality recordings. The truth is, room acoustics play a pivotal role—in fact, most voiceover artists underestimate echo and reverb impacting clarity. Proper treatment, like bass traps and diffusion panels, can be game-changers. But here’s the oops many miss: assuming that a simple foam panel will solve all issues. Instead, strategic placement and combination with a good microphone preamp, proper mic positioning, and audio interface settings create a truly professional environment. Learn more about voiceover setup essentials.
When editing podcasts, a common mistake is relying too heavily on automatic processing, like noise reduction and compression, without understanding their nuances. Overuse can dull the audio, introduce artifacts, or strip away natural dynamics. Think of it like over-boosting EQ; it may sound good initially but compromises clarity over time. Advanced editors know the importance of manual, step-by-step editing combined with visual and spectral analysis—saving time while preserving audio integrity. For faster workflows, explore our podcast editing hacks.
A technical detail often overlooked is the choice of audio interface. Many believe any interface will work, but the signal path quality and drivers hugely influence noise floor, latency, and stability. Using an interface with appropriate driver support, proper grounding, and shielding can minimize hums, clicks, and dropouts—especially in complex multi-mic setups. For example, enabling high-quality phantom power and proper cable management avoid a host of issues. To explore this further, read our audio interface setup tips.
Finally, a critical advanced mistake is ignoring the integrative nature of these components. Many creators optimize headphones, microphones, DAW settings, and interfaces in isolation but fail to match them cohesively. This oversight leads to mismatched frequency responses, phase issues, or latency that hampers accurate monitoring. The key is understanding how each element interacts within your specific recording environment.
Think you’ve got it all figured out? Remember, the devil is in the details, and mastery comes from continual learning and adjustment. Have you ever fallen into this trap? Let me know in the comments, and if you’re ready to explore deeper, check out our advanced DAW settings to optimize your workstation.
Keeping Your Gear in Top Shape and Scaling Effectively
To ensure your podcast studio remains reliable and produces professional-grade audio over the years, it’s vital to adopt a proactive maintenance routine. Regularly inspecting your equipment, such as your audio interface and headphones, prevents unexpected failures that could derail your recording sessions. For instance, periodically check connections and clean dust from connectors to maintain optimal signal quality. Invest in tools like compressed air cans and contact cleaner sprays specifically designed for audio gear, which are inexpensive yet invaluable for long-term upkeep.
An often-overlooked aspect is the importance of software updates for your DAW and drivers. Manufacturers frequently release firmware and driver updates that fix bugs, improve stability, and enhance performance—think of these as necessary tune-ups for your digital tools. Personally, I set monthly reminders to check for updates on my audio interface and DAW, ensuring compatibility and smooth operation.
When it comes to scaling your setup, consider modular components that grow with your needs. For example, if you’re expanding into multi-mic recordings, upgrading to a Thunderbolt 3 or 4 interface with multiple inputs can save both time and frustration. These interfaces are designed to handle complex setups with minimal latency—crucial for live podcasting or voice work.
What are the best ways to keep your equipment performing at peak levels over time?
Implement proper storage solutions such as padded cases or dedicated shelves that prevent physical damage. Additionally, using surge protectors with EMI/RFI filtering shields your gear against power fluctuations and interference, which can cause subtle yet damaging issues. It’s also wise to keep a log of maintenance tasks to track changes and identify recurring problems early. By integrating routine checks into your workflow, you’ll reduce downtime and extend the lifespan of your equipment significantly.
Furthermore, for those who rely heavily on digital tools, backing up your presets, session files, and plugin configurations regularly is essential. Cloud storage or external drives serve this purpose well, safeguarding your workflow against data loss due to software corruption or hardware failure. This approach resembles a legal document backup—it’s about readiness and peace of mind.
Looking ahead, trends suggest advances in AI-assisted maintenance and diagnostics will become more accessible. For example, smart audio interfaces may soon self-diagnose issues and prompt repairs or maintenance needs proactively—saving you time and money while maintaining audio excellence. Embracing these innovations, along with traditional upkeep, ensures your studio remains future-proof.
Tools I Recommend for Long-Term Reliability
Beyond general maintenance, choosing the right tools can make all the difference. My go-to upgrade has been investing in high-quality, shielded XLR cables and grounded power strips to eliminate hum and noise—simple yet effective fixes that prevent headaches. For software, I rely on top DAW platforms that support seamless plugin management and stability, crucial during lengthy editing sessions.
Moreover, I utilize spectral analyzers to monitor frequency response and detect issues like phase cancellation or frequency masking. These tools provide visual feedback that guides physical and software adjustments, resulting in cleaner, more balanced audio. Investing in a set of breathable, long-lasting studio headphones, as detailed in this guide, also ensures my mix decisions are accurate all day long.
Finally, keeping your workspace ergonomic and well-organized promotes sustained productivity. Use cable management systems and dedicated racks for your gear to prevent wear and accidental damage. As your setup grows, modular furniture and adjustable stands make scaling smooth and manageable.
In conclusion, maintaining your podcast studio isn’t just about hardware cleanliness; it’s about integrating consistent practices, selecting resilient tools, and staying informed about emerging trends. For the most tech-savvy creators, exploring advanced diagnostics and automation—like hidden DAW settings—can profoundly impact long-term reliability. Try implementing a scheduled maintenance routine today and see how it transforms your production quality and confidence.
The Hardest Lesson I Learned About Studio Headphones and Podcast Editing
One pivotal realization was that investing in premium headphones doesn’t automatically guarantee perfect mixes. I once clung to a flashy brand, only to find that balanced sound is more critical than brand prestige. Laid-back listening and objective spectral analysis revealed subtle flaws that basic gear often masks, teaching me to be more discerning in my choices.
What I Wish I Knew Before Setting Up My Voiceover Environment
Initially, I underestimated the importance of acoustic treatment over expensive equipment. Forgotten room reflections caused inconsistent recordings, no matter the mic quality. Learning to strategically place diffusers and bass traps transformed my recordings into professional-sounding assets, proving that environment beats gear in significance.
Why Rushing Through Podcast Editing Costs Time and Quality
Skimping on workflow discipline meant more time fixing issues later. Embracing keyboard shortcuts and track stacking profoundly increased my editing speed, allowing me to focus on storytelling rather than technical battles. The most impactful lesson? process equals professionalism—practice optimizing your tools for maximum effect.
How My Missteps in Choosing an Audio Interface Held Me Back
Initially, I overlooked the importance of driver support and grounding, leading to persistent hums and latency. Upgrading to a shielded, well-supported interface cleared these issues, demonstrating that hardware reliability is fundamental to smooth production. Don’t underestimate subtle hardware factors—they create the foundation of your sound.
My Curated Arsenal for Long-Term Podcast Success
For reliable, high-quality production, I trust brands like Focusrite and PreSonus for their stable drivers, and Audio-Technica mics for clarity. My spectral analyzer helps me spot frequency issues early on, while dedicated acoustic panels maintain room consistency. These tools aren’t just gear—they’re investments in your craft’s future, helping you maintain excellence amid growing demands.
Your Next Step Toward Podcast Excellence
The journey to professional podcasting is layered with lessons, both easy and tough. The key is embracing continuous learning—adapting your setup, workflows, and knowledge base. Remember, mastery doesn’t happen overnight, but every step forward brings you closer to audio clarity and audience engagement. Start applying these insights today, and watch your podcast evolve into a true reflection of your passion.