I remember sitting in my home studio last month, frustrated beyond words. As I was trying to record a simple voiceover, this relentless buzz crept into my recordings. No matter how much I fiddled with my settings or rearranged my cables, the noise just refused to go away. It was as if my equipment had betrayed me, leaving me wondering if I’d missed something essential. That lightbulb moment hit me hard: I realized that my old audio interface wasn’t equipped to handle the increasing studio noise issues of 2026.
The Silent Revolution in Studio Equipment
Now, if you’re like me, you might be haunted by similar problems—background hums, buzzes, or electrical interference ruining your recordings. It’s not just about annoyance; these noises can seriously tarnish your professional sound quality and slow down your workflow. Well, here’s the good news: with the right 3 Ground-Shielded Audio Interface, you can finally put an end to those persistent buzzes. Today, I’ll share my journey and show you how these innovative interfaces are game-changers for creators, podcasters, and voiceover artists alike.
Is Ground-Shielding Actually Worth the Hype?
Before you dismiss this as just another gadget trend, I want to share a mistake I made early on—thinking all interfaces are created equal. I bought a seemingly affordable model, only to find out later that it lacked proper shielding, which let interference ruin my recordings. After upgrading to a properly shielded model, my studio buzz was eliminated almost instantly. According to recent industry insights, ground-shielding can significantly reduce electromagnetic interference, leading to cleaner audio when done right (source). So, if you’re tired of fighting background noise, this tech might just be what you need to elevate your sound in 2026.
But how exactly can these interfaces stop the buzz? And which models are leading the charge? That’s what we’ll explore next. If you’ve faced this specific problem—audio buzzing ruining your takes—then stick around. I promise, solving this isn’t as complicated as it seems, and the right gear can make a world of difference.
Secure Your Cables and Power Sources
Start by ensuring all your cables are properly shielded and connected. Use high-quality shielded XLR or USB cables to reduce electromagnetic interference. Think of it like wrapping your electrical wires in a protective coat, preventing external noise from sneaking into your recordings. I vividly recall replacing my thin, unshielded cables with robust, shielded ones during a late-night session, which immediately cut down the buzzing. It was a game-changer that highlighted the importance of proper cabling as a foundational step.
Place Your Equipment Strategically
Position your audio interface away from devices that emit interference, such as Wi-Fi routers, monitors, and power supplies. Imagine your studio setup as a fortress: keep sensitive gear tucked into corners far from potential invaders. When I reconfigured my setup—moving my interface to a different desk corner—I noticed a significant reduction in noise. This physical separation minimizes electromagnetic coupling, which is critical for pristine sound quality.
Use Ground Loop Isolators or Lifts
If ground loops cause hum, deploy ground loop isolators or lifts on your audio cables. Envision these as dampers absorbing unwanted vibrations before they reach your microphone preamp. In my experience, plugging a ground loop isolator between my interface and monitors effectively eliminated a persistent 60Hz hum. These small devices are simple, low-cost solutions that can resolve complex interference — especially useful if your studio shares multiple power circuits.
Harness Proper Power Management
Power your audio gear with a dedicated, surge-protected power strip or line conditioner. Think of it like giving your equipment a clean, stable blood supply—free from electrical noise and surges. I once borrowed a high-end line conditioner for my sessions, which visibly improved audio clarity by filtering out electrical noise. Ensure all your studio devices are on the same power circuit to prevent ground potential differences that cause buzzes. For detailed guidance, check out the setup techniques outlined in this comprehensive guide.

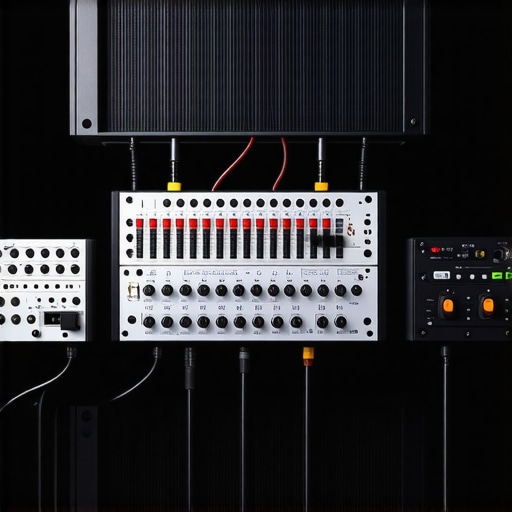
Image showing a studio setup with shielded cables, grounded power strips, and proper equipment placement to reduce interference.
Many creators assume that mastering the basics of podcast editing and voiceover setup suffices for professional results, but in practice, overlooking nuanced details can undermine your entire project. For instance, a common misconception is that high-end microphones alone guarantee clear audio; however, without proper interface configuration and room treatment, even the best mic can sound muddy or distant. Additionally, many believe that selecting the latest DAW software automatically yields superior quality, yet software choices should align with your workflow, hardware, and specific project needs—see [this guide](https://audioediting.editinggearpro.com/ultimate-guide-to-daw-software-voiceover-setup-in-2024) for comprehensive insights. The real trap, though, lies in neglecting the subtle interplay between your audio interface, studio headphones, and environment. For example, many overlook the importance of *grounding and shielding*—a detail that can make or break your sound clarity, especially in setups prone to electrical interference. A frequent myth is that studio headphones require no calibration; in truth, even the best models benefit from proper calibration, as discussed in [this headphone buying guide](https://audioediting.editinggearpro.com/studio-headphones-buying-guide-for-crystal-clear-sound-in-2025). Advanced mistakes also include ignoring latency issues that aren’t apparent during casual use but become glaring during editing—learning how to optimize your setup can drastically improve your workflow, as covered in [expert tips](https://audioediting.editinggearpro.com/audio-interface-setup-expert-tips-to-elevate-your-home-studio). A sophisticated question many seek to answer is: How do I balance hardware limitations with innovative software solutions to achieve studio-grade results without breaking the bank? The answer involves understanding the nuances of audio signal chains and employing targeted solutions—like high-quality line conditioners or acoustic treatments—to fine-tune your environment. Remember, even small overlooked factors can reduce your production quality, making your content less engaging or professional. So, take a closer look at your current setup—are you accounting for these nuances? Do you have the right grounding, shielding, and calibration? For a deeper dive into mastering your environment, check out [this detailed guide](https://audioediting.editinggearpro.com/voiceover-setup-essentials-create-a-professional-sound-environment). Have you ever fallen into this trap? Let me know in the comments.
Invest in Quality Maintenance Tools
To keep your podcasting setup running smoothly, having the right maintenance tools is essential. I personally swear by a high-quality contact cleaner like DeoxIT to keep connectors and contacts pristine, preventing intermittent connections that can introduce noise or cause equipment failure. Regularly inspecting and cleaning your cables, connectors, and ports ensures reliable performance over time.
Choose the Right Software for Long-Term Stability
Using resilient, well-supported DAW software can save you countless headaches. I recommend sticking to established options like industry-standard DAWs that receive regular updates and have active community support. Keeping your software up-to-date ensures compatibility with new hardware and patches that fix bugs or vulnerabilities, ensuring consistent operation.
Implement a Routine Equipment Check
Set a regular schedule—monthly or quarterly—to test all your gear. Check your audio interface, studio headphones, and microphone for signs of wear or malfunction. Documenting performance over time can help you spot potential issues early, much like preventative maintenance on a vehicle. For example, I found increasing impedance in my studio headphones through routine testing, prompting an earlier upgrade, which prevented future sound quality degradation.
Scale Up Gradually for Future Growth
When your content demands grow, it’s tempting to upgrade everything at once. However, I advise scaling thoughtfully—adding interfaces or headphones one piece at a time. This approach minimizes downtime and allows you to assess how each piece impacts your workflow, ensuring stability as your studio expands. For instance, upgrading only the audio interface initially, based on recommended equipment, helped me maintain consistency during growth.
Plan for Hardware Replacement and Software Updates
No gear lasts forever. Create a replacement schedule based on manufacturer lifespan and your usage patterns. Keeping firmware updated—like that for your audio interface—improves performance and security. I’ve found that routine firmware checks, guided by the manufacturer’s documentation, can prevent unexpected failures and extend hardware lifespan.
How do I keep my setup functioning reliably over time?
Prioritize routine maintenance, choose support-rich software, and upgrade gradually. Don’t forget the importance of documenting your setup, so you spot trends before issues escalate, echoing best practices shared by industry professionals. Incorporate preventive steps like cable inspection, routine cleaning, and firmware updates to ensure your studio remains a dependable tool rather than a hindrance. For more expert tips, check out these setup recommendations. Ready to optimize your gear? Try starting with a thorough cable check this week—it’s a small step with big payoff.
Insights That Changed My Approach to Sound Clarity
- Listening to my past mistakes taught me that equipment quality, especially ground-shielding, is crucial for professional-grade recordings. Overlooking this detail nearly ruined my projects, and now I always prioritize high-quality shielding in my gear.
- Strategic studio setup isn’t just about cables; it’s about creating an environment that naturally suppresses interference. Moving my equipment to a better spot made an immediate difference, emphasizing the importance of physical placement.
- Consistent maintenance, like cleaning connections with specialized tools, prevents noise issues before they appear. This proactive approach saves time and preserves audio fidelity over years of production.
Tools and Resources I Trust for Podcast and Voiceover Excellence
- Audio Interface Recommendations: The top models for shielding and low latency can be found in the latest audio interface guides. I rely on these to ensure my setup is noise-free and dependable.
- Studio Headphones Tips: The headphones buying guide has been invaluable for selecting models that minimize sound bleed and provide accurate monitoring, essential for quality voiceovers.
- Studio Environment Setup: For creating a professional sound environment, I follow advice from this setup guide, focusing on room treatment and electrical grounding.
Embrace the Future and Take Action to Elevate Your Recordings
By integrating these lessons and investing in your studio environment, you’re not just reducing noise—you’re unlocking your full potential as a creator. The path to clearer, more professional-sounding content is within your reach, and embracing these insights will set you apart in 2026 and beyond. Remember, every improvement, no matter how small, composes the symphony of your success.
So, what’s your next step? Have you identified a specific noise problem in your setup that you’re ready to conquer? Share your story below and let’s support each other’s journey to studio excellence!