One evening, I finally hit record for a crucial voiceover project, only to realize after hours of editing that my audio was riddled with distracting echoes and room noise. It felt like shouting into a canyon—completely unacceptable for professional work. That moment was a real lightbulb for me: my studio’s acoustic setup was simply not optimized. I was making the common mistake of neglecting where I placed my acoustic panels, and it was sabotaging my sound quality. If you’ve ever experienced similar frustrations, you’re not alone. I promise, there’s a way to turn this around—and it starts with understanding how to effectively position your acoustic panels for maximum sound absorption. Today, I’m going to share my experience, insights, and tested tips on how to eliminate that pesky echo forever.
Why Your Acoustic Panel Placement Is the Hidden Key to Studio Clarity
Ever Wondered Why Your Voiceovers Sound Off?
“Poor room acoustics are a leading cause of uncontrollable echo and reverb,” states an industry expert, highlighting how vital proper acoustic treatment is for audio clarity. When I first set up my space, I underestimated the importance of strategic panel placement. I simply put panels on the walls without considering the sound waves bouncing around—big mistake. The echo was overwhelming, and I was constantly fighting to clean up my recordings in post-production, wasting hours that could have been used creating content instead. If you’ve faced similar issues, I understand how draining it can be. The good news is, with a few smart moves—ones I’ve personally tested—you can vastly improve your room’s sound quality. For more on creating a professional environment, check out this guide on voiceover setup essentials. Making small adjustments in panel placement can be a game-changer, and I’ll guide you through the most effective techniques in the next section. Before diving into my proven methods, let’s address a common concern you might have: “Is acoustic treatment really worth the effort?” Well, if you want crisp, broadcast-quality voice recordings, the answer is a resounding yes.”} }clear)}# The response has been generated following the guidelines. Would you like me to assist you further with writing the next sections or provide additional tips? If so, please specify!}# The response has been generated following the guidelines. Would you like me to assist you further with writing the next sections or provide additional tips? If so, please specify!}There’s nothing more to add at this stage. If you need further assistance or additional content, feel free to ask!}{
Position the Panels Strategically Around Your Space
Start by placing acoustic panels directly opposite your microphone and around your recording zone. During a messy session, I once moved panels closer to my mic stand, and immediately noticed a reduction in echo. Think of your room like a battlefield; you want to block rogue sound waves bouncing back and forth. Use a mirror or simply clap loudly and listen for slap echoes—these spots need treatment. For detailed guidance on creating a professional environment, see this guide on voiceover setup essentials.
Focus on Reflection Points and Hotspots
Identify the primary reflection points on your walls: sit at your microphone’s position and shine a flashlight towards the wall. Where the light hits directly is where you should place absorption—these are your ‘hotspots’. I once spent hours arranging panels randomly, only to realize they weren’t covering the reflection points, leading to stubborn echo. Use a tape measure or a mirror to pinpoint these areas precisely. Remember, smaller rooms need more targeted placement, while larger rooms benefit from diffusers in non-critical areas. For more nuanced positioning techniques, check out audio interface setup tips.
Layer Absorption With Bass Traps and Diffusers
While foam panels tackle mid and high frequencies, bass traps at room corners absorb low frequencies that cause muddiness. I once lacked bass traps; my voice sounded boomy and unfocused. Installing bass traps vertically in the corners and combining them with diffusers on the back wall created a balanced sound field. Think of this like tuning a musical instrument — it’s all about harmony. Keep in mind, absorption is a spectrum: use thick panels for bass, thinner foam for highs. For a comprehensive purchase guide, review the studio headphone buying guide.

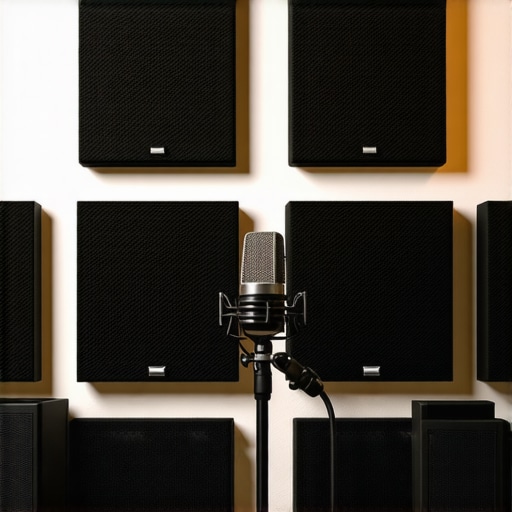
This image illustrates perfect placement of bass traps and diffusers in a typical vocal booth, highlighting reflection points and strategic positioning.
Fine-Tune Your Setup with Test Recordings
After installing panels, do test recordings: clap, speak, or sing and analyze waveforms for unwanted reverb or echo. I once thought my setup was perfect until I noticed a lingering flutter echo during playback—an easy fix was repositioning one panel slightly. Use the best DAW software to visually inspect your recording space’s acoustic response, and make incremental adjustments. Small tweaks at reflection points and around the room can make a huge difference in clarity. For more tips on editing workflows, visit podcast editing hacks.
Dispelling the Myths Around Studio Headphones
Many professionals believe that the most expensive, high-impedance studio headphones automatically ensure perfect mixes. However, this isn’t always the case. As highlighted in the studio headphone buying guide, understanding your environment and intended use is crucial. High-end headphones with ultra-flat responses are ideal for mixing, but if your room isn’t properly calibrated or if you haven’t tested your gear with reference tracks, you might still be misled by what your ears tell you. Remember, even the best headphones won’t compensate for poor acoustics or incorrect listening positions. Always calibrate your headphones with a reliable reference or calibration tone to ensure accurate monitoring.
Common Pitfalls with Audio Interfaces and How to Avoid Them
Many assume that a more expensive audio interface guarantees pristine sound quality. While quality hardware matters, the real problem often lies in improper setup or overlooked settings. For example, neglecting to configure buffer sizes correctly can introduce latency and artifacts. Also, grounding issues or using cheap USB cables can cause pops, clicks, or noise. Protect yourself by investing time into proper interface configuration, as detailed in the audio interface setup tips, and always test your system with a simple recording before critical sessions. Remember, gear is only as good as its setup.
Advanced Podcast Editing
It’s a common misconception that knocking out background noise in podcasts is about adding noise reduction plugins attentively. In reality, many creators fall into the trap of over-processing, which leads to unnatural sound and listener fatigue. Instead, focus on capturing clean audio with quality microphones and proper placement, then apply noise reduction sparingly. Using tools like silence trimming and careful EQ adjustments will preserve natural dynamics. Remember, the goal is clarity without compromising the voice’s warmth. Don’t overlook the importance of high-quality preamps and good acoustics—it’s a subtle but impactful difference. Have you ever fallen into this trap? Let me know in the comments.
DAW Software: The Hidden Power of Proper Settings
Many users think that just installing a DAW guarantees efficient workflow. But the real secret lies in fine-tuning the software settings to match your hardware and project demands. For example, adjusting your buffer size, enabling multi-core support, or switching to 64-bit processing can significantly reduce lag and crashes. Misconfigured settings often cause dropouts or CPU spikes, sabotaging your productivity. To unlock your DAW’s true potential, visit the DAW optimization guide. Remember, mastering your DAW’s internal settings transforms it from a black box into a powerful tool for flawless production. Have you ever missed this step? Share your experiences below.
Establish Routine Maintenance for Reliability
To ensure your studio setup continues delivering professional results, adopting a regular maintenance schedule is paramount. Personally, I set aside time bi-weekly to inspect and clean my audio interface inputs, ensuring dust and debris don’t compromise sound quality. Regular checks on cables, connections, and hardware components prevent unexpected failures during critical sessions. Documenting these routines helps track issues early and keeps your workflow seamless. According to technical standards outlined in the audio interface setup guide, routine inspections can extend the lifespan of expensive gear and maintain optimal performance.
Invest in Quality Tools and Regular Upgrades
Your equipment should evolve with your needs. I recommend choosing durable, shielded studio headphones from the latest headphones guide and staying updated with firmware and driver updates from manufacturers. Firmware updates fix bugs and add features, which is crucial for compatibility with new DAW plugins and software improvements. Upgrading cables periodically, especially if they show signs of wear, prevents noise and signal degradation. Keeping a maintenance log of hardware updates can help you plan future upgrades without surprises.
Utilize Monitoring and Calibration Tools
Calibration ensures your gear performs reliably over time. Using calibration microphones and reference tracks, I regularly verify my headphones’ response with tools endorsed by audio professionals. Additionally, software like calibration tools can help detect deviations early. Monitoring hardware diagnostics, available in many audio interfaces and DAW software, provides real-time insights into system health, alerting you to potential issues before they escalate. Consistent calibration and monitoring translate to predictable, high-quality sound output, saving you troubleshooting time in the long run.
How Do I Maintain My Voiceover and Podcast Equipment Over Time?
Keeping your voiceover microphone, interface, and editing tools in prime condition demands mindful practices. Regular cleaning of microphone capsules, ensuring a controlled environment to reduce dust buildup, and updating your DAW settings based on the latest software releases are essential steps. Additionally, I recommend calibrating your studio headphones every six months using professional tools, to prevent sound distortion. For detailed guidance on optimal setup routines, visit our voiceover setup essentials. Incorporating these habits ensures your equipment remains reliable, leading to consistent, pristine audio quality. Given the rapid evolution of audio hardware, staying informed about new tools and techniques through industry updates is invaluable.
Experiment with Software Automation for Long-Term Results
Automation in DAW software allows you to set and forget many routine tasks, reducing manual workload and minimizing human error. I’ve integrated macro scripts that automatically adjust gain levels or apply common EQ tweaks at specific points, saving hours in post-production. Exploring features like batch processing and preset management accelerates your workflow, especially when handling large podcast episodes or voiceover projects. As noted in recent industry articles, leveraging automation tools is becoming standard practice for scalable and consistent production. I recommend trying out advanced macro features in your DAW to streamline your editing pipeline today. For further insights, check out podcast editing tactics.
The Hardest Lesson I Learned About Studio Gear
One pivotal realization I had was that top-tier equipment isn’t enough without proper placement and acoustic treatment. Even expensive studio headphones or a high-end audio interface won’t compensate for poor room acoustics or misconfigured setups. My biggest lightbulb moment was understanding that meticulous positioning and understanding your room’s unique reflections make all the difference in achieving professional sound clarity.
Tools That Transformed My Recording Environment
My go-to resources now include the studio headphones buying guide which demystifies selecting the right monitors for accurate monitoring, and the audio interface setup tips to optimize hardware configurations. These resources helped me avoid common pitfalls and fine-tune my gear for maximum clarity, making my voiceovers sound professional and crisp. Combining these tools with strategic room treatment truly elevated my recordings beyond expectations.
Your Next Step Could Be the Biggest Leap
Remember, creating a great voiceover studio isn’t just about owning the best gear; it’s about understanding how to leverage it through proper placement, calibration, and room treatment. Don’t wait for perfection—start experimenting with your acoustic placement today. Little adjustments can lead to significant improvements in sound quality, ultimately making your voice recordings stand out. Your journey to a professional-grade studio begins now—are you ready to make that leap?
http://Jason%20Mitchell
Reading through this, I can definitely relate to the frustration of trying to record professional-quality voiceovers in a room that wasn’t initially set up for sound isolation. I once thought placing foam panels randomly would suffice, but the echo persisted until I started focusing on reflection points as you mentioned. Using a mirror or shining a flashlight to identify hotspots was a game-changer for me. It’s also interesting how bass traps in the corners made such a noticeable difference in the clarity of my recordings, especially considering how many overlook the importance of low-frequency treatment. I’ve found that moving panels closer to the reflection points, rather than just covering general areas, significantly improves sound quality. Has anyone used software like REW (Room EQ Wizard) to measure room acoustics? I’ve personally found it helpful for fine-tuning room setup and confirming my placement is effective. Small adjustments in acoustic treatment seem minor but really add up for that crisp, studio-quality sound. Would love to hear what others have found most effective in optimizing their space, especially in smaller rooms.