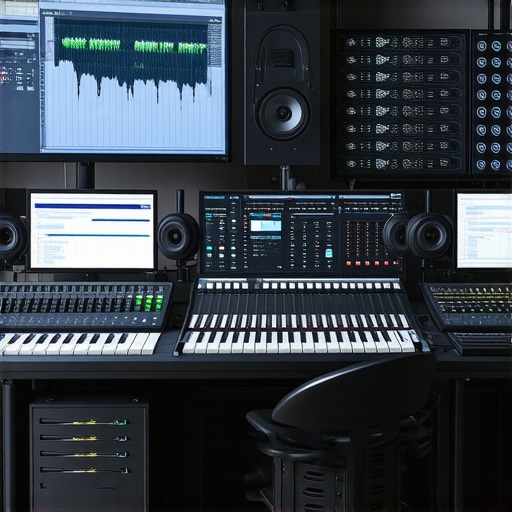
I remember the exact moment I felt overwhelmed by my own DAW project. Tracks tangled up like spaghetti, countless sample folders, and a session so chaotic that I feared losing hours of work. That lightbulb moment hit me hard—if I don’t organize better, my creative process will grind to a halt. Since then, I’ve realized that mastering just a handful of folder hacks can transform how you manage complex projects.
Why Your DAW Organization Could Make or Break Your Workflow
Organizing your project files isn’t just about tidiness. It’s about efficiency, creativity, and saving your sanity when deadlines loom. A disorganized session can lead to duplicated efforts, missed cues, and even data loss. Early on, I made the mistake of saving everything in a single folder—big mistake! It slowed down my session loads and made finding specific audio clips a nightmare. The key is to implement strategic folder structures that grow with your project, not suffocate it.
Is Over-Organizing Actually Worth the Hype?
Some musicians dismiss elaborate folder setups as overkill, but trust me, the time invested pays off. As an example, I once spent hours hunting for a single vocal sample during a tight deadline—wasted time that could have been spent perfecting my mix. When I finally adopted a simple, clear hierarchy, my workflow became significantly smoother. To build that sense of trust, I recommend exploring [pro tips for DAW organization](https://audioediting.editinggearpro.com/best-daw-software-for-precise-music-production-this-year). It’s all about finding a system that works for your style.
Maintaining a well-structured project is crucial as your sessions grow in complexity. Next, let’s dive into some effective folder hacks that will help you tame even the most chaotic projects—saving you time, frustration, and possibly a few gray hairs. Ready to take control? Keep reading because these tricks are game-changers.
Optimize Your Microphone Placement
Start by positioning your microphone correctly. Keep it about 6-12 inches from your mouth, slightly off-axis to minimize plosive sounds. Use a shock mount to reduce vibrations, and consider a pop filter to eliminate harsh breath sounds. I once spent hours adjusting my mic before a client call, only to realize a simple move improved clarity instantly. Proper placement ensures your voice is captured cleanly and consistently.
Calibrate Your Studio Headphones for Accurate Monitoring
Invest time in setting up your headphones to hear your recordings accurately. Use a calibration file or reference tracks to adjust the EQ settings, ensuring flat response. This prevents you from chasing false tones and makes mixing more precise. I learned this when my mixes sounded fine on headphones but muddy elsewhere; calibrating corrected that mismatch. Check out the studio headphones buying guide for insights on choosing the right pair.
Set Up Your Audio Interface for Clarity
Configure your interface’s gain and preamp settings to avoid clipping and noise. Use the article audio interface preamp settings as a reference. The goal is clean, noise-free audio. I adjusted my preamp gain lower than I thought, which dramatically reduced hiss without sacrificing volume. Proper calibration of your interface creates a transparent path from your mic to the DAW.
Choose the Right DAW Settings for Voiceover
Configure your DAW with low-latency settings to monitor in real time without delay. Disable unnecessary plugins during recording to prevent CPU overload, which can cause glitches. For pacing, set your buffer size appropriately; smaller buffers reduce latency, while larger ones prevent dropouts. I once recorded several takes with a high buffer setting, resulting in noticeable delay; adjusting it made a big difference. Learn more about optimizing your DAW in best DAW software.
Implement Acoustic Treatments for a Dry Sound
Since room acoustics greatly influence voice quality, install affordable foam panels or diffusers. Positioning your mic away from reflective surfaces prevents echoes. I faced echo issues in my makeshift studio, but adding foam panels and a portable booth improved the sound drastically. For budget solutions, check out soundproofing tips on a budget.
Test and Adjust Regularly
After setup, record a short test and listen critically. Adjust microphone position, gain levels, and acoustic placements until your voice sounds natural and clear. I’ve found that small tweaks, like angling the mic differently, can make a noticeable impact. Always revisit your settings periodically as conditions change or new equipment arrives.
Many enthusiasts and even seasoned professionals often get misconceptions about the finer points of voiceover setups, DAW software, and studio gear. Let’s dig deeper into some prevailing myths and reveal important nuances that can dramatically impact your audio quality. For example, a widespread belief is that expensive equipment guarantees better sound, but in reality, proper setup and understanding nuances matter more than price. Skimping on calibration of your audio interface or neglecting acoustic treatment can sabotage your effort regardless of high-end gear.
Another trap is assuming that choosing the latest DAW software automatically improves your workflow. Instead, mastering effective settings—such as buffer sizes or plugin management—often delivers more tangible results. For an advanced tip, explore the best DAW software for precise music production and learn how to optimize workflow.
There’s also a common myth that studio headphones with exaggerated bass are ideal for mixing. In truth, many professionals recommend headphones with a flat frequency response for accurate decision-making, which can prevent costly mistakes. Check out the studio headphones buying guide to select the right pair.
The ‘hidden nuance’ often overlooked is the importance of proper headphone calibration and consistent use. If headphones aren’t correctly calibrated, your mixes may sound fine in the studio but mismatch elsewhere, leading to rework and frustration. I advise periodically calibrating your headphones using reference tracks, ensuring your monitoring remains consistent.
Similarly, many overlook the critical task of calibration for your audio interface. Incorrect gain or preamp settings can add noise, cause distortion, or render your recordings unprofessional. For a detailed walkthrough, see audio interface setup tips.
Understanding these nuances and challenging common myths can elevate your production quality. Don’t fall into the trap of assuming more expensive gear is the answer; instead, focus on mastering optimal setup and calibration. Have you ever fallen into this trap? Let me know in the comments.
Once you’ve established a solid voiceover environment, the real challenge is maintaining its performance over time. Regularly checking your gear, updating software, and staying informed about new tools can prevent unexpected issues from creeping in. One effective approach is scheduling routine maintenance sessions—think of it as a health check for your studio. During these checkups, verify microphone connections, clean input ports, and recalibrate your headphones to ensure consistency. Incorporate software updates into your routine, but always back up your settings beforehand—this helps prevent potential compatibility crashes. Additionally, keeping a log of performance issues allows you to spot recurring problems and address them proactively.
Tools like audio interface calibration guides are invaluable for fine-tuning your setup. These guides often include detailed steps for testing signal paths, eliminating noise, and ensuring your input levels are optimal. As the industry evolves, so do the tools—embrace newer plugins and hardware that enhance your workflow without adding unnecessary complexity. For example, the trend toward smart calibration devices is gaining momentum, allowing you to tweak your environment with minimal effort.
How do I maintain my setup over time?
Adopting a proactive mindset is key. Set aside time every few months to perform comprehensive checks—use testing microphones, run software diagnostics, and verify physical connections. Regular cleaning of your gear prevents dust buildup that can cause static or poor connections. Staying updated with manufacturer firmware ensures you benefit from performance enhancements and security patches. Additionally, engage with community forums or professional groups; they often share the latest insights on troubleshooting and optimizing setups, which can save you time and money. Remember, consistency in maintenance not only prolongs your gear’s lifespan but also guarantees reliable performance, enabling you to focus on what truly matters—delivering exceptional voiceover recordings. If you haven’t already, try setting up a recurring maintenance schedule today; even a simple checklist can make a significant difference in your long-term workflow.
Three Surprising Truths I Learned the Hard Way About Creating a Professional Voiceover Environment
First, investing in high-end equipment doesn’t automatically guarantee perfect sound—calibration and setup often matter more than price tags. Second, even the best microphone can sound terrible if placed incorrectly; mic placement is an art that saves hours of editing later. Third, regular maintenance of your studio gear prevents unexpected issues from derailing your recording sessions, turning small tasks into long-term wins.
My Toolbox of Trusted Resources for Voiceover and Studio Success
Choosing the right tools can elevate your recordings from average to exceptional. I rely heavily on the Voiceover Setup Essentials guide, which walks through creating a sound environment tailored for clarity. For headphones, the Studio Headphones Buying Guide helps me pick accurate and comfortable pairs. When fine-tuning my audio interface, I follow tips from audio interface setup articles, ensuring pristine input quality. Lastly, for optimizing my DAW settings, I turn to the best DAW software recommendations, which emphasize workflow efficiency.
Your Next Move: Transforming Practice Into Mastery
Taking action today can reshape your voiceover game. Remember, mastering your setup, understanding your gear’s nuances, and staying curious about new tools are ongoing processes that yield incredible results. Don’t let hesitation hold you back—embrace the learning curve, experiment with your space, and watch your recordings improve dramatically. What’s one small change you’re willing to start with today? Let me know below, and let’s grow together in mastering the art of professional voiceover production.
http://Sophia%20Bennett
Reading this post brought back memories of my early days trying to manage a sprawling DAW session. I used to keep everything in one folder, which led to endless frustration when hunting for specific samples or tracks. Adopting a more structured folder hierarchy made an immediate difference—workflow became smoother, and I saved so much time. What I found especially helpful was creating dedicated folders for different instrument types and vocal takes from the start, so I could easily navigate larger projects. I think the key is to develop a system that not only organizes your current project but also scales with your evolving production needs. Have others found that particular folder structures work better for certain genres or project types? It would be great to hear your experiences on customizing organizational setups for specific workflows.