My Journey into the World of DAW and Voiceover Setup
It all started when I decided to finally take my home studio to the next level. Like many creators, I was overwhelmed by the sheer number of options available, but I was determined to find a setup that truly suited my workflow. After some trial and error, I discovered the incredible importance of choosing the right DAW software and establishing a reliable voiceover setup.
Why I Switched to a New DAW Software in 2024
Initially, I used an older DAW, but I found it limiting when it came to editing and mixing. After reading several reviews and expert opinions, I decided to upgrade to the best DAW software for 2024. It made a noticeable difference in my workflow, allowing me to produce content faster and with higher quality. Plus, integrating it with my existing hardware was surprisingly straightforward, thanks to clear guides like the top DAW and voiceover setup tips.
My Secret to a Crystal-Clear Voiceover Environment
Creating a professional voiceover setup is more than just having a good microphone. I invested in quality studio headphones and a proper audio interface. These components dramatically improved my sound clarity. The right environment, soundproofing, and positioning are crucial. I also learned the importance of voiceover setup essentials for professional results.
What’s the Real Difference Between Good and Great Sound?
Is It Just About Equipment or Also Technique?
Honestly, I used to think that having the top equipment was enough, but I soon realized that technique matters just as much. Proper mic placement, acoustic treatment, and understanding how to use your DAW software effectively can turn decent recordings into outstanding ones. I regularly consult authoritative sources, like expert guides, to refine my skills.
If you’re considering upgrading your setup, I highly recommend starting with your DAW and audio interface—these are the backbone of your studio. Don’t overlook the importance of room acoustics either; even a simple DIY treatment can make a big difference.
I’d love to hear your experiences! Drop a comment below about your own setup journey or any tips you’ve discovered along the way.
Unlocking the Secrets of a Professional Voiceover Environment in 2024
Creating a studio that consistently delivers crystal-clear voiceovers involves more than just selecting high-end gear. It requires a nuanced understanding of room acoustics, microphone placement, and signal chain optimization. I’ve found that even minor adjustments—like the angle of your microphone or the materials used in your room—can significantly enhance sound quality. For deeper insights, I recommend exploring voiceover setup essentials, which provide a comprehensive guide to establishing a professional environment.
How Do You Fine-Tune Your Signal Chain for Optimal Clarity?
One often overlooked aspect is the signal chain—comprising your microphone, audio interface, and preamp. Each component influences the final sound, and their synergy is critical. Investing in quality audio interfaces and studio headphones can prevent signal degradation and noise issues, ensuring your recordings stay pristine. Proper gain staging, along with careful use of EQ and compression within your DAW, can further enhance voice clarity. For detailed guidance on setup, I recommend reviewing the best DAW software for 2024 and how it integrates with your hardware.
What Are the Practical Steps to Achieve Consistency in Voice Recordings?
Consistency in voiceover recordings stems from disciplined techniques and environment control. Using a dedicated microphone with the right polar pattern, positioning it at an optimal distance, and employing soundproofing materials significantly reduce ambient noise and room reflections. Regularly calibrating your equipment and maintaining a clean signal path can make a marked difference. Additionally, recording in a quiet environment, free from external disturbances, boosts quality. For additional tips on refining your setup, visit top studio headphones and voiceover setup tips.
Have You Ever Wondered How Small Tweaks Can Transform Your Audio Quality?
Many creators underestimate the power of subtle adjustments, such as microphone angle, pop filter placement, or even the position of acoustic treatment panels. These details can eliminate plosives, reduce echo, and improve overall clarity—making your voice sound professional and polished. Experimentation is key; even minor modifications can yield impressive results. If you’re eager to elevate your setup further, consider consulting authoritative resources and expert guides to understand the nuanced interplay of equipment and technique.
For those looking to refine their recording environment or upgrade their gear, starting with your DAW and microphone setup is essential. Remember, a well-configured setup not only improves sound quality but also boosts your confidence as a creator. Want to share your setup tips or ask questions? Drop a comment below or connect with fellow enthusiasts to exchange insights!
Beyond the Equipment: The Subtle Art of Acoustic Treatment and Microphone Technique
While investing in high-quality gear is essential, I’ve come to realize that the real magic happens behind the scenes—literally. The room’s acoustic environment, for instance, can make or break your recordings. I remember initially thinking that just a good microphone was enough, but after experimenting with different placements and soundproofing methods, I saw a remarkable difference. Small tweaks like angling the microphone slightly or adding bass traps and diffusers dramatically reduced echo and resonances, leading to a much clearer voice capture. For those serious about sound quality, I recommend exploring voiceover setup essentials that go into detail about creating a professional environment.
How Do You Achieve Consistent and Natural Voice Recordings?
Consistency is the cornerstone of professional voiceovers. Over time, I learned that establishing a routine—such as always recording at the same time of day, using the same microphone positioning, and maintaining a quiet environment—helps maintain a natural tone and reduces editing time. Additionally, investing in a quality audio interface and studio headphones ensures that what I hear during recording closely matches the final output. Proper gain staging and controlled microphone proximity are critical; I’ve found that even a slight variation in distance can alter the tonal quality significantly. Sharing your routines and setups can inspire others—so I encourage you to comment on your own practices or ask questions about refining your workflow.
What Advanced Techniques Can Elevate Your Voiceover Quality?
Once the basics are dialed in, I’ve started exploring techniques like de-essing, subtle EQ adjustments, and dynamic compression within my DAW—tools that can add polish without sounding artificial. For example, careful de-essing removes harsh sibilance without dulling the voice, which is crucial for maintaining clarity. I also make it a point to record multiple takes, then blend or comp them to achieve the most natural sound. For a deeper dive into these advanced techniques, I recommend reviewing expert DAW tips that help streamline this process. Remember, mastering these nuances takes practice, patience, and a willingness to experiment—so don’t be discouraged if immediate results aren’t perfect.
How Can Personal Experience and Continuous Learning Transform Your Sound?
In my journey, I’ve realized that staying curious and open to new methods is vital. Each project teaches me something new—whether it’s the impact of microphone placement, room acoustics, or post-processing techniques. Engaging with online communities, reading authoritative guides, and listening critically to my recordings have all contributed to my growth. I encourage you to document your progress, share insights, and seek feedback—this iterative process is what truly elevates your craft. If you’re eager to refine your setup further, consider exploring comprehensive guides that can help you unlock new levels of clarity and professionalism.
Pushing Beyond Basics: Integrating De-essing and Dynamic Range Control
While foundational setup is crucial, true professionalism in voiceover work emerges when you master advanced post-processing techniques. De-essing, for example, addresses harsh sibilant sounds, ensuring that your recordings sound smooth and natural without sounding overly processed. Carefully tailored EQ adjustments complement this by accentuating clarity while diminishing muddiness. Additionally, dynamic range compression plays a pivotal role in maintaining consistent volume levels, especially when recording varying vocal intensities. As expert guides highlight, mastering these nuanced tools within your DAW can transform adequate recordings into polished, broadcast-ready audio.
To achieve this, I recommend experimenting with subtle ratios and attack/release times to preserve the natural dynamics of your voice, avoiding the overly squashed sound often associated with compression. Combining these techniques with meticulous gain staging ensures the final output maintains its integrity and clarity. Remember, the goal isn’t just technical perfection but also preserving the personality and warmth of your voice—something only achieved through careful, learned application of these advanced processing methods.
How Can Specialized Acoustic Treatments Elevate Your Recording Environment?
Investing in high-quality gear is vital, but the environment where you record can make or break your sound. Beyond basic foam panels, I discovered that incorporating bass traps, diffusers, and tailored acoustic treatments dramatically reduces echoes and resonances, resulting in a more controlled soundscape. For instance, I experimented with placing broadband diffusers strategically behind my microphone to scatter reflections, which softened harsh room tones and enhanced vocal intimacy. This approach, supported by detailed insights from voiceover setup guides, helped me achieve a studio-quality sound in my home environment.

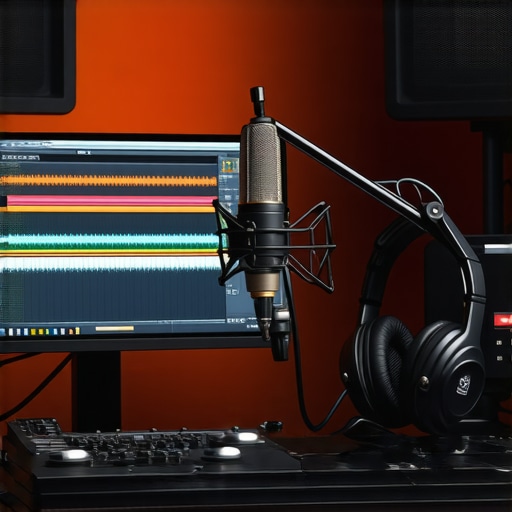
Image prompt: Professional home recording space with acoustic panels, bass traps, and diffusers, emphasizing sound treatment elements for voiceover clarity.
What Are the Latest Hardware Innovations That Can Transform Your Workflow?
Staying ahead in voiceover production means embracing cutting-edge hardware solutions. Recently, I explored the latest high-fidelity audio interfaces equipped with advanced preamps and low-latency monitoring features. These innovations allow for more accurate sound capture and real-time feedback, which is essential when performing nuanced vocal expressions. For example, models that incorporate DSP processing directly within the interface—such as built-in EQ and compression—offer immediate tonal adjustments, streamlining the post-production process. As discussed in expert reviews, leveraging these technological advancements can significantly elevate your professional standards and efficiency.
Things I Wish I Knew Earlier
The Power of Room Acoustics
One surprising realization I had was how much the acoustic treatment of my space affected my recordings. Initially, I thought gear was everything, but I discovered that small tweaks like adding bass traps or diffusers made a huge difference in clarity and warmth. It’s like giving your voice a proper stage to shine on.
Microphone Technique Matters More Than You Think
At first, I believed that just having a good microphone was enough. However, I learned that mic positioning, angling, and consistent distance are critical. Practicing proper technique turned my recordings from decent to professional-looking and sounding.
Consistency is Key
Recording at the same time every day and setting up my environment beforehand helped me achieve a more natural, reliable tone. It’s amazing how routine can eliminate variables and improve overall quality.
The Subtle Art of Signal Chain Optimization
Investing in a quality audio interface and headphones was a game-changer. Fine-tuning gain staging and using gentle EQ and compression within my DAW made my voice sound much cleaner and more polished. Small adjustments, big results.
Continuous Learning Elevates Your Craft
I found that staying curious, reading authoritative guides, and engaging with online communities constantly pushed my skills forward. Sharing experiences and asking questions kept me motivated and improving.
Resources I’ve Come to Trust Over Time
- Audio Engineering Society (AES): Their publications and standards are a gold mine for understanding professional audio practices. I often refer to their articles for in-depth technical insights.
- Sweetwater’s Blog: Their tutorials and reviews are friendly, practical, and regularly updated, making complex topics accessible.
- PureMix: A treasure trove of tutorials from industry pros that helped me grasp advanced mixing and mastering techniques.
- Recording Revolution: Their approachable content and step-by-step guides helped me build my setup from the ground up.
Parting Thoughts from My Perspective
Embarking on my journey into the world of professional voiceover setup has been both challenging and rewarding. The most valuable lesson I’ve learned is that success isn’t just about gear—it’s about understanding your environment, honing your technique, and continuously learning. Whether you’re just starting or looking to refine your existing setup, remember that small, deliberate adjustments can lead to big improvements. Don’t be afraid to experiment, seek out trusted resources like studio headphones or voiceover setup guides, and always keep your passion alive. If this resonated with you, I’d love to hear your thoughts or experiences—feel free to share below or reach out through my contact page. Here’s to your journey toward professional-quality voice recordings!”} ,
http://Melissa%20Grant
Reading through this comprehensive guide really resonated with me, especially the emphasis on the importance of room acoustics and mic technique. I’ve experienced firsthand how small adjustments—like angling your microphone or adding bass traps—can dramatically improve clarity. When I first started, I underestimated the impact of environment, and it took a lot of trial and error to get things sounding professional. Now, I swear by using diffusers and proper mic placement, which makes a huge difference during editing. For anyone just beginning, I’d recommend focusing on creating a controlled recording space; even simple DIY acoustic treatments can yield noticeable results. Have others found specific setups or DIY solutions that worked particularly well for them? I’d love to hear your success stories or tips for optimizing home studios on a budget.
http://James%20Carter
This post hits close to home for me because I recently upgraded my home studio, and the difference in sound quality has been incredible. Like many, I was overwhelmed by choosing the right equipment, but I quickly learned that synergy between my DAW, interface, and acoustics makes all the difference. I found that investing in acoustic treatment, such as bass traps and diffusers, was a game-changer—especially in a small space where reflections could really muddy the recordings. I also experiment with mic positioning to minimize sibilance and pops. One trick that worked well for me was using a reflection filter to focus sound directly into the mic, which cut down on room noise effectively. Has anyone here found a particular acoustic treatment or setup that provided unexpectedly good results on a budget? I’d love to hear what worked well for others, especially DIY solutions that don’t break the bank.
http://Sophia%20Bennett
Reading about your journey into elevating your home studio really resonated with me. I started my setup last year, and I can totally relate to feeling overwhelmed by the array of equipment and techniques available. What made a huge difference for me was dedicating time to learn proper mic technique and room acoustics early on, rather than just investing in high-end gear. I found that small changes, like using a portable sound booth and experimenting with microphone angles, had an outsized impact on clarity. I think a lot of creators underestimate how much acoustic treatment—like bass traps or even DIY panels—can improve the final sound, especially in limited spaces. Have you experimented with different placement strategies to optimize your microphone positioning? I’d love to hear your thoughts or tips on creating an effective space without breaking the bank, as I’m always looking to improve and learn from others’ setups.