I remember the moment vividly. I was sitting in my home studio, headphones on, ready to record what I thought would be a simple voiceover project. But as I hit record, the sound was muddy, inconsistent, and frankly, just not professional enough. After hours of frustration, I realized my setup was the root of the problem. That was the lightbulb moment that changed everything for me. Since then, I’ve dedicated myself to understanding the best tools and techniques for professional audio in 2024, and I want to share that knowledge with you.
Why Your Choice of DAW and Voiceover Setup Matters More Than Ever
In today’s competitive content landscape, quality audio isn’t a luxury — it’s a necessity. Whether you’re creating podcasts, voiceovers, or music, your tools directly impact your sound. The right digital audio workstation (DAW) software combined with a solid voiceover setup can make the difference between sounding amateurish and sounding like a pro. From my experience, a little investment and knowledge can elevate your recordings from good to broadcast-ready.
But here’s the catch: with so many options out there, it’s easy to feel overwhelmed. I’ve made mistakes early on — like choosing a DAW that didn’t match my workflow or skimping on essential equipment — that set me back. That’s why I want to help you avoid those pitfalls and get straight to the best practices that deliver results.
Have You Faced Challenges with Your Audio Quality or Setup?
If you’ve ever struggled with echoey recordings, inconsistent sound, or just can’t seem to get that crisp professional tone, you’re not alone. It’s frustrating, but fixable. The good news? I’ve compiled proven tips and recommendations that will help you craft a studio environment and choose software that truly works for your needs. For a comprehensive guide on creating a professional sound environment, check out this resource.
In the upcoming sections, we’ll explore the top DAWs for 2024, essential equipment, and insider tricks to streamline your workflow. Ready to transform your audio game? Let’s dive in and set you up for success.
Pick the Right Digital Audio Workstation (DAW)
Start by selecting a DAW that matches your workflow and project needs. I remember my initial mistake when I chose a complex DAW that overwhelmed me, leading to frustration. After trying a more user-friendly option, my editing speed doubled, and clarity improved. Look for a DAW that offers intuitive editing tools and reliable performance. For voiceovers, top-rated software is essential. Test demo versions if available to ensure smooth operation before committing.
Optimize Your Recording Environment
Creating a professional sound environment is crucial. Use this guide to set up your space effectively. I once spent hours adjusting my room’s acoustics by adding foam panels and diffusers, which drastically reduced echo. Position your microphone away from reflective surfaces and noise sources. Consider investing in soundproofing or portable booths if necessary. Proper room treatment prevents unwanted reverberation and ensures your voice is captured cleanly.
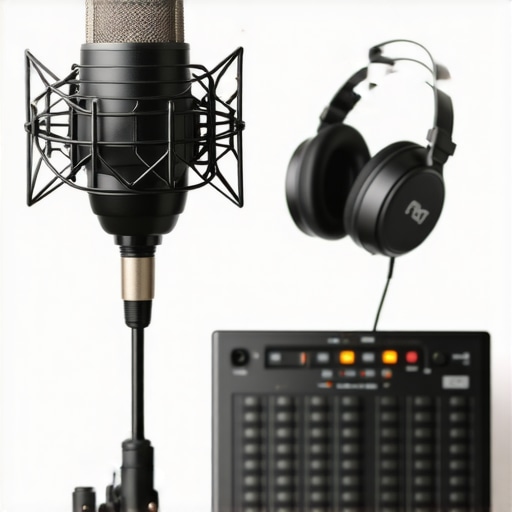
Select the Right Hardware for Clarity
High-quality microphones, audio interfaces, and headphones are non-negotiable. I recommend audio interfaces with clean preamps and studio headphones that deliver flat frequency responses. When I upgraded to a better interface, my recordings instantly sounded more professional and consistent. For detailed hardware recommendations, visit the studio headphone buying guide.
Master Your Mic Technique
Position your microphone correctly—about 6-12 inches from your mouth, slightly off-axis—to avoid plosives and sibilance. Use a pop filter, which I learned the hard way after recording several takes with harsh pops. Practice consistent distance and speaking volume to maintain even sound levels. Record in short segments, then compile and edit for clarity. Microphone technique is often overlooked but makes a significant difference in final quality.
Implement Effective Post-Processing
Post-processing is where your raw recordings transform into polished audio. Use noise reduction to eliminate background hums and artefacts. Compression helps even out volume inconsistencies, making your voice sound more professional. A subtle equalizer adjustment can enhance vocal presence without sounding unnatural. For streamlined editing, I rely on these expert tips. Remember, less is more—over-processing can ruin your natural tone.
Test and Fine-Tune Regularly
Regularly listen back to your recordings on different devices—studio monitors, headphones, and speakers—to identify issues. I schedule weekly review sessions, tweaking mic placement, room acoustics, or settings as needed. Small adjustments over time lead to consistent results. Keep a log of what works best, and don’t hesitate to revisit your setup periodically to adapt to new equipment or room changes.
Many voiceover artists and content creators fall into misconceptions that hinder their audio quality, often without realizing the hidden nuances that make a real difference. Let’s dig deeper into what most people get wrong about crafting professional voiceover recordings, especially in the rapidly evolving landscape of 2024.
Are You Falling for the Microphone Myths
A prevalent myth is that investing in the most expensive microphone guarantees stellar sound. In reality, microphone placement, room acoustics, and post-processing play equally, if not more, critical roles. For example, a high-end mic in a poorly treated room can produce worse results than a modest mic in a well-optimized space. Many overlook the importance of creating a professional sound environment, which is often the real game-changer.
Moreover, some believe that digital plugins and effects can fix bad recordings. This is a trap—over-processing can introduce artifacts, mask deficiencies, and ultimately degrade your audio quality. Instead, focus on getting a clean recording first, then use subtle post-processing as a finishing touch. Remember, the foundation is your environment and technique, not just software.
Master the Nuance of Room Acoustics
Here’s a critical insight that many overlook: room acoustics are not just about adding foam panels. The shape, size, and furnishings of your space influence sound diffusion and absorption, affecting clarity and warmth. A common mistake is to treat only the walls without considering the ceiling or furniture placement, which can lead to uneven sound. An advanced tip is to measure your room’s frequency response with software or a measurement mic, then tailor your acoustic treatment accordingly. This nuanced approach ensures your voice is captured with precision, avoiding the echo-y or boxy sound that can plague amateur setups.
Why Your Gain Stages Might Be Sabotaging Your Audio
One often overlooked detail is setting proper gain levels on your audio interface and microphone. Too high, and you’ll introduce clipping and distortion; too low, and you’ll amplify noise and lose detail. Many beginners set gain levels by eye or guesswork, leading to inconsistent results. Instead, use a dedicated meter or software to monitor your input levels, aiming for peaks around -12dB to -6dB. This careful calibration prevents common pitfalls and ensures your recordings are clean and dynamic.
Finally, always remember that every element—microphone placement, room acoustics, gain staging, and post-processing—is interconnected. Neglecting one aspect can undermine the entire setup. As I often emphasize, regular testing and fine-tuning are essential. For detailed hardware and software tips, check out this guide.
Have you ever fallen into this trap? Let me know in the comments!
Maintaining a reliable voiceover setup is crucial for consistent professional results. Over time, even the best equipment can develop issues or become outdated. That’s why I prioritize regular checks and thoughtful upgrades to keep my studio functioning seamlessly. One of my go-to practices is setting a schedule for cleaning and inspecting my gear, especially my microphone and audio interface, which are the backbone of my recordings. Dust buildup or loose connections can cause noise or signal loss, so a quick monthly inspection helps prevent surprises. Additionally, updating your software and firmware regularly ensures compatibility with new plugins and operating systems, preventing glitches that can slow your workflow. For example, I make it a habit to check for updates from my DAW provider—such as my preferred DAW—every quarter. This keeps my editing environment optimized and secure.
Investing in reliable tools is only part of the equation; knowing how to maintain them is equally important. I recommend keeping spare cables, adapters, and power supplies on hand. Faulty or worn-out cables often cause crackles or dropouts, so replacing them promptly saves time and frustration. When it comes to software, backing up your presets, templates, and session files regularly is essential. I use cloud storage solutions to safeguard my work against hardware failure or accidental deletion. This habit allows me to restore my setup quickly after any mishap, ensuring my productivity remains uninterrupted.
Looking ahead, I believe automation and smart diagnostics will play an increasing role in studio maintenance. Future tools might offer predictive alerts for hardware wear or software conflicts, making proactive care easier than ever. For now, however, a disciplined routine of cleaning, updating, and backing up remains the best strategy.
How do I keep my setup running smoothly over the long haul?
Start by documenting your maintenance routine and sticking to it. Regularly check your gear, update your software, and clean your workspace. Additionally, test your hardware periodically with diagnostic tools—many audio interfaces come with built-in health checks or can be tested via third-party software. For example, this guide offers excellent tips for monitoring your equipment’s health. Remember, a well-maintained studio not only guarantees high-quality recordings but also extends the lifespan of your investment. I encourage you to try setting a quarterly maintenance check and see how much smoother your workflow becomes. It’s a small effort that pays off by keeping your sound crisp, clean, and professional every time you hit record.
When I first started recording voiceovers, I thought all I needed was a good mic and some basic software. But I quickly learned that the real secret lies in the details—room acoustics, gain staging, and a disciplined maintenance routine. These lessons weren’t obvious at first, but they transformed my recordings from amateur to professional. Here are some of the most impactful insights I wish I knew earlier:
What I Learned the Hard Way About Studio Acoustics
One of my biggest surprises was how much room treatment affected my sound. I once thought adding foam panels was enough, but I overlooked ceiling reflections and furniture placement. Measuring my room’s frequency response with simple software revealed uneven bass and echoes I never expected. Now, I know that tailoring acoustic treatment to your space is crucial for clarity and warmth. Don’t underestimate the power of a well-treated studio—your voice deserves it.
Why Proper Gain Staging Can Save Your Recordings
Early on, I set my gain levels by guesswork, which led to clipping and noisy recordings. It wasn’t until I started using a dedicated level meter that I understood the importance of peaking around -12dB. Consistent gain staging ensures your recordings have enough headroom and preserves dynamic range. It’s a small detail that makes a huge difference when editing and mixing. Trust me, avoiding distortion from the start saves hours of post-production trouble.
The Hidden Benefit of Regular Equipment Maintenance
I used to neglect routine checks on my microphone and audio interface, which caused unexpected noise and dropouts. Now, I keep a maintenance schedule, including cleaning connectors and updating firmware. These habits extend the lifespan of my gear and keep my sound clean. A quick monthly inspection can prevent costly surprises and maintain your professional standards over years.
How Small Tweaks Lead to Big Results
Adjusting microphone position by just a few inches or fine-tuning your room’s reflection points can dramatically improve your voice clarity. I learned to listen critically on multiple devices, ensuring my sound translates well everywhere. These small, consistent improvements build up over time, making your setup more reliable and your recordings more polished.
http://Alex%20Morgan
This post really hits home for me, especially the part about room acoustics and the importance of proper gain staging. When I first started recording voiceovers, I underestimated how much the environment could affect sound quality. I spent hours adjusting my mic position and adding acoustic panels before I noticed a significant difference in clarity. It’s always tempting to focus on the equipment, but as you pointed out, room treatment and technique are just as critical.
One thing I’ve learned is the value of using measurement tools, like Room EQ Wizard, to analyze your space and tailor your acoustic treatment. It saved me from the echo-y sound I initially couldn’t control. I also found that consistent gain staging makes a huge impact on recording quality; peaking around -12dB really helps maintain headroom and prevents distortion.
For those just starting, how do you suggest prioritizing these elements if your budget is limited? Is it better to invest first in a good microphone or soundproofing and acoustic treatment?
Thanks for sharing these practical tips—definitely a great resource for anyone serious about improving their voiceover setup.
http://Emily%20Johnson
This post really resonates with me, especially the emphasis on room acoustics and microphone technique. I used to think that just having a decent microphone was enough, but I quickly learned that environment and placement are just as crucial. I remember spending hours trying different mic angles to reduce sibilance and popping, and it made a noticeable difference. Additionally, I started using free tools like Room EQ Wizard to analyze how my room affects sound, and it was eye-opening how much the shape and furnishings could influence clarity.
One challenge I faced was balancing soundproofing with natural acoustics, especially in a small home studio. For those with limited space and budget, do you have suggestions for affordable acoustic treatment options or DIY solutions? I’d love to hear how others have optimized their spaces without breaking the bank.
It’s clear that consistent testing and fine-tuning can significantly improve results over time. I still find myself adjusting setup every few months to adapt to new equipment or changes in the room. How often do you recommend revisiting your room calibration? Thanks for sharing such detailed insights—super helpful for anyone serious about professional voiceover quality.
http://Derek%20Roberts
I really appreciate this detailed breakdown of creating a professional voiceover environment. I totally agree that equipment isn’t enough on its own; the room acoustics and mic technique play such a huge role in final sound quality. I’ve spent years tweaking my setup, and what made a real difference was investing in proper acoustic panels, especially the ceiling treatment and diffusers. It helped tame some of those pesky echoes that I didn’t even realize were there.
When it comes to budget-friendly options, I found that DIY treatments, like using rockwool or Owens corning foam cut to size, work surprisingly well and are much cheaper than commercial panels. Also, placing furniture strategically can help break up sound waves and improve clarity.
I’d love to hear others’ experiences—what’s your go-to DIY acoustic treatment? How do you balance soundproofing versus acoustic treatment in a small home studio? These tiny tweaks really add up and have transformed my recordings.