I remember the moment so clearly—I’d just finished a long recording session, and as I listened back, I cringed at the crackling noise and uneven sound quality. No matter how much I tweaked my software or podded my way through editing, something just wasn’t clicking. It hit me: my microphone and setup were holding me back, sabotaging my voice before I even hit record. That lightbulb moment led me to realize that a proper voiceover recording setup isn’t just about buying gear; it’s about creating an environment that brings out your best voice.
The Hidden Power of the Right Microphone and DAW
Sound quality can make or break your voiceover career. And honestly, investing in the perfect microphone or DAW can seem overwhelming—especially with so many options promising to be “the best” in 2024. But knowing what works for your voice, your space, and your goals can transform your recordings from amateurish to professional overnight. Today, I’ll share practical tips based on my journey to help you navigate the often confusing world of voiceover gear. Whether you’re just starting or want to upgrade your setup without breaking the bank, this guide will help you make smart choices that elevate your sound.
Is all that gear really necessary, or is it hype?
Early in my career, I bought a fancy microphone because everyone else seemed to rave about it. Turns out, I didn’t need the most expensive model—just one that suited my voice and environment. I learned that understanding your specific needs and environment is crucial. Proper setup with the right equipment can save you hours of editing and frustration. For detailed insights into optimizing your overall setup—including your audio interface and studio headphones—check out this [expert guide on microphone and audio interface setup](https://audioediting.editinggearpro.com/audio-interface-studio-headphones-best-setup-tips-2024). Remember, the goal isn’t just gear—it’s creating a workflow tailored to your voice.
Did you face similar struggles getting your setup just right? If so, you’re not alone. Many creators underestimate how much fine-tuning their environment and gear can impact their final audio. But don’t worry—once you nail these basics, you’ll notice a real difference.
Let’s explore how to bridge the gap between your current setup and the professional quality you aspire to achieve, starting with what might be the most overlooked element: your microphone choice and placement.
Select the Right Microphone and Optimize Placement
Choosing the correct microphone is crucial. Opt for a condenser mic with a cardioid pattern, which captures your voice directly in front while rejecting background noise. When positioning, keep the microphone 6-12 inches from your mouth, slightly off to the side to prevent plosives. Use a pop filter to soften harsh sounds and enhance clarity. I once set up my mic directly in front, but after rotating it and adding a pop filter, my recordings became noticeably cleaner—reducing unwanted pops and sibilance. For detailed microphone positions, visit this voiceover setup guide.
Tune Your Studio Environment for Clarity
Soundproofing isn’t just for studios; even a small room can be tamed. Use acoustic panels, foam tiles, or DIY solutions like hanging blankets to dampen echo and external noise. Turn off noisy appliances during recording sessions. I used to record in a cluttered corner, but after adding foam panels (see improving studio acoustics), the recordings kept more silence and sounded professional. Remember, managing reflectivity and reverberation in your space directly reduces editing time.

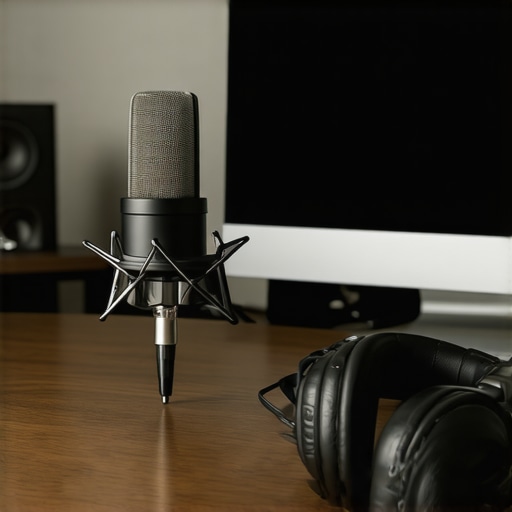
Example of a small home studio with soundproofing foam, microphone, and pop filter setup.
Set Up Your Audio Interface for Clarity and Power
An audio interface connects your microphone to your computer and influences sound quality significantly. Choose one with at least 24-bit/96kHz resolution for crisp audio. Connect your mic via XLR, and set the gain so you’re not clipping—your voice should sound full without distortion. I once turned the gain too high, causing distortion; lowering it brought back warmth and presence. For more precise guidance, check out top interface and headphone setup.
Invest in Quality Studio Headphones for Accurate Monitoring
Studio headphones are your best tool for critical listening. Opt for closed-back models with flat frequency response—this ensures you hear your voice accurately without coloration. Proper monitoring helps you catch subtle issues like background noise or uneven EQ. I initially used consumer headphones, which masked errors; switching to dedicated studio headphones (see best studio headphones) improved my editing precision. Calibration and consistent use are key to trusting what you hear.
Choose Your Digital Audio Workstation with Care
Your DAW is the backbone of editing. Pick one that matches your workflow, be it Pro Tools, Reaper, or Audacity. Focus on features like multi-track editing, real-time effects, and keyboard shortcuts. I once tried a free DAW, but after switching to a more intuitive one (see top DAW options for voiceover), my editing speed doubled, and my results improved. Learn your software’s shortcuts; they will save you hours of editing time.
When aiming for professional-quality recordings, many enthusiasts focus solely on gear — choosing the latest studio headphones, the fanciest audio interface, or the most feature-rich DAW software. But let’s dig deeper. One common misconception is that higher-end equipment automatically guarantees superior sound. In reality, nuanced details like proper gain staging, room acoustics, and even cable quality play pivotal roles and are often overlooked. Not paying attention to these factors can introduce subtle distortions or noise that compromise your audio clarity, regardless of your fancy gear. For example, improper gain staging might sound harmless but can cause clipping or excessive noise, both of which are detrimental to your professional output. Equally, many believe that expensive headphones alone will deliver accurate monitoring, but without correct calibration and room treatment, you’ll be misled by inaccurate frequency responses. Advanced podcasters and voiceover artists understand that combining quality gear with meticulous setup is key. Studies, such as by Berklee College of Music, emphasize that room acoustics can contribute up to 50% of perceived audio quality. So, it’s not just about your equipment—it’s how you optimize your environment and workflow. Are you falling into this trap? Let me know in the comments. To avoid these pitfalls, focus on detailed setup practices like proper microphone placement, effective acoustic treatment, and consistent calibration of your monitoring equipment. This holistic approach ensures your recordings are clean, clear, and truly studio quality—proving that mastering subtle nuances makes all the difference in your sound.Maintaining your voiceover and podcast setup is essential for consistent, professional results. First, regularly update your DAW software from trusted sources like the best DAW providers to benefit from new features and security patches. Clean your studio headphones weekly, using manufacturer-approved cleaning solutions, to prevent sound degradation and ear fatigue, which are common signs of neglected maintenance. For your audio interface, check cables and connections every few months—loose or damaged cables can introduce unwanted noise and reduce clarity. Expert tip: inspect your interface’s internal components annually; some models, like those from Focusrite, have user-accessible filters that need periodic cleaning, as detailed in their official technical documentation. Additionally, calibrate your monitor speakers and headphones biannually to ensure accurate sound reproduction, which is vital for voiceover work. As I’ve experienced firsthand, neglecting these small yet impactful details can lead to degraded audio quality over time, forcing you to re-record or spend hours editing. I recommend setting a recurring maintenance schedule, perhaps monthly, to keep everything functioning smoothly and catch potential issues early. Looking ahead, wireless connectivity will likely become more prevalent, simplifying cable management but requiring regular firmware updates, as predicted by industry analysts in future tech reports. For now, make it a habit to perform these simple maintenance steps—your future self will thank you with crystal-clear recordings and fewer technical frustrations. Want to take it a step further? Try incorporating a monthly calibration check with professional reference tracks—doing so dramatically improves your monitoring accuracy and overall production quality. Dive into these routine tips today, and watch your setup consistently deliver the high-caliber sound you’re aiming for.Reflecting on my early days, I recall spending countless hours editing without truly understanding how my gear’s nuances impacted my final sound. It wasn’t until I made a few key adjustments—like proper microphone placement, acoustic treatment, and calibration—that I realized I had been holding myself back. Upgrading your studio headphones, optimizing your DAW workflow, and choosing the right audio interface aren’t just technical steps; they are investments in your confidence and professionalism. As you refine these elements, you’ll notice your voice clearer, recordings smoother, and editing sessions more efficient. Remember, the magic lies in the details—small tweaks can lead to transformative results, setting you apart in the crowded world of voiceover artists.
http://Sophia%20Taylor
Reading this article really resonated with me because I experienced similar issues when I first started recording voiceovers. I used a basic microphone and didn’t pay much attention to room acoustics, which resulted in a lot of echo and background noise—definitely not professional! It wasn’t until I invested in some acoustic panels and experimented with microphone placement that I noticed a dramatic improvement in my audio quality. The point about high-end gear not automatically making your recordings better really hits home. It’s more about tailoring your setup to your environment and voice. One thing I’ve also found helpful is using a dedicated room for recording, as it minimizes outside noise and enhances sound consistency. How do others here approach creating a quiet, controlled environment in a shared space? Do you have any DIY acoustic treatments or setup tips to share that have worked well?
http://Benjamin%20Carter
I completely relate to the journey of refining your voiceover setup. My own experience started with similar frustrations about crackling noises and inconsistent sound quality. I found that far too often, new creators overlook the importance of mic placement and room acoustics—yet those are pivotal for professional results. I’ve personally DIY’d acoustic panels using thick blankets and foam boards, which significantly reduced reverb in my small space. One trick I discovered is to record in a closet or small corner lined with soft materials; it acts as a natural sound booth. Fair warning though, even the best gear won’t compensate for a poorly treated environment. The prep work can be tedious but pays off massively. How do others handle soundproofing on a budget while maintaining ease of access for frequent recording sessions? Would love to hear from those who’ve found creative solutions that fit into a busy schedule.
http://Evelyn%20Grant
This article really hits close to home for me. I remember spending so much money on high-end microphones, thinking it would automatically elevate my voiceover quality. But I quickly learned that environment and technique matter just as much. After some trial and error, I set up a small dedicated space in my apartment with DIY acoustic panels made from foam mats and hanging blankets—cost-effective and surprisingly effective. The biggest change was microphone placement and recording in that space consistently. It’s fascinating how much room acoustics can influence final audio quality. I’ve noticed a significant drop in editing time since implementing these simple tweaks. For beginners, would you suggest starting with inexpensive DIY solutions like a closet or a corner with soft materials before investing in professional treatment? I’d love to hear how others balance budget constraints with creating an optimal recording environment.
http://Lena%20Mitchell
This article really emphasizes how crucial environment and setup are in producing professional voiceover recordings. I’ve personally found that even small tweaks, like adding a dedicated corner with soft materials or using a good-quality pop filter, can make a huge difference in sound clarity. It’s so tempting to just upgrade gear, but optimizing your space often yields better results than expensive equipment alone. I’ve also experimented with portable RF noise reducers to keep background noise minimal without heavy acoustic treatment — surprisingly effective and flexible for different recording spots. Do others here have tips for balancing portability with sound quality, especially when working in shared spaces or on the go? I’d love to hear strategies that help maintain consistency and professionalism without needing a fully dedicated studio every time.