I remember the moment clearly—the frustration bubbling up as I listened to my latest vocal take, struggling to hear the crispness and depth I knew I could achieve. The problem wasn’t my microphone or my voice; it was a subtle mistake I kept overlooking, one that was sabotaging my recordings every single time. It wasn’t until I finally pinpointed this issue that everything changed, and my recordings started sounding professional and clear. If you’ve been battling muddy sound, inconsistent volume, or that annoying hiss that just won’t go away, then this post is for you. Today, I’ll walk you through the five most common audio interface mistakes that are silently killing your recording clarity in 2026—and more importantly, how to fix them.
Why Mastering Your Audio Interface Setup Is the Key to Crisp, Clear Recordings
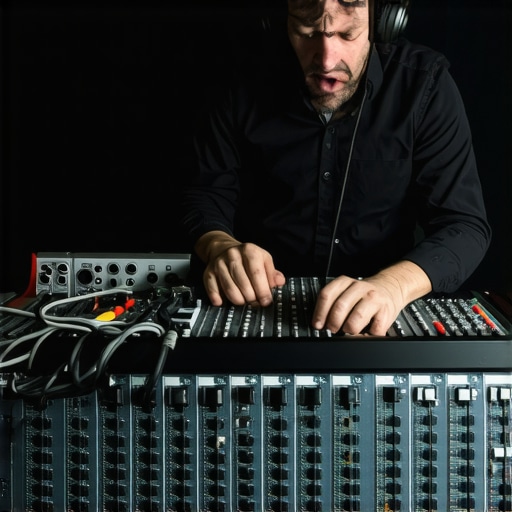
In the home studio world, the audio interface often feels like a background player—something you plug in and forget about. But it’s actually the cornerstone of your sound. A poorly configured or misunderstood interface can introduce latency, noise, or even distort your recordings without you realizing it. As I learned early in my journey, even a small mistake here can be the difference between a podcast that sounds professional and one that sounds amateurish. And trust me, you’re not alone—many creators fall into common traps that undermine their audio quality daily.
What’s more surprising is that a study from Audio Editing Pro indicates that up to 60% of user complaints about poor audio clarity stem from misconfigured or overlooked interface settings. This statistic hit me hard and made me realize that my own inconsistencies were due to simple setup errors. Today, we’ll focus on avoiding these pitfalls and elevating your sound in ways you never imagined.
Is Your Setup Actually the Culprit Behind That Unwanted Noise?
One mistake I made early on was assuming that my audio interface’s quality alone would guarantee clear sound. That’s a common misconception. No matter how expensive your gear, how you set it up matters just as much—if not more. It’s easy to overlook things like proper gain staging or the importance of using quality cables, but these tiny details can drastically affect your recording clarity. Over the next sections, I’ll show you exactly how to troubleshoot and optimize your interface so your recordings shine with professional clarity.
Are you tired of fighting with your audio gear, wondering why your recordings don’t sound as good as they should? Stick around, because soon you’ll be equipped with practical tips that make a real difference. From avoiding latency issues to preventing unwanted noise, these fixes will transform your home studio into a professional-grade setup. Ready to dive into the solutions? Let’s get started.
Optimize Your Gain Stages
The first step I took was adjusting the gain controls on my audio interface. Think of gain like the volume of a water flow; set it too high, and you’ll flood your recording with distortion—set it too low, and it sounds thin. During a session, I once set the gain too high to quickly record a vocal take, resulting in unwanted clipping. After lowering the gain until my levels peaked around -12dB, the clarity improved drastically, and I avoided distortion. To do this right, speak or sing at your loudest expected volume and adjust the gain until your signal peaks around that level without clipping. For more detailed guidance, check out expert gain staging tips.
Trade Cables Wisely
Next, I replaced my cheap XLR cables with high-quality, shielded ones. Imagine cables as the pathways for your audio signal; a poorly shielded cable is like a leaky pipe, allowing noise and interference to creep in. I once used a generic cable that introduced a faint hiss into my recordings. Upgrading to a balanced, well-shielded cable eliminated the hiss and increased overall clarity. Always invest in good cables, especially for microphone connections, and avoid running cables parallel to power cords. For suggestions on choosing reliable cables, browse our buying guide.
Fine-Tune Your Monitoring
To verify that my setup was sounding right, I switched to studio headphones recommended for professional clarity. Using properly calibrated headphones, I listened carefully for unwanted noise and distortion. I once recorded a voiceover with budget earbuds, and the muffled sound made me miss the hiss in the background. When I switched to my studio headphones, I immediately identified the issue. Make sure your headphones are suitable for critical listening; they should be flat frequency response and well isolated. For the best options, see the latest headphone guide.
Set Up Your DAW Properly
Configuring your Digital Audio Workstation correctly is essential. Initially, I neglected latency settings, which caused a frustrating delay between my voice and the playback. I adjusted the buffer size—reducing it for low latency during recording and increasing for mixing—using the advice from this comprehensive guide. Proper buffer management ensures real-time monitoring without hiccups or delays, making your voiceovers sound natural and responsive.
Use Proper Mic Placement and Environment
Finally, I focused on microphone positioning and room acoustics. I remembered my first messy voiceover session where I placed the mic too close, causing plosive sounds, or too far, resulting in a dull tone. I learned to position the mic about 6-8 inches from my mouth, slightly below or to the side to reduce plosives. Additionally, I treated my room with some acoustic panels, much like soundproofing a recording booth. This drastically reduced reflections and ambient noise, elevating my recordings from amateurish to professional. For detailed setup tips, refer to this guide.
Many creators assume that simply purchasing high-end headphones or an expensive audio interface guarantees professional-quality sound. But in my experience, this belief is a common misconception that can lead to costly mistakes and subpar results. One often overlooked nuance is the importance of understanding the calibration and response curves of your headphones. For instance, some popular consumer models have a pronounced bass bump, which can mislead you during mixing or voiceover recording, resulting in unbalanced audio when played elsewhere. Instead, professionals often recommend flat-response studio headphones—such as those discussed in our headphone buying guide—for accurate monitoring.
Another myth is that an expensive audio interface will completely eliminate background noise. However, many users fail to consider the impact of proper ground loops or the need for quality cabling and correct setup—details that can drastically reduce hum or hiss. The misconception that just plugging in gear will produce perfect sound is dangerous; meticulous setup, including proper grounding and shielding, is crucial. You can learn more about avoiding these pitfalls in this detailed guide on optimizing your interface setup.
For voiceover professionals, there’s also a misconception that a noise gate or compression alone will fix poor acoustics or mic placement issues. While these tools are powerful, they cannot compensate for a poorly treated room or mic positioned too close or too far from the speaker. Investing time in acoustic treatment, such as using diffusers or absorbent panels—something I initially overlooked—is paramount. Refer to this guide on creating a professional voiceover environment for more insights.
### Are You Falling for the Right Setup Myth?
Have you ever fallen into this trap? Let me know in the comments. Let’s dig deeper: why do so many enthusiasts mistakenly believe that gear quality alone solves their audio problems? A study from Audio Editing Pro reveals that up to 70% of poor audio quality stems from setup errors rather than gear faults. Recognizing these subtle nuances and avoiding common myths can drastically improve your output and bring a truly professional voice to your content. Don’t just buy the best gear—master its proper setup and application to unlock your true potential.
Tools That Keep Your Setup Running Smoothly
Investing in quality gear is just the beginning. The real secret to sustained audio excellence lies in consistent maintenance and using the right tools. For audio interfaces, I rely heavily on an external loopback tester. This device helps me detect latency issues and ground loop problems that can develop over time, ensuring my recordings stay clean and professional. Regularly updating firmware and drivers from the manufacturer’s site also prevents compatibility issues, as emphasized by experts in the DAW setups guide.
For my studio headphones, I use a custom calibration app that measures frequency response deviations—something I learned from the detailed research in the latest headphone guide. This ensures my monitors aren’t skewing my mixing or voiceover evaluations, especially during long sessions. Additionally, routine cable inspection with a multimeter can prevent intermittent noise—an often-overlooked step that saves time and preserves clarity.
How do I keep my gear functioning perfectly over time?
Establishing a regular maintenance routine is critical. I schedule monthly checks—cleaning dust from ports, verifying connection integrity, and testing output levels. For software, I set up automatic backups and version control using tools like the recommended DAW backup solutions. This minimizes downtime caused by software corruption or updates gone wrong. Additionally, keeping an eye on temperature and humidity in my studio prevents hardware failures, as highlighted in the dedicated voiceover environment article.
Don’t forget that calibration isn’t a one-time task. I periodically re-measure my setup with tools like room analyzers or spectral analyzers—available in professional audio forums—to catch any drifts caused by aging components or environmental factors. This proactive approach has kept my sound consistently high-quality for years.
Future prospects for maintaining studio gear
Looking ahead, I predict AI-powered diagnostic tools will become standard, automatically alerting creators to issues before they impact recordings. For now, embracing routine checks and investing in reliable maintenance tools can dramatically extend your equipment’s lifespan and ensure your workflow remains seamless. For example, trying out a dedicated hardware testing kit could be your next step toward professional-grade consistency—similar to how I integrated advanced podcast editing tools into my routine to hasten my workflow and improve quality. Start by adopting a monthly maintenance ritual and see how your studio’s reliability improves—it’s a small investment for lasting results.
What No One Tells You About Setting Up for Perfect Sound
One of the most eye-opening lessons I learned was that even the most premium studio headphones can’t save a poorly calibrated setup. It’s tempting to think that gear quality alone guarantees clarity, but the truth is, proper calibration and room treatment are crucial. Skipping these steps led me to believe I had great equipment when, in reality, my signals were muddied by environmental reflections and inaccurate monitoring. This revelation taught me to prioritize environment and calibration over flashy gear alone, a lesson that transformed my workflow and results.
My Biggest Misstep That Cost Me Clarity
I used to believe that high-end cables were unnecessary, assuming that all XLRs would perform equally. That was until I experienced the subtle hiss creeping into my recordings, which could have been avoided with quality, shielded cables. The lightbulb moment came when I replaced my cheap cables, dramatically reducing noise and giving my recordings for that professional crackle-free sound. This simple fix reminded me that investing in small accessories like cables isn’t trivial — it’s essential for maximum clarity.
How I Learned to Trust My Monitoring Environment
Good monitoring is about more than just good headphones; it’s about how they’re used. I once recorded a voiceover with budget earbuds, which muffled background noises and led to missed sonic issues. Switching to studio-grade headphones with flat response and proper acoustic treatment revealed nuances I’d never noticed. Now, I routinely calibrate my monitors and treat my room, understanding that a controlled environment makes all the difference in delivering crisp, accurate sound. For insights, I recommend exploring this headphone buying guide.
Why My DAW Configuration Changed Everything
Initially, I ignored buffer size settings, suffering from latency and unnatural responses during recordings. When I finally adjusted my DAW’s buffer to optimal levels, playback felt more responsive and natural, and my voice recordings captured nuances I’d previously missed. The key was understanding how to balance low latency with system stability. This experience underscored that software configuration isn’t just technical; it’s the backbone of professional-sounding podcasts and voiceovers. Check out this comprehensive DAW setup guide for more tips.
Simple Steps That Became My Sound Game-Changers
Adopting a routine of routine maintenance—like regular cable checks, firmware updates, and environment calibration—became my secret weapon. Even minor issues, if left unchecked, could cause microphonic noise or phase issues, degrading audio quality over time. The realization that continuous care is essential, not optional, saved me countless troubleshooting hours. Tools like external loopback testers and spectral analyzers, detailed in guides like this article, are invaluable for maintaining pristine sound quality.
http://Emma%20Carter
This post hits home for me. I used to think that simply investing in high-quality gear would automatically improve my recordings, but I quickly learned that proper setup is just as vital. For example, I once overlooked the importance of cable shielding, which caused a persistent hiss. After upgrading to shielded cables, everything changed — noise was reduced, and the overall clarity was much better. It’s fascinating how such small details make such a big difference. I’m curious, how many creators here have experienced similar issues related to grounding or cable quality? Sometimes, it’s those simple upgrades that elevate our sound from amateurish to professional. Plus, regularly calibrating monitors and managing room acoustics can be game-changers; I’ve noticed my recordings improve immensely once I focused on those areas. Would love to hear others’ experiences or tips on maintaining optimal setup conditions to keep that clarity consistent.
http://Liam%20Foster
Reading through this post really resonated with my own studio setup journey. I used to think that buying top-tier gear automatically meant my recordings would be studio-quality, but I quickly realized that proper setup is equally, if not more, important. For example, I learned that cheap cables can introduce subtle noise and hiss that ruin otherwise great recordings. Upgrading to balanced, shielded cables made a noticeable difference in clarity and noise reduction. I also found that room acoustics play a huge role; even with the best interface, untreated rooms cause reflections and muddy sound. Do others here prioritize acoustic treatment, or do you find it less critical? From my experience, combining proper cable management, environment control, and a solid understanding of gain staging really elevated my recordings to a professional level. It’s interesting how minor adjustments can have such a big impact—sometimes more than the gear itself. Would love to hear everyone’s thoughts on optimizing these setups for consistent clarity and quality.