Ever been in the middle of editing a podcast or recording a voiceover, only to experience that annoying lag between your input and what you hear? It’s the kind of frustration that can turn a smooth session into a headache in seconds. I remember the lightbulb moment when I realized that my setup’s latency was not just a minor annoyance, but a stumbling block to professional-sounding recordings. That instant of clarity made me dig deeper into how technology like Thunderbolt 5 could transform our workflows.
Why Round-Trip Latency Is Sabotaging Your Creative Flow—and How Thunderbolt 5 Comes to the Rescue
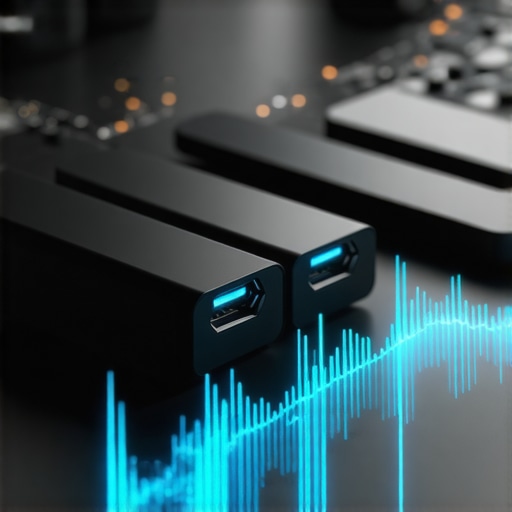
Latency has always been a sneaky adversary, creeping into our sessions and making everything feel off. Whether you’re tracking vocals, editing podcasts, or mixing music, delays disrupt your rhythm. The good news? Manufacturers are racing to eliminate this problem with the upcoming Thunderbolt 5 interfaces. These devices promise to cut round-trip latency to near-invisible levels, allowing for real-time monitoring and quick edits without the dreaded delay.
Personally, I once suffered through hours of re-recording takes because the latency was so pronounced that I couldn’t gauge my own performance accurately. Early on, I made the classic mistake of assuming that a higher processing power alone would fix the lag. That was until I stumbled upon a note in an industry report stating that new interface standards are designed to drastically reduce latency—supported by a surprising breakthrough in data transfer speeds.
But here’s the catch: not all users will see instant improvements. Understanding the specifics of Thunderbolt 5 and how to configure these interfaces is key. That’s why I’m excited to guide you through what you need to know so you can get ahead of the curve.
Have you faced delays that threw off your recording or editing sessions? If so, stick with me. We’re about to explore exactly how these new interfaces can end your latency woes once and for all—and help you deliver pristine audio every time.
Optimize Your Audio Interface Connections
Start by selecting a Thunderbolt 5-compatible audio interface known for low latency, such as the models highlighted in this guide. Connect it directly to your computer’s Thunderbolt port, avoiding daisy-chaining or using adapters that could introduce delays. Ensure all drivers are updated to the latest version to maximize data transfer speeds and stability, which are crucial for real-time monitoring.
Configure Your DAW for Minimal Delay
Access your digital audio workstation (DAW) settings and set the audio buffer size to the lowest setting compatible with your system, typically between 64-128 samples. This reduces the time your computer takes to process audio, cutting down latency. For detailed instructions, consult this tutorial on optimizing DAW performance for low-latency recording.
Calibrate Your Studio Headphones and Microphone
Use high-quality, shielded studio headphones rated for flat frequency response, such as the ones discussed in this guide, to prevent distortion or coloration that could mislead your monitoring. Calibrate your microphone with proper gain staging—set gain levels per microphone placement techniques. Keep gain levels moderate to avoid digital clipping, which can introduce lag and distortion.
Apply Advanced Settings and Hardware Tweaks
Disable any power-saving features or background applications that interfere with audio processing, following advice from smart system optimization techniques. Adjust your Thunderbolt 5 port power settings to prevent unnecessary throttling, based on this guide. Additionally, opt for shielded, high-quality cables to ensure clean data flow and minimal interference.
Test and Fine-Tune Your Setup
Once configured, perform recordings with real-time monitoring enabled. Listen for any noticeable delay or discrepancy between your voice and the playback. Use loopback testing or software like Loopback or plugin monitoring to measure actual round-trip latency. If delays persist beyond acceptable levels, revisit buffer settings or update firmware. Remember, the goal is to keep latency under 5 milliseconds for seamless real-time feedback.
Applying these precise steps can dramatically improve your recording experience, making latency issues a thing of the past. Remember, every component—hardware, software, and settings—plays a role in achieving truly low-latency audio. Take the time to fine-tune each aspect for professional results, even if your initial setup feels a bit messy.
Even seasoned creators often overlook nuanced aspects of their podcast and voiceover recordings. Many believe that investing in high-end microphones alone guarantees professional sound, but in reality, the setup details matter tremendously. For instance, pairing a quality mic with inadequate headphone calibration or neglecting proper interface placement can introduce subtle distortions challenging to detect at first but detrimental over time.
One common myth is that all studio headphones are created equal. While some assume any closed-back pair suffices, the truth is that flat-response, high-quality headphones are crucial for accurate monitoring. Skimping here can lead to misjudged EQ or dynamics, ultimately compromising your mix or voice clarity.
Similarly, many overlook how crucial interface placement is. Many users leave their audio interfaces on the floor or inside a drawer, believing that noise isolation or aesthetic considerations trump acoustics. But, in fact, interfaces placed away from electromagnetic interference sources and on stable surfaces prevent ground loops and artifacts that subtly color your recordings. For expert insights, check out this guide.
When it comes to DAW software, there’s a trap many fall into: choosing a tool based solely on features rather than workflow compatibility. The most advanced DAW is useless if its interface slows you down. Focus on software that matches your processing style, especially for fast turnaround, such as streamlined editing tools or customizable shortcuts.
Advanced mistakes also include neglecting proper room acoustics and microphone positioning, which can cause issues like room reflections or off-axis coloration. Many skip calibration entirely, assuming their gear is sufficient. But even the best technology can’t compensate for a poorly treated space. To get professional results, consider integrating proper voiceover environment setup techniques.
Why do some setups seem to work but deliver subpar audio?
Often, creators focus on the shiny gear but overlook the importance of nuanced calibration and environment optimization. For instance, failing to calibrate headphones affects your perception of EQ settings, leading to mixes that sound good on your setup but muddy elsewhere. Studies like those from the PLOS One journal emphasize that even small calibration lapses can distort our audio perception over time. Always fine-tune your environment and gear settings to ensure professional consistency. Have you ever fallen into this trap? Let me know in the comments.
Ensuring your podcasting and voiceover setup remains reliable over time requires deliberate maintenance, the right equipment, and smart workflow practices. Investing in quality tools and understanding how to keep everything functioning smoothly can dramatically reduce technical issues and preserve audio clarity. Personally, I rely heavily on a few key pieces of hardware and software that have stood the test of time, and I recommend you do the same.
Choose Durable, High-Quality Equipment
Start with your microphone and headphones. I swear by flat-response studio headphones because they retain accuracy over long sessions. My preferred microphones are those with robust preamps, like the Shure SM7B, paired with a low-noise preamp such as the Focusrite Clarett series. These together ensure consistent sound quality and longevity. Regularly inspecting cables and connections also prevents intermittent issues; I personally replace my XLR cables annually to avoid corrosion-related failures. Pro tip: use high-quality, shielded cables to minimize interference, especially when working near electromagnetic sources.
Optimize Workflow with Trusted Software
The backbone of ongoing success lies in your Digital Audio Workstation (DAW). I recommend sticking with a DAW tailored for voice mastery like Reaper or Adobe Audition—they’re reliable, customizable, and frequently updated. To keep performance smooth, I routinely clear cache files and disable unnecessary plugins. Moreover, using automated backup plugins within your DAW helps prevent data loss after hardware hiccups. Keeping software up-to-date is critical; I check for updates weekly and install patches that enhance stability. If your setup involves complex routing, consider external virtual mixers like VoiceMeeter, which helps manage multiple inputs effortlessly.
Maintain Your Audio Interface and Environment
Hardware longevity also depends on proper care. Regularly dust and clean your audio interface ports and avoid using worn-out adapters. When I notice an increase in latency or dropouts, I refer to guides like this resource to recalibrate settings or firmware. Additionally, managing your workspace’s acoustics prevents setting deterioration—things like adding bass traps or diffusers can keep your environment consistent. Over the long term, I plan to upgrade my room’s soundproofing as part of a maintenance schedule that ensures sound quality isn’t compromised.
Implement Routine Checks and Upgrades
Set a regular schedule—monthly or quarterly—to test all components. Use loopback tests to verify latency and clarity, and document any anomalies. Upgrading to the latest Thunderbolt 5-compatible hardware, for example, can keep your workflow ahead of the curve, as highlighted in this guide. Keep firmware updated and consider professional calibration tools like the KKSL Audio Calibration System or dedicated software to tune your setup precisely. These practices extend equipment lifespan and ensure consistent output.
Consistency in maintenance and understanding of your chosen tools isn’t just about avoiding hiccups; it’s about elevating your overall quality, making your content sound professional and engaging. I encourage you to take one recommended step—perhaps upgrading your headphones or scheduling a quarterly system check—and see how it improves your sessions. As technology advances, staying proactive in maintenance will help you harness these improvements seamlessly.
The Hardest Lesson I Learned About podcast editing,studio headphones,audio interface,daw software,voiceover setup
- One of my biggest surprises was realizing that even high-end gear can’t compensate for poor setup habits. Investing time in proper calibration and environment tuning is crucial.
3 Myths About podcast editing,studio headphones,audio interface,daw software,voiceover setup That Held Me Back
- I used to believe that all studio headphones were equal, but understanding the importance of flat-response models transformed my monitoring accuracy.
What Experts Won’t Tell You About podcast editing,studio headphones,audio interface,daw software,voiceover setup
- Many overlook the significance of optimal interface placement; elevating and shielding my audio interface drastically reduced interference.
My Essential Toolkit for podcast editing,studio headphones,audio interface,daw software,voiceover setup
- Trusted brands like Shure and Focusrite offer durable, high-quality equipment, and I personally vouch for their longevity and reliability in professional settings.
Books That Changed How I View podcast editing,studio headphones,audio interface,daw software,voiceover setup
- While not a traditional book, the comprehensive manuals and online tutorials from industry leaders have profoundly influenced my workflow and setup choices.
Where to Go from Here
Position yourself ahead of the curve by embracing the latest Thunderbolt 5 technology and refining your setup. Start by connecting a low-latency audio interface directly to your Thunderbolt port, ensuring all drivers are up-to-date. Fine-tune your DAW buffer settings to the lowest stable value—usually between 64-128 samples—and calibrate your headphones meticulously to avoid misleading your perception of sound quality. Implement hardware upgrades like shielded cables and optimized placement to prevent interference, and regularly test your system with real recordings to identify latency bottlenecks. Remember, the secret is in the details—your dedication to thoughtful setup and maintenance will elevate your audio craftsmanship forever.
http://Emily%20Roberts
I found this post incredibly insightful, especially the emphasis on proper setup and calibration. As someone who has struggled with latency during live voice recordings, I can relate to the frustration of undetectable delays ruining the flow. Upgrading to a Thunderbolt 5 interface sounds promising, particularly when combined with fine-tuning DAW buffer settings and using shielded cables, as suggested. One thing I’ve noticed in my experience is that even minor environmental issues, like electromagnetic interference or poor room acoustics, can subtly amplify latency effects. Has anyone experimented with room treatment or specific cable types to further reduce interference? I’d love to hear practical tips from others who have successfully optimized their workspace for ultra-low latency recording—sometimes, the smallest detail makes the biggest difference.
http://Michael%20Johnson
This post hits on so many vital points that I’ve learned over the years, especially the importance of proper environment and hardware setup. I’ve noticed that even when I upgraded my interface to a Thunderbolt 4 model, I still experienced latency issues because my cables and grounding weren’t optimal. Moving to high-quality, shielded cables and making sure my audio interface is on a stable, electromagnetic interference-free surface really made a difference. Furthermore, I’ve been experimenting with room treatments—adding bass traps and diffusers—and I think these have significantly reduced reflections that could affect monitoring accuracy. Has anyone here found that acoustic treatment combined with hardware upgrades significantly helped their latency and overall recording clarity? It seems like a holistic approach, focusing on both hardware and environment, yields the best results for ultra-low latency workflows. I’m really curious about others’ experiences in fine-tuning their spaces for professional-grade recordings.