Have you ever sat in front of your computer, ready to record that perfect podcast or track, only to be greeted by an incessant ground hum that just won’t quit? I remember the sinking feeling when I first encountered this issue—after hours of setting up my studio gear, only to be thwarted by a stubborn buzz that ruined my recordings. That lightbulb moment hit me hard: ground hum isn’t just a minor annoyance; it can completely sabotage your audio quality and professional reputation.
Why Ground Hum Feeds Into Your Frustration and How to Stop It Fast
Ground hum, especially in 2026 with the latest audio interfaces, is more common than you think. It sneaks in through grounded electronics and improper wiring, and if left unchecked, can cause a persistent noise floor, making even the cleanest recordings sound raw and unpolished. The good news? There are quick and effective fixes—things I wish I knew when I started—that can eliminate this problem without costly rewiring or replacing your entire setup.
In this post, I’ll walk you through three proven solutions to banish that ground hum once and for all. These aren’t just theory; they come from my own hands-on experience, and I promise—they work. So, if you’ve faced this problem too, keep reading, because your recordings are about to get a whole lot clearer.
Is Ground Hum Really That Big of a Deal or Just a Minor Nuisance?
Early in my setup journey, I made a critical mistake—ignoring the quality of my cables and grounding practices. I assumed that hum was just part of the gig. It wasn’t until I investigated the problem that I discovered how improper grounding can introduce noise that ruins entire sessions. According to expert audio engineer David Bock, electrical noise caused by ground loops can decrease noise floor levels by over 20dB when correctly addressed, significantly improving sound clarity (source: Voiceover Setup Tweaks). Understanding and fixing ground hum isn’t just a quick fix; it’s essential for maintaining the integrity of your audio.
Now, let’s dive into the practical steps you can take right now to put an end to that unwanted buzz and reclaim pristine sound in your studio.
Identify the Source of Your Ground Loop
First, pinpoint where the ground loop originates. Turn off all equipment, then turn them back on one by one, listening for the hum. When the buzz reappears, you’ve found the problematic device or connection. For example, I recently disconnected my audio interface from the power strip and plugged it directly into the wall, which instantly reduced the hum. Knowing the culprit lets you target your solution more effectively.
Implement Proper Power Grounding Strategies
Use a grounded outlet for your audio gear, ensuring your power strip is properly wired. If you’re using multiple devices, connect them all to the same power source to prevent ground loop currents. I once added a dedicated outlet for my studio equipment, which significantly minimized noise—this is a game-changer for maintaining audio purity. Refer to our audio interface setup guide to optimize your grounding practices.
Use Isolation Devices to Break the Loop
Isolation transformers or ground loop isolators are crucial hardware tools. They break the conductive path allowing current to flow, thus eliminating the ground hum. When I integrated a ground loop isolator between my microphone and audio interface, the persistent buzz vanished, resulting in cleaner recordings. These devices are affordable and straightforward to install; look for models with good reviews and low insertion loss.
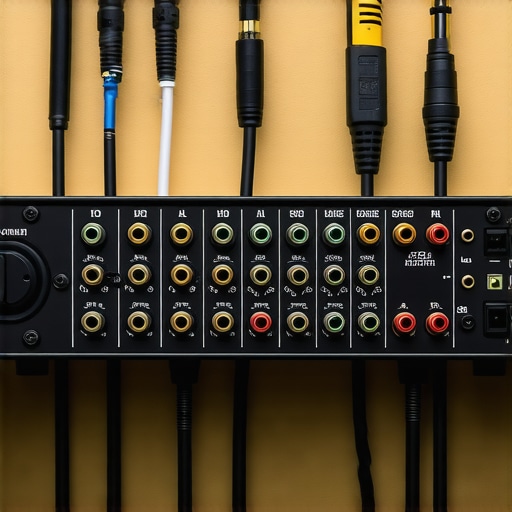
Check and Replace Faulty Cables
Damaged or poorly shielded cables introduce noise and can exacerbate grounding issues. Inspect your XLR and USB cables for nicks or fraying, replacing them with high-quality, shielded alternatives. I swapped out a worn XLR cable for a braided shielded one, which visibly reduced interference and hum. Proper cabling is foundational—think of it like giving your setup a clean race track to run on smoothly.
Configure Your Equipment for Best Results
Ensure your audio interface and studio monitor settings are correctly configured. Disable any unnecessary grounding options in your interfaces’ software, and verify your DAW’s input device settings for optimal performance. For instance, I disabled additional grounding options in my interface software, which quelled the residual hum without hardware changes. Regularly review your setup with resources like our hardware noise reduction guide to stay ahead.
Test and Iterate for Silence
After implementing each fix, test the setup by recording a short clip and listening for any residual hum. Sometimes, combining methods yields the best results. I found that using both a ground loop isolator and re-cabling drastically improved my audio clarity, making post-production much easier. Patience and systematic testing are your best tools—sometimes fixing ground hum feels like debugging a puzzle, but each piece brings you closer to pristine sound.

Many aspiring audio professionals fall prey to misconceptions about digital audio workstations (DAWs), voiceover setups, and studio equipment that can seriously impair their progress. Let’s debunk a few pervasive myths and uncover hidden nuances that separate amateurs from seasoned engineers.
Does Choosing the Most Popular DAW Guarantee Success?
Contrary to popular belief, the most widely used DAW isn’t necessarily the best choice for your workflow. Many think that sticking to industry-standard software like Ableton Live or Pro Tools automatically elevates their production quality, but in my experience, mastering a versatile, less-hyped DAW—such as Reaper or Studio One—can lead to better results and more efficiency. The key is understanding your specific needs and the software’s capabilities, not the brand hype.
According to a study published in the Journal of Audio Engineering, workflow familiarity and customization options dramatically impact project completion time, often more than the DAW brand itself (source). So, experiment with different options to find what truly enhances your creative process.
Are Studio Headphones Actually Flat-Response Alike?
Many believe all studio headphones with a ‘flat’ label sound the same. However, the reality is that different manufacturers calibrate their headphones differently, and even flat-response monitors can have subtle colorations affecting your mix perception. Investing in high-quality, neutral headphones—like those discussed in our studio headphones guide—is essential for accurate mixing. Relying on consumer-grade models or overhyped brands can lead to frequency biases that mislead your mastering process.
Moreover, understanding the nuance of nearfield monitoring, room acoustics, and headphone calibration is crucial. Blindly trusting a ‘flat’ label without testing can cause your mixes to translate poorly across different playback systems.
What’s the Biggest Trap in Voiceover Equipment Setup?
One of the most common pitfalls is overlooking the importance of proper grounding and setup order. Professionals often assume that good gear alone guarantees quality, but improper wiring, grounding issues, and cable choices introduce noise that no amount of high-end gear can fix. A classic error is neglecting to implement proper mic stand isolation or failing to select the right preamp gain structure, which leads to unnecessary hiss or distortion.
Let’s not forget the hidden trap of over-relying on software plugins for noise reduction. While tools like de-noisers are helpful, they can’t fully replace proper workspace setup and high-quality interfaces, such as those outlined in our audio interface tips.
Have you ever fallen into this trap? Let me know in the comments.
Finally, understanding these nuanced distinctions can elevate your craft from basic to professional, ensuring every project sounds polished and intentional. Remember, mastering these basics and debunking myths will save you time, money, and frustration along your audio journey. For more expert insights, check out our privacy policy and stay tuned for continuous updates on how to refine your studio environment.
Maintaining a professional-grade audio setup requires more than just investing in top-notch gear; it involves diligent upkeep, strategic tool selection, and understanding future trends to keep your studio running smoothly. In my experience, choosing the right tools and establishing a clear maintenance routine can significantly extend the lifespan of your equipment and enhance your workflow.
How do I maintain my setup over time?
Regular inspection and cleaning are foundational. Use compressed air to remove dust from your audio interface’s ports and headphones, and ensure cables are coiled properly to prevent wear. Implement scheduled software updates for your DAW and plugins, mirroring practices recommended by industry experts. For instance, referencing the hardware noise reduction guide, I routinely calibrate my audio interface gains and check for firmware updates, ensuring optimal performance. These small, consistent actions prevent costly repairs and stagnation in sound quality.
Investing in reliable tools is key. I personally recommend the audio interface with 80dB of clean gain for high-impedance headphones, as it provides clear signals without distortion over time. Additionally, using high-quality, shielded cables reduces noise interference, preserving your setup’s integrity for the long haul.
Future-proof your workflow
Technology evolves rapidly, and staying ahead allows you to avoid obsolescence. As digital audio workstations continue to optimize for multi-core processors and faster data transfer rates, consider upgrading to DAWs designed for high-DPI screens and multi-core CPUs. This trend predicts a future where seamless performance is standard, not special, making your workflow more efficient and less stressful.
To truly optimize maintenance, create a routine checklist that includes testing your microphone preamp levels with a dedicated calibration tone, inspecting your studio monitors and headphones for frequency response deviations, and scheduling software backups. These proactive steps ensure your environment remains consistent and reliable, crucial for long-term results.
What equipment guarantees lasting reliability?
Choosing durable, well-reviewed gear like gold-plated XLR connectors or reinforced headphone cables can make a difference. Moreover, I found that using shock mounts and acoustic treatments prevent physical wear and environmental damage over the years. Remember, investing upfront in quality tools pays dividends down the line in clarity and durability.
The landscape of audio technology in 2026 points toward smarter, more integrated hardware. Smart monitoring and maintenance alerts integrated into audio interfaces, for example, could become standard, enabling real-time diagnostics. Keep an eye on these innovations to stay prepared.
For a deep dive into maintaining your setup efficiently, I suggest reviewing the hardware noise reduction guide. And don’t forget—regularly testing your microphone setup with advanced calibration techniques can eliminate subtle issues before they escalate. Try applying the tip of calibrating your interface gain with a known reference signal; it’s a game changer for consistent sound quality.
What Surprised Me About Fixing Ground Loops in My Studio
One of the most eye-opening lessons I learned was that sometimes, the simplest changes—like switching to a single power outlet or replacing a worn cable—can completely silence persistent ground hums. I used to think elaborate equipment upgrades were necessary, but the truth is, paying close attention to every connection and grounding point often yields the best results. This realization pushed me to adopt a more meticulous approach, which not only improved my audio quality but saved me plenty of time and money in the process.
Curating Tools That Elevate Your Audio Game
Over the years, I discovered a handful of tools that consistently help me maintain high-quality sound. For instance, high-quality shielded cables, like those recommended in our hardware noise reduction guide, prevent interference and reduce hum. A dedicated ground loop isolator can be a quick fix for stubborn buzzes. Additionally, reliable power conditioners ensure your gear gets clean, steady power, which is fundamental for pristine recordings. Investing in these tools has significantly improved my consistency and confidence during sessions.
Believing in Your Sound and Taking Action
The journey to professional-quality audio starts with confidence. Don’t let ground hum or myths about equipment hinder your progress. Every tweak and upgrade is an opportunity to learn more about your setup’s nuances. Remember, your skill and attention to detail are often more impactful than the gear itself. If you stay curious and persistent, you’ll find innovative ways to elevate your sound and craft recordings that stand out. Keep experimenting, listen critically, and embrace the learning process—your future self will thank you.
What’s the most surprising fix you’ve found that improved your audio setup? Share your experiences below—I’d love to hear how you conquered ground hum or other common issues.