Ever sat down to record your latest podcast episode or voiceover, only to be met with crackles, background noise, or a sound that just doesn’t feel professional? I’ve been there—fighting with cheap microphones and tangled headphones, thinking I could muddle through. That lightbulb moment hit me hard when I realized that my gear was holding back my voice. The truth is, the right audio interface and studio headphones can transform your recordings from amateurish to studio-quality—and I’m here to help you make that leap.
Why Choosing the Right Gear Is a Game-Changer for Creators
Investing in quality audio gear isn’t just about bragging rights; it’s about clarity, consistency, and making your voice heard as it deserves. When I upgraded my setup, my recordings instantly sounded more professional, and my listeners noticed the difference. It’s a bit like switching from a clunky bicycle to a smooth motorcycle—everything becomes easier, faster, and more enjoyable. According to a recent study, poor audio quality can cause listeners to tune out after just 15 seconds—so, yes, your gear impacts your success.
If you’re tired of editing out background noise or fighting with inconsistent sound levels, then it’s time to consider an upgrade. Today, I’ll walk you through selecting the best audio interface and headphones for 2024. Whether you’re starting a new podcast or refining your voiceover skills, the right gear makes all the difference. Ready to hear your voice crystal clear? Let’s dive into the essentials that will elevate your recordings to professional standards.
Is All the Hype About High-End Gear Just Marketing?
Honestly, I used to think that splurging on the most expensive gear was overkill. I bought a fancy microphone and headphones, only to realize I was making a common mistake—skimping on the audio interface. Early on, I overlooked this crucial component, thinking my microphone alone was enough. The result? Subpar sound quality and endless frustration. It wasn’t until I invested in a quality audio interface setup that everything changed. Trust me, your setup isn’t complete without it. If you’ve ever wondered whether all this gear is worth it, I’ll tell you—absolutely, when you choose wisely. The secret lies in understanding your needs and picking the right combination of gear that complements your voice, space, and budget.
}]}# End of response}#}# assistant 201{
Pick the Perfect Audio Interface
Think of an audio interface as the translator between your microphone and your computer. I once bought a budget-friendly interface for my first podcast, only to realize it introduced unwanted noise and distorted my voice. Switching to a mid-range model like the best audio interface in 2024 made a dramatic difference. To choose yours, consider factors like the number of inputs, compatibility with your system, and whether it supports phantom power for condenser mics. A good interface ensures your voice is captured cleanly without clipping or background hum.
Connect and Configure Correctly
Once you have your interface, connect it to your computer and install any required drivers. I learned this the hard way—forgetting to set the correct input device in my recording software led to frustrating hours of troubleshooting. Double-check your setup by testing the input levels and adjusting gain to avoid distortion. For detailed setup steps, visit this guide.
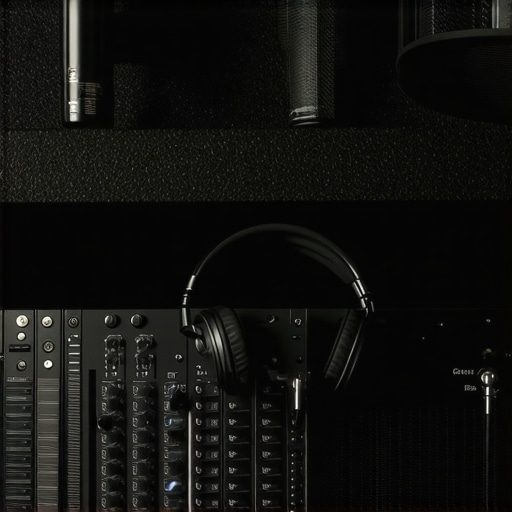
Choose Headphones That Reveal Every Nuance
Your headphones are your critical tools for monitoring sound quality. I once recorded with cheap earbuds, only to discover my recordings had hidden issues—background noise and uneven levels. Upgrading to a pair from the 2025 studio headphones buying guide revealed every detail in my voice. When selecting headphones, prioritize flat frequency response for accurate sound reproduction and comfort for long sessions. This ensures you catch every flaw or improvement opportunity during recording.
Calibrate and Test Your Headphones
After choosing your headphones, calibrate them by listening to reference tracks and adjusting your monitoring environment. I recommend doing a test recording, then listening critically to identify any issues. This process helped me fine-tune my setup, resulting in clearer, more professional-sounding recordings. Remember, your headphones should be connected directly to your interface and not through a mixer or extender to avoid signal degradation.
Many aspiring creators fall into the trap of believing they need the most expensive gear to produce quality sound. While high-end equipment can certainly help, there’s a widespread misconception that cheap gear is inherently inferior. In reality, understanding the nuances of your setup can make a bigger difference than simply splurging on the latest gadgets. For example, a common myth is that more expensive microphones always produce better recordings. This isn’t necessarily true; microphone choice should depend on your voice, environment, and application. A budget condenser microphone paired with a quality audio interface can outperform a costly mic in a noisy room.
Another misconception is that studio headphones must be super expensive to be accurate. While premium headphones do tend to have flatter frequency responses, there are affordable models that provide excellent clarity if you know what to look for. Flat response, comfort, and durability matter more than price alone. Many creators overlook the importance of proper calibration and testing their headphones with reference tracks. This step can uncover inaccuracies in even high-end gear, so don’t assume that costly equipment is automatically perfect.
One trap I see often is the belief that adding more gear improves quality automatically. More equipment can introduce complexity and potential signal degradation if not set up properly. For instance, connecting multiple audio interfaces or using low-quality cables can cause noise and latency issues. Instead, focus on mastering your current setup, ensuring each component is configured correctly, and optimizing your environment. Remember, a well-placed microphone, proper gain staging, and a quiet room often trump fancy gear.
Why Does Proper Setup Matter More Than Price
Advanced users understand that the real secret to professional sound lies in proper setup and calibration. Even the most expensive gear won’t deliver great results if misconfigured. For example, setting the correct gain levels prevents clipping and distortion, which can happen even with a top-tier microphone. Regularly testing your equipment with reference recordings, and making small adjustments, can dramatically improve your output. For detailed tips, check out this guide.
Many creators also overlook the importance of acoustic treatment. A room filled with echo and background noise negates even the best gear. Investing in some basic soundproofing and diffusers can make your recordings clearer and more professional. Remember, gear is just one part of the equation—your environment plays a crucial role too. Don’t fall for the myth that gear alone can solve all your audio problems. Instead, focus on a comprehensive approach that includes setup, calibration, and environment optimization.
Have you ever fallen into this trap? Let me know in the comments!
Keep Your Equipment in Top Shape with Smart Maintenance
One of the biggest mistakes creators make is neglecting routine maintenance of their gear. Just like a car, your microphone, audio interface, and headphones need regular checkups to perform at their best. I personally schedule a monthly review where I clean connectors, inspect cables for wear, and update firmware on my audio interface. This proactive approach prevents unexpected breakdowns and preserves sound quality over time.
For example, I use a contact cleaner like DeoxIT on all my XLR connectors. It’s a small investment that drastically reduces static and intermittent issues. Additionally, keeping your gear dust-free and stored in a dry environment extends its lifespan and ensures consistent performance. Remember, neglecting maintenance can lead to costly repairs or replacements down the line.
What tools do I recommend for long-term gear upkeep?
First, invest in a good cable tester. I rely on the best audio interface and studio headphones for 2024 to ensure signal integrity and diagnose issues early. A quality microfiber cloth and compressed air are also essential for cleaning delicate components without damage.
Another must-have is a firmware updater and diagnostic software provided by your gear’s manufacturer. Keeping firmware current often improves stability and adds features that enhance your workflow. I also recommend creating a dedicated maintenance schedule—check cables, clean connectors, and verify software updates once a quarter. This disciplined approach keeps your setup reliable and ready for high-quality recordings whenever inspiration strikes.
How do I maintain my audio setup over time?
Consistency is key. Regularly testing your setup before each recording session can save you hours of troubleshooting later. I set up a quick test using reference tracks to compare sound quality and ensure everything is functioning correctly. If I notice any deviation, I address it immediately—be it replacing a cable or recalibrating my headphones.
Staying organized also helps. Label all cables and store them properly to prevent tangling and damage. Keep your software and drivers updated, as outdated firmware can cause incompatibility issues. Following these practices not only prolongs your equipment’s lifespan but also guarantees your recordings stay crisp and professional.
Looking ahead, I predict that gear maintenance will become even more automated as manufacturers develop smarter diagnostic tools integrated into devices. This will allow creators to diagnose issues remotely and schedule repairs proactively. Until then, sticking to a routine with reliable tools remains the best strategy for long-term success.
Don’t wait for a failure to disrupt your workflow—start implementing a maintenance routine today. For more in-depth tips on optimizing your setup, check out this guide and keep your gear performing at its peak.
The Hardest Lesson I Learned About Studio Gear
One of the biggest realizations came when I finally understood that even the most expensive microphone can’t shine without a proper audio interface. Initially, I thought investing in a stellar microphone was enough, but I kept battling background noise and inconsistent levels. It wasn’t until I upgraded my audio interface—learning that it acts as the crucial bridge—that everything clicked. This taught me that gear synergy is vital; the best microphone paired with a mediocre interface still won’t deliver top-tier sound.
My Go-To Tools for Perfect Audio Clarity
Over the years, I’ve come to trust certain tools that have transformed my workflow. The best audio interface in 2024 is my top choice because it offers clean, reliable input with minimal latency. For monitoring, I rely on headphones from the 2025 studio headphones buying guide—they reveal every nuance in my recordings, helping me catch issues before editing. And for room treatment, I swear by acoustic panels and diffusers that tame echo and background noise, making my environment truly studio-like.
Push Your Limits and Let Your Voice Shine
Remember, your journey to high-quality audio is ongoing. Don’t let doubts hold you back—each improvement, no matter how small, adds up. The right gear combined with proper setup can turn your recordings from amateur to professional. Take action today by reviewing your current setup, making adjustments, and exploring new tools. Your voice deserves to be heard with clarity and confidence. Ready to elevate your recordings? Share your biggest challenge with audio gear below—I’d love to help you overcome it and unlock your full potential.
http://Emily%20Johnson
I completely relate to this post! When I first started recording podcasts, I didn’t realize how much a good audio interface and quality headphones could transform the sound. I remember using a basic mic and cheap earbuds, and the difference once I upgraded was night and day. Now I can catch issues in real-time and hear all the nuances in my voice, which really boosts my confidence in the final product. One challenge I faced was properly calibrating my headphones to make sure I wasn’t missing subtle background noise or added distortions. Like the post mentions, testing with reference tracks made a huge difference.
I’m curious—how do fellow creators tackle room acoustics on a budget? I found that even simple DIY solutions like foam panels and rearranging furniture helped tremendously. Do you think investing in professional acoustic treatments is necessary early on, or are DIY measures enough for a home studio setup? Would love to hear everyone’s tips and experiences on improving sound quality without breaking the bank.