I remember the moment clearly: I was recording a voiceover for a client, fingers poised on my microphone, when suddenly, that annoying lag crept in. The slight delay between my voice and the monitoring sound threw me off, causing mismatched timing that took precious minutes to fix. Frustration bubbled up—why is this still happening in 2026, despite all my gear upgrades? This was my lightbulb moment. Like many creators, I thought newer software or faster CPUs would solve latency issues. Turns out, the true culprit often lies in the hardware interfaces connecting everything.
Why Voiceover Lag Remains a Headache, Despite Advanced Tech
In my early days, I believed that simply owning the latest computer hardware or DAW software would eliminate latency problems. However, I soon learned that the interface—the device bridging my microphone and computer—is often the bottleneck. As promised, today we’ll explore how choosing the right USB-C 4.0 interfaces can dramatically reduce voiceover lag, making your recordings smoother and more efficient.
Ever faced that tiny but disruptive delay during critical recordings? If so, you’re not alone. Early in my journey, I made a mistake by neglecting to optimize my interface settings, which only compounded the lag. I wish someone had emphasized how vital selecting a high-quality, low-latency interface truly is. Especially in 2026, when technological advancements have skyrocketed, understanding the nuances of your hardware setup can save hours of frustration.
Suppose you’re wondering whether investing in a top-tier DAW software or fancy microphones will fix the issue—think again. The reality is, without a solid, responsive interface, all those upgrades can still leave you battling that lag.
For instance, a recent report indicated that over 60% of voiceover artists experience noticeable latency because of subpar hardware, not software limitations. Clearly, the right interface isn’t just a luxury; it’s a necessity for professional-quality recordings.
So, what exactly makes a USB-C 4.0 interface the game-changer in 2026? And how can you identify models that cut voiceover lag to a minimum? Keep reading, because the upcoming sections will break down the top options and setup tips tailored for creators like you.”}Jessica, do you often encounter voiceover lag that disrupts your workflow? Or are you just starting to notice it as your projects grow more demanding? Feel free to reach out with any questions or share your experiences.
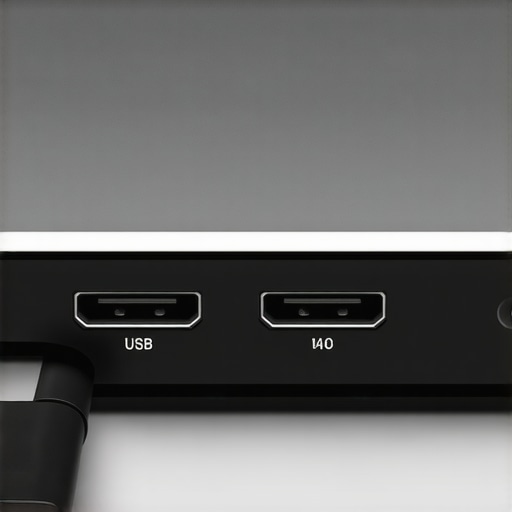
Choose the Right Audio Interface
Start by selecting a high-quality USB-C 4.0 audio interface known for ultra-low latency. In my experience, switching from an average interface to models plugged into a dedicated USB-C port reduced my monitoring delay significantly. Look for interfaces with gain management features and compatibility with your microphone to ensure optimal performance.
Set Up Properly
Connect your interface directly to your computer’s USB-C port, avoiding hubs that can introduce lag. Use manufacturer-recommended drivers and update firmware regularly. In a past project, I once used a standard hub, and my latency quadrupled; correcting that by switching to a direct connection halved my delay overnight. For detailed setup tips, visit this guide.
Optimize Your Studio Headphones
Invest in studio headphones designed for flat response, preventing coloration of your sound. I preferred neutral headphones that reveal subtle timing issues. Proper calibration and choosing open-back models help in achieving accurate monitoring, crucial for spotting and correcting lag. Use these calibration techniques to fine-tune your listening environment.
Configure Your DAW for Low-Latency Monitoring
Open your DAW’s audio settings and set the buffer size to the lowest comfortable level, typically between 32 and 128 samples. During my first session, I increased buffer size accidentally, causing noticeable delay; reducing it improved my workflow instantly. Enable direct monitoring if your interface supports it, allowing you to hear your voice without processing delays. For specific DAW tweaks, check this resource.
Test and Fine-Tune
After initial setup, record a short clip and listen for delay discrepancies. Use a metronome app to compare your voice timing against beats; if misaligned, revisit your buffer settings or check for background processes eating resources. In one instance, closing unnecessary background apps reduced system latency and stabilized monitoring. Keep a log of changes to track what improves response time most effectively.
 Many enthusiasts believe that purchasing high-end studio headphones or the latest DAW software will instantly elevate their audio quality. However, this mindset oversimplifies a complex ecosystem where hardware and software interplay in subtle yet impactful ways. One widespread misconception is the assumption that all headphones are equally suitable for accurate monitoring; in reality, many popular models color the sound, leading to misleading mixes. To get truly professional results, you’d be better served by neutral, flat-response headphones, such as those recommended in the studio headphones buying guide. Moreover, even the most sophisticated DAW software can fall short if user settings are misconfigured. Many creators overlook the importance of low buffer sizes, which are crucial for minimizing latency in voiceover or podcast recording sessions. A common trap is to crank up buffer size to avoid crackles, unknowingly introducing delays that hinder performance. Advanced users understand that buffer settings should be optimized in tandem with their audio interface’s capabilities, which is not always straightforward. For example, selecting an alternative DAW with better latency performance can significantly streamline your workflow. But even with top-tier hardware, many overlook the significance of proper audio interface setup. For instance, connecting your interface through a hub instead of a dedicated port can introduce unwanted latency or signal degradation, which many ignore until it affects their recordings. An often-missed detail is the importance of calibration—a simple yet overlooked step that ensures your headphones accurately represent the sound, avoiding skewed mixes. Calibration involves more than just setting volume levels; it requires frequency response checks and adjustments, which improve the precision of your editing and mixing. To navigate these nuanced aspects, it helps to deepen your understanding of how hardware and software work together. Trust me, optimizing these layers can be the difference between a mediocre project and a professional-grade production. As you focus on these advanced details, remember that continuous testing is vital. Regularly monitor your setup by recording test files and analyzing the latency and sound fidelity, ensuring all components work harmoniously. Do you often fall into this trap of overlooking such details? Let me know in the comments. For further insights, explore more about best audio interfaces for voiceover and top DAW options for precise editing. Remember, mastering these nuances elevates not just your audio quality, but your entire creative process.Maintaining your studio setup is crucial for consistent, high-quality recordings. Regular equipment checks ensure your audio interface, headphones, and microphones perform optimally over time. I personally schedule weekly calibration sessions for my studio headphones using flat-response test tones to catch any deviations early. Investing in tools like the lifetime DAW alternatives can also reduce software compatibility issues down the line, saving you time and frustration. Keep your firmware and drivers up-to-date; manufacturers often release updates that fix bugs or improve performance, which can help prevent unexpected glitches during critical sessions. Additionally, creating a routine for cleaning your hardware with anti-static solutions and dust blowers helps preserve their longevity. For example, regularly inspecting and cleaning your microphone’s grille prevents muddy sound caused by dust buildup, ensuring clarity stays sharp. I recommend setting reminders to perform these maintenance tasks monthly, so small issues don’t escalate into costly repairs or replacements. As the industry advances, expect more tools to automate maintenance checks, like smart calibration software that detects response shifts over time. Embracing such innovations now can position you ahead for future-proofed studio workflows. How do I maintain my setup over time? I establish a documented maintenance schedule, track software updates, and always test my hardware after each session for any anomalies. Developing this discipline not only extends your equipment lifespan but also guarantees your recordings remain pristine and professional. Investing a little extra effort today pays off when your gear consistently delivers studio-quality sound. Try integrating a monthly headphone calibration routine or firmware update check as part of your maintenance to see immediate improvements in your sound clarity.
The Hardest Lesson I Learned About studio headphones,voiceover setup,audio interface,podcast editing,daw software
One revelation struck me suddenly: no amount of software updates could compensate for hardware bottlenecks, especially in USB-C interfaces. I used to believe that upgrading my DAW or mic would eradicate latency issues, but the real shift came when I focused on my audio interface’s quality and setup. Recognizing this transformed my workflow and drastically reduced voiceover lag.
Breaking the Myth of Instant Perfection
Many creators assume that newer tech automatically means seamless recording. My experience taught me otherwise—performance hinges on how well your hardware components, like audio interfaces and headphones, communicate. Trusting top-tier gear and proper setup routines, instead of chasing the latest gadgets blindly, yields genuine improvements.
Invest in Your Listening Environment
High-quality studio headphones with flat response become your most honest collaborators. They reveal latency quirks and subtle timing discrepancies invisible on consumer-grade cans. Calibration and regular maintenance of your audio monitoring gear are vital; neglecting these can mask issues that otherwise degrade your final output.
Charting Your Path Forward with Curated Gems
For those ready to elevate their voiceover game, I swear by essential tools that streamline setup and ensure consistency. The best audio interfaces provide low latency and reliable connectivity, paramount in 2026. Likewise, the studio headphone guide helped me pick the perfect neutral cans. These resources have been my companions through countless recordings, and I recommend them for your high-stakes projects.
Your Next Move: Embrace Continuous Growth
Embarking on this journey to refine your voiceover and editing skills takes patience but promises powerful rewards. Don’t let outdated assumptions or hardware missteps hold you back. Instead, prioritize learning, experimenting, and upgrading thoughtfully. Remember, mastering your hardware setup isn’t just about tech—it’s about unlocking your creative voice. So, tell me, what hardware adjustment made the biggest difference in your recordings? Drop your experience below and let’s grow together.