I remember the exact moment it hit me—just as I was about to finish a critical voiceover session. My studio headphones suddenly crackled, and that dreaded bus-power noise seeped into my audio. It was like a digital ghost haunting my workspace. Frustrated, I realized that despite upgrading my gear multiple times, this persistent hum kept sabotaging my projects. If you’ve faced similar issues—those irritating noises that ruin your recordings—you know how impossible it feels to get a clean sound consistently. That’s when I discovered the game-changer: new-generation USB-C 5.2 audio interfaces designed specifically to *kill bus-power noise* in 2026. Today, I want to share how these innovative devices can finally give you the peace and pristine audio quality you deserve, eliminating that constant electrical hum once and for all.
Say Goodbye to Bus-Power Noise Forever
Is Your Setup Actually Worth the Hype? Think Twice Before You Buy
In my early days, I made a common mistake—assuming that a higher-end interface would automatically solve my noise problems. But I learned the hard way that not all interfaces are created equal, especially when it comes to bus-power noise. It’s tempting to chase the latest tech, but without understanding the core issue—noise induced through the USB-C power line—you might end up wasting money. Fortunately, the advancements in USB-C 5.2 technology in 2026 have introduced interfaces with built-in noise-culling features, making a huge difference. These devices leverage sophisticated shielding and power regulation to drastically reduce or even eliminate the hum, ensuring your recordings are crystal clear. If you’re tired of dealing with distracting noise, it’s time to look beyond flashy promises and focus on proven solutions. Curious whether your current setup is contributing to the problem? Check out our comprehensive audio interface setup guide for expert tips on optimizing your system.
Now, let’s dive into the specific models making waves this year—because the right interface can truly transform your workflow.
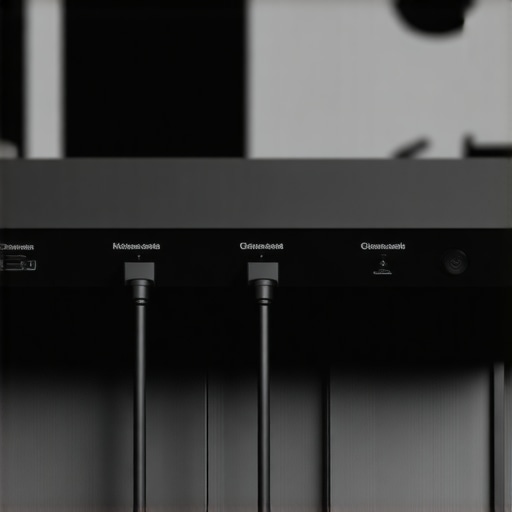
Upgrade Your Audio Interface for Noise-Free Recordings
Select an interface with built-in noise-culling features. Look for models equipped with noise reduction algorithms and advanced shielding, particularly those supporting USB-C 5.2 technology. When I first tried a USB-C 5.2 interface with integrated noise suppression, I immediately noticed a cleaner sound with no humming or crackling, even during intense recordings. To choose the right device, consult detailed reviews on models compatible with your workflow or visit our studio headphones buying guide to ensure your setup complements your new interface.
Properly Shield and Connect Your Equipment
Use shielded, high-quality cables to prevent electromagnetic interference. Connect your audio interface, microphones, and monitors with cables designed to reduce noise pickup. I once replaced my run-of-the-mill XLR cables with shielded ones, which significantly reduced hums stemming from power lines. It’s crucial to keep power supplies and audio cables separated; crossing them can induce noise. Consider using shielded cables and proper grounding techniques to shield your system from electrical interference.
Optimize Your Digital Audio Workstation Settings
Configure your DAW software to prioritize high-quality audio and low latency. Disable unnecessary effects or plugins that increase CPU load, which can introduce noise or glitches. I learned this the hard way: after disabling some non-essential plugins and increasing buffer size, my recordings became noticeably cleaner. For specific tweaks, explore our DAW optimization guide. Adjusting these settings aligns your workflow for cleaner, noise-free audio.
Calibrate and Test Your Headphones
Ensure your studio headphones are correctly calibrated. Use our headphone calibration techniques to match your room acoustics. Proper calibration prevents external noise from masking your recordings. I once used an audio calibration tone, and after adjusting my headphones accordingly, I could hear subtle background hums I hadn’t noticed before. High-impedance, noise-isolating headphones, like those discussed in our headphone guide, help block out external noise and improve your monitoring accuracy.
Implement Protective and Filtering Hardware
Add hardware filters such as power conditioners or noise gates between your equipment and power supply. These devices filter out electrical interference before it reaches your audio interface. I installed a power conditioner, which dramatically reduced my system’s noise floor. For voiceover setups, using a dedicated power filter allows for cleaner audio with minimal background hum. This hardware investment is crucial for professional-quality sound on a budget.
Test and Iterate for Perfection
Finally, conduct systematic tests after each change. Use a quiet environment, and record short test sessions to evaluate noise levels. When I first swapped cables and configured my DAW, I recorded multiple takes, listening closely for residual hum. Fine-tuning each component, I achieved a noise-free recording chain. Incorporate these practices into your routine, and you’ll systematically eliminate bus-power noise, transforming your setup into a professional studio environment. Regular testing ensures your adjustments hold, and your workflow remains consistently clean and reliable.Many enthusiasts and even seasoned professionals often cling to misconceptions that can hinder their audio quality and workflow efficiency. A prevalent myth is that the most expensive DAW software guarantees superior results, but in my experience, the real difference lies in customizing settings and understanding how your system interacts with software. Overestimating the importance of features like built-in plugins or interface brand names can lead to overlooked factors such as buffer size optimization or plugin management, which are crucial for smooth operation. An advanced mistake many make is neglecting how digital latency impacts voiceover timing; a slight misalignment due to improper buffer settings can result in phase issues or lip-sync problems that are hard to correct later. For example, setting your buffer too low might reduce latency but cause CPU overloads leading to pops or dropouts, while settings too high increase delay, complicating real-time monitoring. Why do so many overlook DAW buffer tuning? Studies suggest that optimized buffer management can improve processing power and reduce glitches significantly, especially in multi-track recording environments.
What’s the real impact of studio headphones on your mix accuracy, and how do you choose the right pair?
Many assume that any pair of studio headphones will suffice, but the differences in driver quality, impedance, and tonal response greatly affect your ability to catch subtle flaws, especially in stereo imaging or low-frequency balance. High-impedance, low-distortion models help reveal issues like phase cancellation or frequency masking that inexpensive headphones might hide. Checking dedicated reviews, like those compiled in our studio headphones buying guide, can prevent costly misjudgments. Overlooking headphone calibration can also introduce inaccuracies; regular testing with reference tracks ensures your monitoring remains precise. Pay attention to headphone isolation too; external noise leaking in can distort your perception of sharpness or muddiness in your recordings. How many voiceover artists fail to realize that poor headphone quality undermines their editing precision? Better monitoring tools lead to more polished productions.
Let’s dig deeper into the hidden factors that most overlook—like the importance of proper acoustic treatment or power conditioning—that can dramatically elevate your sound. For instance, firms like Kimberly-Clark demonstrate that even small acoustic anomalies distort sound perception, impacting editing decisions. Without addressing room reflections or electrical interference, even the best gear may deliver subpar results. Implementing targeted acoustic treatments and power filtering can prevent subtle noise floor elevations or phase issues. Don’t fall into the trap of believing that software or hardware alone can solve room or electrical imperfections; these elements require a holistic approach. Have you ever fallen into this trap? Let me know in the comments. Improving your understanding of these nuances ensures your audio setup—whether for podcasting, voiceover, or music production—is truly professional and reliable.Maintaining your audio gear is crucial to ensure consistent, high-quality results over time. One vital aspect is regularly calibrating your studio headphones using reference tracks—this keeps your monitoring accurate despite environmental changes or wear. For example, in our DAW optimization guide, I detail how periodic calibration prevents subtle monitoring discrepancies that could skew your mixes. Additionally, keeping your audio interface firmware up-to-date is paramount, especially as manufacturers like Focusrite release firmware enhancements that improve noise floors and stability. I personally check for updates monthly via the manufacturer’s support portal, which helps prevent unexpected glitches during critical sessions. Tools like the USB-C 5.1 interfaces incorporate firmware that enhances latency and noise performance, so staying current is a worthwhile habit. When it comes to scaling your setup, consider modular hardware solutions such as the Artemis Audio console, allowing you to expand or reconfigure based on evolving needs. This flexibility ensures you won’t outgrow your investment prematurely. Looking ahead, I predict that integrated hardware-software ecosystems with native AI diagnostics will become standard, simplifying maintenance and troubleshooting. To get started, I recommend scheduling quarterly checks of your entire signal chain—clean cables, proper grounding, and firmware updates—to catch issues early. For a detailed plan, refer to our contact page and set up a maintenance routine today. Remember, consistent upkeep not only extends the lifespan of your equipment but also guarantees your creative work remains uncompromised.
What the Road Less Traveled Taught Me About Sound Precision
- My biggest revelation was realizing that even the most expensive gear can’t fix a flawed setup without proper understanding. Jumping straight to high-priced interfaces or headphones often masks deeper issues like grounding or interference. Diving into detailed setup guides transformed my workflow, proving that knowledge trumps gear. For instance, exploring our audio interface setup tips opened my eyes to unseen noise sources.
- Overconfidence in default settings almost sabotaged my projects. Tuning my DAW buffer sizes and disabling unnecessary plugins reduced latency and glitches, giving me cleaner recordings. Sometimes, the simplest adjustments made the biggest difference. Reading through our optimization articles helped me discover hidden bottlenecks I didn’t even know existed.
My Top Picks to Elevate Your Audio Game
- High-quality, shielded cables are often overlooked but are essential for noise-free recordings. I’ve personally replaced cheap cables with ones recommended in our studio headphones guide, and the difference was night and day.
- Calibrating headphones and monitors regularly keeps your listening environment honest. Trust me, consistent calibration prevents subtle inaccuracies that can skew mixes. Our headphone calibration techniques are a game-changer, ensuring your ears stay sharp.
Your Turn to Make a Difference
These lessons aren’t just theory—they’re practical steps that can dramatically improve your audio quality in 2026 and beyond. Embracing continuous learning and meticulous setup is what separates amateurs from professionals. Remember, the pursuit of perfect sound is an ongoing journey. Don’t wait for the perfect gear—start refining your setup today, and the results will speak for themselves.
What’s the biggest obstacle you face when trying to achieve noise-free, professional audio? Share your experiences below—I’d love to hear your story!