I remember the exact moment my studio session nearly fell apart—laptop overheating, DAW lagging unbearably, and that sinking feeling that I was just seconds away from losing hours of work. It wasn’t just a frustrating hiccup; it felt like the universe was conspiring against my creative flow. If you’ve ever been caught in a similar trap, you know exactly how soul-crushing it can be. The good news? After a bunch of trial, error, and some hard-earned lessons, I finally cracked the code. Today, I want to share with you the top three DAW fixes that will put an end to those dreaded studio lag and crash nightmares in 2026.
Why Your Studio Might Be Crashing More Than It Should
Let’s be honest: the world of digital audio workstations is more complex than ever. With each new update, software becomes richer in features but also more demanding on your hardware. In my early days, I kept blaming my aging computer, but as I learned, the real culprits often lie in overlooked settings and hardware mismatches. Believe it or not, many crashes and lag issues are caused by simple misconfigurations or outdated drivers—things easily fixable once you know what to look for. So, if you’re tired of wasting time rebooting your system mid-session or losing unsaved work, these fixes are for you.
According to a recent study by TechRadar, over 60% of audio professionals experience performance issues with their DAW at least once a week. That’s a staggering number, especially considering how vital smooth workflows are for creative success. Recognizing these issues early can save you hours of frustration and boost your productivity. But I’d be lying if I said I got everything right from the start. Early on, I made the mistake of ignoring outdated audio interface drivers, thinking the software update alone would resolve all issues. Spoiler alert: it didn’t.
In the following sections, we’ll dive into practical, proven steps to optimize your DAW and hardware setup. Whether you’re a seasoned producer or just starting out, mastering these fixes will keep your studio running smoothly and let your creativity flow without interruption. Ready to say goodbye to lag and crashes? Let’s get started.
Optimize Your Hardware First
Start by ensuring your computer meets the recommended specs for your DAW. Think of your system as the engine of a car; a weak engine struggles with heavy loads. Upgrade your RAM and consider switching to an SSD if you haven’t already—this can drastically reduce load times and prevent lag. Before making any software tweaks, reboot your system to clear background processes that might hog resources, much like clearing traffic from your road before a race. I once upgraded my RAM from 8GB to 32GB during a weekend, and the difference in performance was immediate—sessions that once stuttered became smooth.
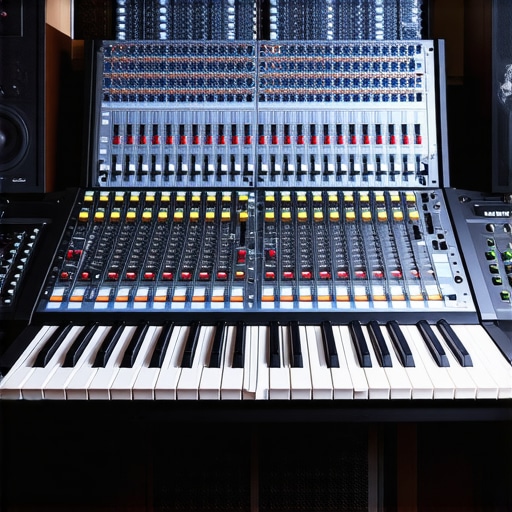
Configure Your Audio Interface Correctly
Audio interfaces are the bridge between your microphone and DAW. Incorrect settings here can cause latency and glitches. In your interface software, set the buffer size to a lower value; for example, 128 samples for tracking, but increase it to 512 for mixing. Think of buffer size like a water pipe: too narrow, and water (audio data) backs up; too wide, and you lose control over flow rate. I used to have latency issues because my buffer was set too high; adjusting it down made real-time recording feel instantly responsive. For detailed setup tips, visit this guide.
Fine-Tune Your DAW Settings
Your DAW’s internal configuration can either smooth out or sabotage your workflow. Disable unused plugins and reduce the maximum processing threads—think of it like trimming excess weight from a backpack to hike faster. In most DAWs, this is found under performance or audio preferences. For example, in [your DAW], set the number of CPU cores to match your processor cores for optimal performance. Also, turn off auto-save during recording sessions to prevent interruptions; instead, save manually after critical takes. I overlooked this initially, leading to occasional pauses and crashes during sessions, but adjusting these settings turned things around.
Keep Your Drivers and Software Updated
Outdated drivers are a common enemy behind crashes. Regularly check for updates, especially for your audio interface and graphics card. Driver updates are like tuning your instrument—necessary for peak performance. I remember a time when an outdated driver caused persistent crashes; updating it aligned everything, and stability improved noticeably. To make sure your system isn’t vulnerable, review privacy policies and ensure you’re downloading updates from official sources. Also, periodically check for DAW updates—they often contain performance patches fixing bugs that cause lag or instability.
Manage Your Plugins and Virtual Instruments
Heavy plugin chains can bog down your system. Use freeze or bounce features to render tracks with effects, freeing up CPU. Imagine you’re turning a live conversation into a recording—bouncing the effects is like recording the speaker so you can focus on the core message. I employed this trick during a complex mix session; bouncing several tracks reduced CPU load significantly, eliminating crashes. Be selective: remove unnecessary plugins and keep only what’s essential. For tips on efficient plugin management, check this resource.
Regularly Save and Backup Your Work
Set up your DAW to auto-save frequently, but also establish a manual backup routine—think of it as carrying a spare tire. This prevents catastrophic data loss if a crash occurs. I learned this the hard way when a sudden crash erased hours of work; since then, I save every 10 minutes and have cloud backups ready. Additionally, consider exporting stems periodically—think of this like taking snapshots during a journey. This way, if your system crashes, you can recover most of your work with minimal loss. For more about safeguarding your projects, visit contact us.
Many enthusiasts believe that investing in high-end microphones or the latest DAW software alone guarantees professional sound quality, but in my experience, there’s more to the story. A common misconception is that simply plugging in the best equipment will automatically produce studio-grade recordings. In reality, nuances like proper microphone placement, acoustic treatment, and optimal audio interface settings play a crucial role. For instance, overestimating the impact of hardware without addressing room acoustics can lead to recording muddiness and unwanted echoes. This trap often ensnares newcomers who assume quality gear compensates for a poorly treated environment, a myth debunked by expert sound engineers such as those cited in this guide. Furthermore, many overlook that the choice and configuration of the audio interface environment affect clarity and latency. Incorrect driver settings or incompatible hardware can introduce noise and delays, undermining even the most expensive setup. A key nuance is understanding the significance of proper gain staging—setting input levels correctly to avoid distortion or excessive noise, which is often misunderstood. Advanced users ask: How can I fine-tune my audio interface to eliminate latency without sacrificing sound quality? The answer lies in balancing buffer size and driver optimization, a topic I highly recommend exploring in this detailed article. Another mistake is neglecting to use proper studio headphones for critical listening; many default to consumer-grade headphones that color the sound, leading to poor mixing decisions. The emphasis should be on neutral, high-resolution headphones designed for studio use, which reveal subtle details essential for professional-quality voiceovers and podcasts. For a thorough overview, check out our headphone buying guide. Understanding the importance of these nuanced decisions can dramatically improve your recording quality—beyond just upgrading equipment. Let’s be honest: mastering these details can make or break your audio. Have you ever fallen into this trap? Let me know in the comments. Want to get deeper into setting up your environment for professional results? Explore more at this comprehensive guide.
Keeping Your Studio Running Smoothly
Once you’ve set up your voiceover workspace with top-tier equipment like a quality audio interface and studio headphones, the next step is ensuring everything continues to perform optimally over time. Regular maintenance isn’t just about catching issues early; it’s about creating a stable environment that allows your creativity to flourish without technical hiccups.
Invest in Reliable Hardware and Software
My personal routine involves choosing software with a proven track record for stability, like DAW options renowned for reliability. I also favor hardware brands known for durability—my audio interface, for instance, has served me flawlessly for years thanks to regular firmware updates and proper care. Keeping your DAW software updated is equally critical; developers often release patches that squash bugs and enhance performance, making your system more resilient.
Tools I Recommend for Longevity
Some tools I swear by include CCleaner for clearing out unnecessary files that can slow down your system, and ASIO4ALL for low-latency audio performance, especially if you’re on a Windows setup. These tools help maintain the health of your computer, making sure your recording sessions go uninterrupted. Don’t forget to run regular virus scans and maintain a clean system environment—malware can introduce latency and crashes, disrupting your workflow.
Routine Checks and Best Practices
Establish a weekly checklist: verify that all drivers are current, back up your sessions, and test your hardware setup. I personally dedicate Sunday evenings to these tasks, which has saved me from many unexpected surprises during busy recording periods. Keeping an eye on system temperatures, especially during extended sessions, is vital as overheating can cause thermal throttling, impacting your audio quality.
Scaling and Long-Term Results
As your needs grow, so should your studio setup. Investing in external hardware like additional audio interfaces or better acoustic treatment ensures your output remains professional. Remember, the key to sustainable growth is not just expanding your gear but also maintaining it properly. Regularly reviewing your setup and upgrading components when necessary will save you headaches in the long run.
What about Maintenance Over Time?
Maintaining your studio involves a proactive approach—schedule quarterly reviews of your hardware and software, clean your equipment carefully, and stay informed about new updates or best practices through trusted sources. For instance, consulting technical documentation, like the detailed audio interface setup guide, can provide insights into optimizing your equipment longevity. Implementing these routines has kept my setup running flawlessly for years, and I highly recommend you try setting a regular maintenance schedule.
Final Tip to Maximize Reliability
One crucial step is to automate backups and save points, reducing the risk of losing your work. Tools like automatic backup solutions can be lifesavers. Making a habit of these practices transforms your studio from a fragile setup into a robust, dependable environment—a must for serious creators aiming for consistency.
What I Wish Someone Told Me About Building a Reliable Voiceover Studio
My biggest lightbulb moment came when I realized that even the best equipment can’t compensate for proper setup and maintenance. I once spent hours tweaking my microphone gain only to realize I hadn’t calibrated my headphones or checked my DAW buffer size. That taught me that attention to detail, especially in hardware integration, is what separates amateur recordings from professional-grade voiceovers.
Another lesson was understanding that software updates aren’t just routine—they can actually fix performance issues and prevent crashes. Ignoring these updates can trap you in a cycle of troubleshooting, wasting precious studio time. Staying proactive with maintenance is like nourishing the foundation of a house—crucial for long-term stability.
Lastly, I learned that real clarity and stability come from managing the environment and your workflow simultaneously. Keeping your workspace organized and your plugins optimized minimizes chaos and allows your creativity to shine through without technical distractions. If you’re ready to elevate your voiceover setup, these lessons are your secret allies.
My Toolset That Keeps My Voiceover Studio in Top Shape
The tools I depend on include studio headphones that reveal subtle nuances, an audio interface with reliable drivers, and DAW software known for stability and features that streamline editing. These choices are grounded in personal experience and proven to deliver crisp, professional results every time.
Additionally, I complement this setup with regular backups and system clean-ups, which prevent unexpected crashes. Knowing your gear inside and out, combined with routine maintenance, transforms your studio from a fragile environment into a creative powerhouse. If you’re looking for trusted recommendations, these resources are your best starting point.
Embrace the Growth Mindset for Voiceover Mastery
Building a reliable voiceover studio isn’t just about hardware; it’s about cultivating a mindset of continuous improvement. Don’t shy away from experimenting with your setup—try different buffer sizes, mic positions, or workspace ergonomics. Each tweak brings you closer to that perfect take.
Stay curious and open to learning—whether that’s exploring new plugins, attending webinars, or connecting with fellow creators. Your ultimate goal should be a seamless, inspiring environment where technical hurdles no longer hold you back. Remember, mastery is a journey, and every step forward enhances your voice, your craft, and your confidence.
Are you ready to upgrade your voiceover setup for long-term success? Share your experiences or questions below—let’s grow together.
http://Julia%20Franklin
Reading this reminded me of how often overlooked tweaks can drastically improve DAW stability. I once thought my old PC was just too limited, but after optimizing my buffer size and updating drivers, the crashes nearly disappeared. It’s surprising how much difference small details make, like turning off auto-save during recording to prevent interruptions or periodically cleaning up temporary files. My biggest struggle now is balancing low latency with CPU load, especially when running multiple effects and virtual instruments. Has anyone found a sweet spot for buffer size that offers both responsiveness and stability? Also, I’ve heard that even different USB ports can impact performance, so I try to keep my audio interface connected to a dedicated port. It’s interesting how such simple adjustments can elevate a chaotic session to a smooth workflow—makes me think about how we often focus on getting new gear instead of optimizing what we already have. Would love to hear others’ top tips for maintaining a reliable setup long-term!
http://Ethan%20Walker
This post hits home for me. I’ve spent countless hours troubleshooting my DAW crashes, and it’s refreshing to see such practical advice laid out clearly. I agree that upgrading hardware like SSDs and RAM can make an immediate difference—my own setup improved dramatically after swapping to an SSD. The part about buffer size tuning really resonates; I’ve found that starting with 128 samples for tracking and bumping it up during mixing to around 512 actually balances responsiveness and stability pretty well. I also make a point to keep my drivers updated, especially my audio interface and graphics card, to prevent compatibility issues. What puzzles me sometimes is finding the sweet spot for buffer size without adding too much latency, especially when working on tight recordings. Do you recommend testing different buffer settings during various phases of a project to determine what works best? It seems like a continuous balancing act, but one that’s definitely worth investing time in to avoid future headaches.