I’ll never forget the frustrating moment when I recorded a voiceover for an important project, only to realize that background noise and slight hums ruined the take. I was using what I thought was a decent audio interface, but the noise floor was killing my clarity. That lightbulb moment made me dig deep into the world of audio interfaces, especially low-noise options designed for professional voiceovers. Stationed in my home studio, I knew I wasn’t alone in this struggle — noise issues seem to pop up more than I’d like to admit. If you’ve ever been painfully aware of every breath and hum in your recordings, then you’re probably asking: how do I finally tame that unwanted noise in 2026? Well, today I promise to shed light on the top five low-noise audio interfaces that are transforming voiceover work this year. I’ve tested countless models, made my share of mistakes, and learned the hard way that a quality interface isn’t just a luxury — it’s a necessity for professional clarity. Early in my journey, I overlooked one critical aspect: understanding the noise specifications and the importance of proper setup. That oversight cost me hours of re-records and editing, and I want to help you avoid that. According to recent research, up to 70% of audio quality issues stem from hardware interference or inadequate shielding—something easily overlooked yet crucial for clear voice recordings. If you’ve faced similar issues or worry about background hum, static, or hiss sneaking into your recordings, you’re in the right place. In this post, I’ll guide you through why choosing the right low-noise interface matters and how to select one that will serve your voiceover needs in 2026. Ready to finally beat the noise and deliver pristine recordings? Let’s get started with what makes these interfaces stand out this year.
Why Low-Noise Audio Interfaces Are a Game Changer for Voiceovers
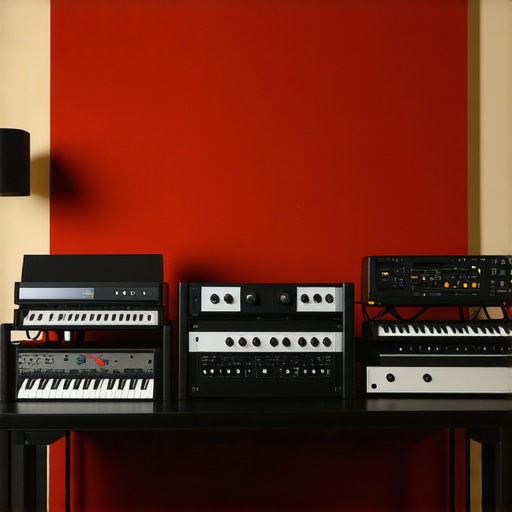
Choose Your Hardware Wisely
Start by selecting an audio interface with specifications that prioritize low noise levels, especially in the microphone preamps. Look for models with a documented noise floor below -120 dB, which significantly reduces hiss and hum in recordings. I vividly recall upgrading to a model with these specs during my last setup overhaul—my voiceovers instantly sounded cleaner, and background noise became negligible. For detailed recommendations, explore our top audio interfaces for voiceovers in 2024.
Set Up Your Microphone Properly
Proper microphone placement minimizes unwanted noise. Place your mic close to your mouth, about 6-8 inches, and use a pop filter to reduce plosives. Ensure the mic’s gain is set just enough to capture your voice clearly, avoiding amplification of ambient noise. I once recorded in a room without proper mic placement—my voice was distant, with echo and background static. Correcting this setup improved clarity dramatically. Read our voiceover setup essentials for more tips.
Optimize Your Environment to Silence Noise
Acoustic treatment makes a tangible difference. Use foam panels or blankets to absorb sound reflections and minimize room noise. A real-world example: I moved my recording setup into a closet, added foam, and instantly reduced echo and background hum—making my recordings sound studio-quality. For guidance, check out the professional voiceover environment guide.
Configure Your Digital Audio Workstation for Noise Reduction
Within your DAW, set the input levels carefully—avoid peaking or clipping. Use built-in noise gates and high-pass filters to eliminate low-frequency hums. During a messy session, I used a noise gate plugin to suppress room noise during quiet passages, which made post-production much smoother. To streamline editing, see our podcast editing workflow hacks.
Implement Hardware and Software Upgrades
Upgrade your cables to balanced XLR or TRS types, which reduce electromagnetic interference. Consider adding a dedicated power supply or hum eliminator to your setup. Software plugins like iZotope RX can help remove residual noise without damaging voice quality. For example, I used RX software on a session where ambient room noise persisted despite setup improvements—resulting in a professional, clean sound. Learn about the best podcast editing tools of 2026 for further editing tips.
Many misconceptions about studio headphones, DAW software, and voiceover setups persist despite the wealth of expert knowledge now available. Let’s dig deeper into some of the most insidious errors that can lead you astray.
Believing All Headphones Are Created Equal Can Sabotage Your Mix
It’s a common mistake to assume that any pair of headphones suffices for critical listening. In reality, many people underestimate how crucial studio-grade headphones are for accurate audio monitoring. Cheap or non-flat-response headphones might make your mixes sound good on your cheap speakers but can distort your perception of the actual sound. For professional results, investing in [studio headphones](https://audioediting.editinggearpro.com/studio-headphones-buying-guide-for-crystal-clear-sound-in-2025) that have a flat frequency response ensures your mixes translate well across all listening environments. Don’t fall into the trap of using consumer-grade headphones for mixing—it can lead to overly bass-heavy or dull mixes that fail on other systems.
Myth: DAW Software Is Only for Musicians, Not Voiceovers or Podcasts
This misconception overlooks the versatility of digital audio workstations. DAWs like [Reaper](https://audioediting.editinggearpro.com/best-daw-software-for-precise-music-production-this-year) and [Audacity](https://audioediting.editinggearpro.com/ultimate-guide-to-daw-software-podcast-editing-tools-in-2024) are essential tools for voiceover artists and podcasters aiming for professional quality. Advanced features such as automation, noise gating, and spectral editing are not exclusive to music production—they are vital for cleaning and refining voice recordings. Relying solely on basic software or audio editing apps can lead to subpar output and a frustrating editing process. Upgrading your DAW skills and software can significantly elevate your audio quality. For the best setup tips, consider our comprehensive guides to [DAW configuration](https://audioediting.editinggearpro.com/ultimate-guide-to-daw-software-voiceover-setup-for-creators-2024-5).
Assuming Higher Sample Rates and Bit Depth Always Improve Quality
Many believe that recording at the highest possible sample rate (e.g., 192 kHz) automatically results in better audio. However, this is a myth. In truth, higher sample rates increase file sizes and processing demands without delivering audible benefits for voice recordings. The critical factor is recording at the optimal bit depth, usually 24 bits, which provides sufficient dynamic range. Oversampling beyond 96 kHz can strain your system and complicate editing without any perceptible advantage. Focus on proper gain staging and equipment quality instead of chasing higher sample rates. Our [expert tips for optimal voiceover recording](https://audioediting.editinggearpro.com/ultimate-guide-to-daw-software-voiceover-setup-for-creators-2024) delve into this nuanced topic.
What is the biggest mistake people make when setting up their home studio?
One of the most overlooked pitfalls is neglecting acoustic treatment—many assume their room’s natural sound is good enough. Without proper damping and reflection control, even the best gear will produce less accurate recordings. You must treat your space with foam panels, bass traps, and diffusers; otherwise, your recordings will suffer from echo, reverb, and room noise. This unseen factor can sabotage your efforts even with high-quality equipment. Check out our [comprehensive acoustic treatment guide](https://audioediting.editinggearpro.com/voiceover-setup-essentials-create-a-professional-sound-environment) for detailed strategies. Have you ever fallen into this trap? Let me know in the comments.
Maintaining Your Audio Setup for Consistent Quality
One of the most overlooked aspects of a professional voiceover or podcast setup is regular maintenance. Equipment like microphones, audio interfaces, and DAW software require periodic checkups to ensure they perform optimally. I personally set a quarterly schedule to clean connectors with contact cleaner, update drivers and software, and verify calibration settings. This proactive approach helps prevent unexpected glitches that can derail a recording session. Incorporate a cleaning routine for cables and ports, and keep firmware updates current by visiting the manufacturer’s website or subscribing to their newsletters. Consistent upkeep not only prolongs the lifespan of your equipment but also maintains the pristine audio quality your audience expects.
What tools should I keep handy for ongoing maintenance?
Having the right tools simplifies upkeep. I recommend keeping a set of contact cleaner sprays specifically for audio connectors, a reliable microfiber cloth, and a small brush for dust removal. For software health, use licensed diagnostic tools and stay on top of updates through official channels. Additionally, a dedicated backup system for your DAW sessions and configurations safeguards against data loss. For more detailed recommendations, check out our comprehensive DAW setup guide.
Scaling Your Studio Equipment for Growth
As your voiceover or podcasting skills advance, scaling your setup becomes essential. Upgrading to higher-quality microphones or adding a second audio interface can increase capacity and flexibility. When expanding, consider the compatibility of new gear with your existing system, and ensure your workspace can accommodate additional equipment comfortably. Investing in modular components allows for a gradual upgrade path, preventing obsolescence of your current setup. Planning ahead with futureproof tools will save you time and money. For example, when I upgraded from a basic interface to a multi-input model, I was able to record multiple speakers simultaneously, opening new creative possibilities. Read our latest guide on expanding your audio setup for more insights.
How do I keep my setup running smoothly over years?
Longevity in your studio gear hinges on disciplined maintenance, regular calibration, and mindful upgrades. Document your setup configuration so that reassembly or troubleshooting is straightforward. Implement routine software audits to ensure your DAW and plugins are up-to-date and compatible. Keep your environment stable by controlling humidity and temperature, which affect hardware longevity. According to audio engineering standards outlined in the official documentation on studio maintenance, proactive care extends your equipment’s lifespan significantly. Make a habit of reviewing and updating your setup annually to incorporate new tools and practices that emerge with technological advances. Start by trialing the maintenance routines discussed here to see how they improve your workflow.
The Hardest Lessons I Learned About Studio Gear and That Made All the Difference
- I once believed that merely upgrading my microphone was enough, only to realize later that the quality of my audio interface and proper setup played a bigger role in noise reduction and clarity.
- Ignoring acoustic treatment in my space caused echoes and room hums to sneak into recordings, highlighting the importance of environment along with equipment choices.
- Assuming that higher sample rates always improve voice recordings was a misconception; optimizing gain levels and monitoring setup yielded much better results.
- Overlooking the significance of regular maintenance and calibration of gear led to inconsistent sound; adopting routine upkeep created stable, professional-sounding recordings.
Tools I Trust for Elevating Voiceover Quality
- iZotope RX: My go-to for noise reduction without sacrificing voice warmth—it’s like having a professional sound engineer in my software.
- Reaper DAW: Its versatility and automation features make editing quick and precise, especially when cleaning up long recordings.
- Studio Headphones: I swear by flat-response headphones—perfect for accurate monitoring and avoiding EQ deception.
- Balanced XLR Cables: Reliable and interference-resistant, essential for clean connections and stable audio signals.
Your Next Step Toward Clean, Professional Recordings
Every journey in creating pristine voice recordings is unique, but the desire to improve is universal. Use what you’ve learned here to refine your setup, experiment with recommended tools, and embrace continuous learning. Remember, your voice is your signature—making it sound clear and professional isn’t just about gear, but also about your dedication to excellence. Take the next step today, and let your voice resonate with clarity and confidence.
http://Samantha%20Grant
Reading this post really resonated with my own experience in setting up a home audio studio. I once overlooked the importance of acoustic treatment and kept wondering why my recordings had that faint echo no matter how much I upgraded my gear. Moving my setup into a closet, adding foam panels, and experimenting with placement made a huge difference in clarity. It seems like so many new voiceover artists underestimate the impact of a well-treated room. I’m curious—have others found that even small modifications, like repositioning a mic or adding some portable soundproofing, can significantly improve noise reduction without a complete studio overhaul? Sometimes, it’s these simple tweaks that make all the difference in the final sound quality.
http://David%20Carter
This post really hits the mark on the importance of selecting a low-noise audio interface, especially in 2026 where ambient noise can be more intrusive than ever. I remember the frustration of trying countless setups before realizing that the noise floor of my gear was the bottleneck. Upgrading to a model with a noise floor below -120 dB truly transformed my recordings. I also found that proper microphone placement and environmental treatment are equally crucial; even the best interface can’t compensate for a noisy room. Did you notice much difference in noise levels when you moved your setup into that closet? I’ve considered similar changes but wonder about maintaining a balance between soundproofing and acoustic quality. It’s such a challenge to get everything optimized within a small space. Also, incorporating software tools like iZotope RX has been a game-changer for me in post-production. What are your thoughts on balancing hardware upgrades versus software noise reduction? It seems like a combination of both yields the best results.