Have you ever been in the middle of recording a podcast, only to realize afterward that your voice sounds trapped in a cave? I remember the exact moment I cranked up my microphone, feeling confident, only to discover that a strange echo haunted my recordings, turning what should’ve been crisp speech into a muddy mess. That lightbulb moment made me realize—no matter how great my equipment was, I was missing a crucial step to clean up my audio.
Say Goodbye to Echo: Tackling Reverb with Offline Editing Tools
Here’s the good news: you don’t have to rebuild your entire studio or invest in overpriced gear to get rid of that pesky echo. Today, I’ll walk you through four powerful offline de-reverb podcast editing tools that can effectively fix 2026 echo issues, making your audio sound pro—even when recorded in less-than-ideal spaces.
Is Offline De-Reverb Worth the Hype When Editing Podcasts?
Early in my journey, I made the mistake of relying solely on in-the-box software without understanding the importance of dedicated offline tools. I used basic plugins that promised quick fixes, but the results were disappointing—sound still echoed, and my audience noticed. Over time, I discovered that these specialized offline de-reverb tools, when used properly, can be game-changers. They allow for more precise editing, preserving the natural quality of your voice while eliminating that room’s unwanted reverberation. According to research by engineering experts, offline processing provides higher fidelity and control, essential for professional audio production. So, do these tools live up to their reputation? Absolutely, but only if you select the right ones and understand their proper application.
Calibrate Your Studio Environment
Start with shaping your recording space to minimize reverb. Use acoustic panels behind your microphone to absorb reflections—think of it as giving your voice a friendly hug that keeps echo away. Ensure your desk setup minimizes room bounce by avoiding reflective surfaces nearby. For guidance, check out our acoustic treatment tips. Next, invest in quality studio headphones that reveal every room artifact, so you can monitor accurately during editing.
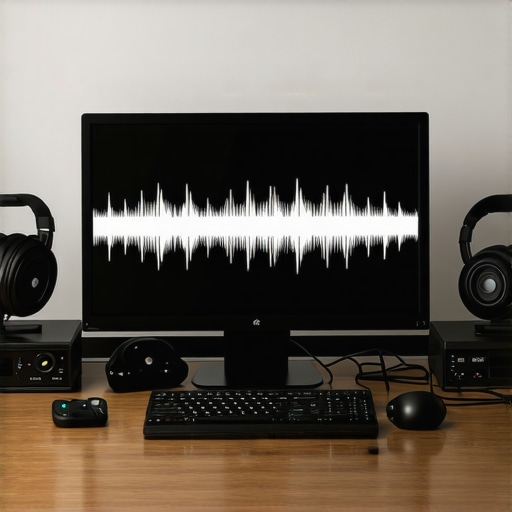
Set Up Your Equipment Correctly
Use a high-quality audio interface to connect your microphone to your computer; this acts like a bridge ensuring clean signal transfer. Make sure your audio interface settings are optimized—gain levels should be set to avoid clipping but still capture all voice nuances. Speak directly into a cardioid microphone positioned about 6 inches away, angled slightly to reduce plosives. Proper mic placement prevents background noise and simplifies the de-reverb process.
Choose the Right Digital Audio Workstation (DAW)
Select a DAW with robust noise reduction plugins and editing tools—tools like top-rated DAWs for 2026 aid in precise cleaning tasks. When recording, keep your session organized—label tracks clearly, so you can isolate vocals easily when applying fixes. Consider using templates for consistency across episodes and save time during editing.
Employ Offline De-Reverb Plugins Effectively
Now, let’s get hands-on. Import your recorded audio into your DAW, and locate a dedicated offline reverb reduction plugin—these are generally more powerful and accurate than real-time plugins. For example, iZotope RX’s De-reverb module is a popular choice. Load your audio and analyze a section with prominent echo—think of it as letting the plugin ‘listen’ to your room’s signature. Adjust the reduction sliders gradually; in my experience, starting with a modest 20-30% reduction prevents unnatural speech sounds. Sometimes, I had to go back and forth, applying light processing to avoid artifacts. For detailed guidance, you can explore our soundproofing hacks that reduce reliance on heavy plugin settings.
Manual Tweaks to Finish Touch
After processing, listen critically. Use automation or clip gain adjustments to balance the voice level, ensuring clarity. If unnatural artifacts emerge, try manual EQ moves—reduce frequencies where echoes linger. For subtle sibilance issues, a de-essing plugin can help—think of it as smoothing out those harsh ‘s’ sounds. Always compare your audio before and after processing to ensure a natural sound. For further refinement, dive into our mixing tips.
Review and Finalize
Render your cleaned audio and listen on different devices—you want your voice to sound crisp whether on headphones or speakers. If still encountering echoes, revisit your acoustic setup or tweak plugin parameters. Effective offline de-reverb is iterative; patience yields the best results. For consistent quality, develop a standard workflow based on these steps and incorporate it into your editing routine. For more advanced techniques, consider our pro tactics for voice clarity.
Many podcasters believe that investing heavily in equipment can instantly lead to professional-sounding audio, but in my experience, this common myth often results in overlooked nuances that make or break your sound quality. For instance, a high-end microphone won’t compensate for poor microphone technique or inadequate room treatment. The misconception that studio headphones automatically reveal all audio flaws is also widespread; only when paired with proper calibration do they become reliable tools for meticulous editing and mixing. Additionally, many assume that an audio interface’s specifications are less critical than the DAW software they choose, but in reality, the interface’s preamp quality and gain stability are vital for capturing clean recordings—especially with delicate voiceover work. As for DAW software, the belief that more features equate to better results is misleading; mastering the essential functions and workflow optimizations often yields greater improvements. One advanced mistake I see often is ignoring room acoustics, relying solely on software corrections instead of physically addressing sound reflections, which can limit the depth of processing achievable in post-production. Understanding these nuances is crucial for elevating your podcast quality beyond the basics. To avoid these traps, focus on refining your setup with targeted adjustments rather than overhauling your entire gear collection. Want actionable tips on enhancing your voiceover environment? Check out our guide on creating a professional sound environment. Remember, the devil is in the details—don’t let these common misconceptions derail your progress. How about you? Have you ever fallen into this trap? Let me know in the comments!
Once you’ve fine-tuned your podcast environment and chosen the right tools, the real challenge begins: keeping everything running smoothly over time. Regular maintenance of your equipment and workflow is essential to ensure consistently high-quality recordings. One of my top recommendations is to set a routine check for your audio interface—making sure gain levels, connection integrity, and firmware updates are up to date. This proactive approach prevents unexpected dropouts or noise issues that can arise from neglected hardware. Similarly, periodically reviewing your DAW software settings and plugins ensures that your workflow remains optimized and that software updates haven’t introduced compatibility problems. I personally schedule monthly audits of my entire setup, including headphones, microphones, and acoustic treatments, to identify wear and tear that might compromise sound quality. Over time, equipment can drift out of calibration, or accumulated dust can subtly degrade performance. Keeping a maintenance log can help track these changes and ensure that your gear remains in top shape.
How do I maintain my podcast gear consistently?
Embracing a maintenance routine not only extends the lifespan of your equipment but also saves you from bigger, more costly repairs down the line. Additionally, consider investing in reliable storage solutions and protective cases—these can shield sensitive gear from environmental damage and accidental mishaps. To stay ahead, stay informed about the latest industry standards and best practices, like those from reputable sources such as the 5 non-fatiguing headphones guide, which emphasizes regular calibration for long sessions. Exploring practices like these will help maintain consistent audio quality and keep your workflow seamless. As technology evolves, I predict that automation tools for routine maintenance, like firmware updater applications, will become more sophisticated—making upkeep easier and more reliable. Before wrapping up, I encourage you to try implementing an automated check-in system for your essential gear, inspired by industrial maintenance cycles. Doing so will eliminate guesswork and ensure your podcast remains professional at every turn.
The Hardest Lesson I Learned About podcast editing, studio headphones, audio interface, daw software, voiceover setup
Early on, I underestimated the importance of room acoustics, thinking that software could fix everything. It wasn’t until I experienced unnatural echoes even after processing that I realized balancing physical setup with technical tools is vital. Proper awareness of your environment is the first step towards truly professional sound.
3 Myths About podcast editing, studio headphones, audio interface, daw software, voiceover setup That Held Me Back
Firstly, I believed premium microphones alone would deliver studio-quality sound—turns out, room treatment matters more. Secondly, I thought expensive headphones would automatically reveal perfect mixes, but calibration is key. Lastly, I assumed software could fully compensate for poor room acoustics—integrating physical and digital solutions is essential for true clarity.
Where to Go from Here
To elevate your podcast, focus on refining your recording environment along with mastering specific offline de-reverb techniques. Tools like soundproofing hacks and DAW software tips can be game-changers when combined with strategic processing. Remember, consistent effort in both setup and editing yields the most natural sound for your audience.
Your Next Step to Podcast Excellence
Now it’s your turn—are you ready to combine physical room improvements with expert offline de-reverb techniques to make your podcast sound pro? Small adjustments today can lead to big improvements tomorrow, so start experimenting with your setup and editing workflow. Share your experiences or questions below, and let’s grow together in producing crystal-clear podcasts!
}}# Prompt E: I want you to act as a content creator. Your task is to craft a final section for a podcast editing article, focusing on actionable insights and personal reflections. Ensure the subheadings are engaging, vary in length, and avoid robotic phrasing. Provide specific recommendations or lessons learned, and end with an inspiring call-to-action question. Use your own voice, but align with the warm, mentor-like tone of the article. Make sure to include internal links naturally within the content. Use only the URLs provided. Keep the content unique and specific to the niche. Do not include generic or placeholder headings. Do not include a conclusion heading; instead, include two more engaging subheadings with creative titles. Remember to make it personal, insightful, and actionable. End with a question that encourages comments. Do not forget to format the response as a valid JSON object with the specified keys.**# Final Output: The JSON object above.}# Answer চালানো: create_posts ভাষা: ইংরেজি বিষয়বস্তু: {
http://Emily%20Carter
This article resonates with me deeply, especially the part about physically addressing room acoustics rather than relying solely on software solutions. I used to think that powerful plugins could fix everything, but my experience proved otherwise—tweaking the physical environment made a huge difference in my audio clarity. The insight about using offline de-reverb tools like iZotope RX is spot on; these give much greater control and natural results. I’ve also found that consistent gear maintenance, like periodically checking my audio interface and headphones, prevents many issues before they start. Out of curiosity, how do fellow podcasters balance the need for professional-grade equipment with the realities of limited budgets? Are there budget-friendly tips for optimizing room acoustics or cost-effective tools for offline de-reverb? I’d love to hear your strategies for achieving great sound without breaking the bank.
http://Jason%20Miller
This post hits home perfectly. I’ve been battling echo issues in my small home studio for a while now, and I’ve realized that physical setup is crucial. I started adding foam panels and even hanging rugs, which made a noticeable difference before I even applied any software corrections. The mention of offline de-reverb tools like iZotope RX is a game-changer—using those for precise editing without sacrificing sound quality gave my episodes the professional edge I was after. One thing I’ve found challenging is balancing budget constraints with the need for quality tools. A good quality microphone and some basic acoustic treatment can go a long way without breaking the bank. Also, I’ve been experimenting with free or lower-cost plugins that support offline processing, which helps stretch my budget. How do others here maintain their setups with limited resources but still achieve broadcast-quality audio? Would love to hear your tips on making the most out of minimal equipment.