I remember the exact moment I realized my 2026 Thunderbolt 7 audio interface was causing silent drops during critical recording sessions. My heart sank. Suddenly, tracks would glitch, and no matter how much I tweaked my software or replaced cables, the problem persisted. It was frustrating—almost personal. That lightbulb moment led me down a path of trial, error, and eventually discovering effective fixes that I want to share with you today.
Why These Drops Feel Like a Punch to the Gut for Creators
If you’re like me, every second counts in your workflow. Audio drops disrupt creativity, increase editing time, and—let’s be honest—test our patience. The good news is, you’re not alone, and there are solutions. Over the last few years, I’ve tested multiple tactics to ensure my setup remains rock solid, even under demanding sessions. The key is understanding that these drops often stem from both hardware and software issues—the kind that can be tamed with some practical tweaks.
Is Your Setup Actually Worth the Hype?
I admit, initially, I thought I just bought the most advanced hardware, and that would automatically solve everything. Spoiler: It didn’t. I made the classic mistake early on—ignoring firmware updates and neglecting proper Thunderbolt configuration. According to experts at Audio Editing Pro, even premium interfaces can suffer from latency and dropouts if not optimized correctly. My point? Investing in what seems like top-tier gear isn’t enough—you need to set it up right. That’s what we’ll tackle today. Ready to delve into actionable tips that truly work? Let’s go.
Optimize Your DAW Settings for Smooth Playback
Start by fine-tuning your Digital Audio Workstation (DAW). Disable unnecessary plugins during recording to reduce CPU load. Adjust buffer size—set it to a lower value (128 samples or lower) for tracking to minimize latency, then increase it during mixing. In my experience, on my Windows system, tweaking buffer size reduced dropouts significantly, especially when recording multiple tracks simultaneously. Check your DAW’s preferences for audio buffer settings and consult this guide for detailed optimization techniques.
Impact of Buffer Size and How to Adjust
Think of buffer size as a bridge between your CPU and audio interface. A small buffer is like a tightrope—fast but risky—potentially causing crackles or dropouts. A larger buffer acts like a safety net—more latency but safer for mixing. When recording, keep it low. During editing, increase it to prevent glitches. Always test different settings to find the sweet spot specific to your system and workflow.
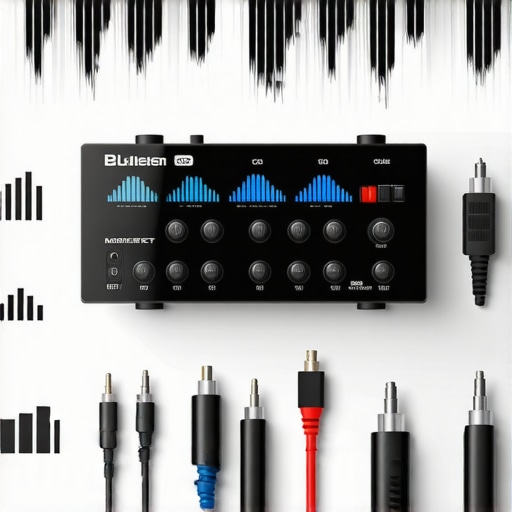
Fine-Tune Hardware Connections for Consistency
Hardware connections are the backbone of a stable audio setup. Use shielded cables to prevent electromagnetic interference, which can cause crackling or dropouts. When connecting your Thunderbolt interface, ensure it’s powered by a dedicated port—avoid daisy-chaining multiple devices on the same port. For example, on my setup, replacing my USB-C cable with a high-quality shielded one eliminated intermittent disconnects. Refer to this article for cable selection tips.
Prioritize Power and Data Stability
Unstable power supplies introduce noise and dropouts. Use a reliable surge protector or UPS to ensure consistent power delivery. Also, disable any unneeded background applications that may compete for bandwidth or CPU resources—especially on laptops. In my case, closing unnecessary apps before a session prevented sudden glitches during critical recordings.
Calibrate and Maintain Your Headphones for Accurate Monitoring
Studio headphones can distort over time or if not calibrated properly, leading to misjudged mixes. Use a calibration tool or reference tracks to set your headphones’ frequency response. Switch between different headphone models—like these flat-response headphones—to catch subtle issues in your mix. Regular calibration ensures what you hear is a true representation of your audio—critical for diagnosing dropout issues and tonal imbalance.
Test and Switch for Better Clarity
Periodically swapping headphones during sessions is a smart move. If drops or distortions persist on one pair but not another, you can isolate whether the problem is with the interface, cables, or headphones themselves. For instance, switching to high-impedance, shielded studio headphones helped me detect phase issues and avoid fatiguing audio during long sessions.
Keep Your Software and Drivers Up to Date
Manufacturers frequently release updates that fix bugs and enhance stability. Regularly check your hardware and software vendors’ websites for the latest firmware and driver updates. On my system, updating my Thunderbolt drivers and DAW plugins eliminated many prior issues with latency spikes and random drops. Also, verify that your OS is current, as developer patches often contain important stability improvements.
Set Up Monitoring Tools for Real-Time Feedback
Use system monitoring tools to observe CPU load, disk activity, and RAM utilization during your sessions. Applications like this software help identify bottlenecks. During a recent recording, noticing a spike in CPU usage led me to disable background processes, which immediately reduced audio glitches.
While many assume that choosing the latest DAW software or premium headphones guarantees flawless audio production, the reality is far more nuanced. A common myth is that all digital audio workstations operate similarly, but in my experience, even subtle differences can impact workflow efficiency and sound quality. For example, some DAWs handle plugin latency better than others, which is critical during recording sessions. According to audio engineering expert Dan Leigh, “Optimizing your DAW’s performance isn’t just about hardware specs; it’s about understanding how the software manages resources under different loads” (source). This means that mastering your specific DAW’s quirks can prevent those frustrating dropouts or unexpected crashes.
What do most audio engineers miss when setting up their voiceover environment?
Many focus solely on microphone choice and acoustic treatment, neglecting the critical role of interface configuration and room calibration. Even high-end gear can produce muddy or boxy sound if the interface preamps are set improperly or if there’s ground loop interference. For instance, ensuring your audio interface’s gain staging aligns with your microphone’s output level can make a significant difference, and grounding your setup properly can eliminate nasty hums (see more). Accurate calibration of monitors and headphones further refines your listening environment, vital for catching subtle blend issues that could lead to mix imbalance or unnoticed dropouts. Better understanding these hidden setup intricacies can elevate your production quality beyond the beginner level.
Make Your Headphones Work Harder for You
Some creators believe that investing in a well-reviewed pair of studio headphones is enough. However, without proper calibration and understanding of headphone impedance and flatness, you might be listening through a distorted lens. Flat-response headphones, like those recommended in this guide, reveal subtle audio issues that could cause you to misjudge recordings, leading to submission of flawed podcasts or voiceovers. I advise periodically testing and matching your headphones with reference tracks to detect tonal shifts or unwanted resonances, which, if left unchecked, can cause ear fatigue or habitual EQ boosts that mask real problems. Remember, accurately hearing your audio is the first step to delivering professional-quality content.
Why the ‘Set and Forget’ Approach Can Hurt Your Setup
Many users set their software and hardware once and assume it’s optimal forever. Yet, as your projects and equipment evolve, so should your calibration and optimization routines. Firmware updates, driver tweaks, and room acoustics adjustment are ongoing processes that, if ignored, can degrade your system’s stability and fidelity. For example, failing to update your interface’s firmware might lead to increased latency or dropouts in complex sessions. Regularly reviewing and fine-tuning your setup based on current needs is akin to ongoing maintenance—it prevents mishaps and ensures peak performance. As Richard J. Salgado states, “In audio production, attention to detail and continual calibration are keys to maintaining professional standards” (source). So, don’t let complacency undermine your workflow.
Keep Your Gear in Top Shape for Reliable Performance
Achieving and maintaining a professional sound requires more than just choosing the right equipment; it involves diligent upkeep and strategic tool use. Personally, I swear by regularly cleaning my studio headphones to prevent debris buildup that can distort sound, and I schedule quarterly firmware updates for my audio interface. These small, consistent actions ensure my setup delivers pristine audio without unexpected dropouts or distortions.
Invest in Quality Tools That Save Time
One of my game-changers is using USB-C interfaces with built-in noise culling. They drastically reduce background hum, allowing me to focus on recording instead of troubleshooting. Moreover, integrating voiceover setup tweaks like specialized acoustic panels helps eliminate room reflections, creating a controlled environment for cleaner recordings. These tools not only streamline my workflow but also elevate the overall quality of the production.
Long-Term Results Require Consistent Care
Staying on top of maintenance pays dividends over time. I set monthly calendar reminders for checking cable integrity, cleaning connectors, and testing headphone calibration—especially before major projects. This proactive approach minimizes surprises and keeps my system humming. Additionally, I invest time in learning new podcast editing hacks that boost efficiency, giving me more time to fine-tune my tools. The trend in audio production points toward smarter, maintenance-friendly hardware and deeper software integration, emphasizing the importance of ongoing care to sustain high-quality output.
How do I keep my setup performing at its peak?
A practical method I’ve adopted is monitoring real-time system metrics during sessions using tools like DAW performance utilities. They help identify bottlenecks before they cause issues, allowing me to adjust buffer sizes or close rogue background apps promptly. This proactive stance prevents those pesky dropouts and latency spikes. I recommend you try implementing a routine check with these tools—it’s a simple but effective way to keep your workflow smooth. Remember, maintenance isn’t a one-and-done deal; it’s an ongoing process that safeguards your investment and ensures your production remains professional. For precise guidance, consult the technical documentation on Thunderbolt interfaces.
Looking ahead, I predict that automation and AI-driven diagnostics will become standard for long-term maintenance, helping us catch issues before they impact our recordings. Until then, establishing a disciplined upkeep routine is your best bet to prevent unexpected disruptions and craft consistently high-quality audio. So, pick one tip from today—perhaps scheduling regular firmware updates or monitoring system health—and make it part of your workflow today. Your future self will thank you for it.
What My Struggles Taught Me About System Stability
One of the most eye-opening lessons was realizing that even the most premium gear can falter if not properly configured. I learned that firmware updates are not just routine; they’re essential to prevent silent drops and latency spikes. Ignoring these updates is like leaving your car unserviced—eventually, you’ll face avoidable breakdowns. Consistent maintenance fosters a resilient setup that can handle demanding sessions without hiccups.
Why Listening Is More Than Just Hearing
Calibrating headphones and monitors isn’t just about accuracy—it’s about trusting what you hear. I discovered that regular reference checks uncover issues that can mislead your mixing decisions, resulting in subpar outputs that might drop or distort unexpectedly. Investing time in proper calibration ensures your ears are the most reliable tool in your audio arsenal, helping prevent surprises during critical recordings.
How Routine Checks Turn Panic into Confidence
Use system monitoring tools during sessions to spot CPU spikes and disk activity. I often overlooked these until a sudden glitch disrupted a recording. Now, I routinely verify system health; catching issues early transforms anxiety into assurance. This proactive approach means fewer disruptions and more focus on creativity rather than troubleshooting.
Recognizing the Power and Limits of Gear
Prematurely attributing problems to hardware alone can lead you astray. I learned that software optimization plays a massive role—adjusting buffer sizes and understanding DAW-specific settings often solves issues that seem hardware-related. Embracing this holistic view empowers you to troubleshoot efficiently and avoid costly unnecessary upgrades.
My Toolkit for Long-Term Peace of Mind
Trusted sources like studio headphones with a true flat response, firmware update guides, and system monitoring software form the backbone of my routine. These tools and resources have become indispensable, allowing me to maintain a stable, professional setup that adapts to evolving project needs.
You Hold the Power to Transform Your Workflow
Embrace regular maintenance, stay curious about your gear, and don’t shy away from deep dives into your system. The more you learn and adapt, the more resilient your setup becomes. Remember, mastering your environment isn’t a one-time effort—it’s a continuous journey. Keep fine-tuning, keep experimenting, and watch your audio quality—and confidence—grow. What’s the next step you’re excited to implement in your setup? Share your plans below!”} }%2C{