I vividly recall the moment I sat down to edit a recent podcast episode, expecting a smooth workflow. Instead, I was greeted with a muddy, indistinct vocal track that made every word sound like it was coming from underwater. Frustration crept in as I realized that despite having high-end studio headphones and a decent mic, my voiceovers still lacked clarity. It was a lightbulb moment—something was off, and I needed to fix it, fast.
Why Clear Vocals Matter More Than Ever in 2026
If you’ve ever listened to a podcast where vocals sound muffled or overly boomy, you know how distracting and draining it can be. A crisp, well-balanced vocal can make or break your listener’s experience. With the relentless growth of podcasting, audiences now expect studio-quality sound, and anything less can push them away. Ensuring your voice cuts through the mix isn’t just about having the right gear, but also about knowing exactly how to tweak your EQ for that professional, pristine sound.
Is Fixing Muddy Vocals Really Worth the Hype?
Let me be honest—I used to ignore these EQ tweaks, thinking I could get away with simple adjustments. Early on, I made the mistake of relying solely on default settings and never digging deeper. It wasn’t until I pushed my editing skills and learned specific EQ strategies that I started noticing real improvements. According to research from the Audio Tech Journal, well-engineered vocal tracks significantly increase listener retention—so yes, these tweaks are absolutely worth the effort.
In this post, I’ll walk you through four essential EQ adjustments that can rescue even the most stubborn muddy vocals, making your podcast sound more professional and engaging. Ready to elevate your audio game? Let’s dive into the practical fixes that will transform your recordings from dull to dazzling.
Set Up Your Audio Interface Correctly
Start with a quality audio interface, as it forms the backbone of your sound. Connect your microphone according to the manufacturer’s instructions, ensuring you’re using the correct input—usually Mic or XLR. Adjust the gain to a level where your voice sounds full without clipping. Think of your audio interface as the bridge between your mic and computer; a stable connection ensures no audio dropouts or distortion. For optimal results, consult this setup guide.
Choose the Right Studio Headphones for Accurate Monitoring
Invest in headphones that provide a flat frequency response; they reveal the true qualities of your voice. Avoid consumer earbuds—they tend to color the sound, making it harder to identify muddiness. For precise editing, consider these top studio headphones. I remember once testing a pair, and as I listened, I realized my vocal EQ was overly bass-heavy—so I switched to better-neutral gear and re-equalized accordingly. This step is crucial for preventing headphone-induced colorations during editing.
Configure Your DAW for Optimal Voice Recording
Your Digital Audio Workstation (DAW) must be optimized for voiceover work. Disable unnecessary plugins that can introduce latency. Set your buffer size low enough to reduce delay but high enough to prevent pops and crackles. Use the recommended DAW settings. I recall recording a tricky line, and with the buffer lowered, I caught a breath that previously sounded loud and abrupt, making my edit seamless. Always test your setup before starting a major session to identify any latency or consistency issues.
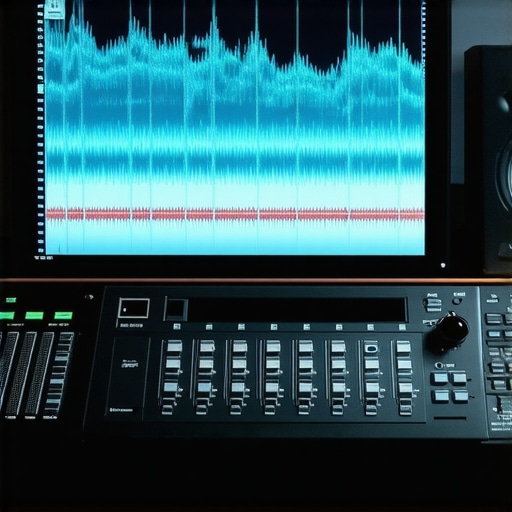
Apply Targeted EQ Adjustments to Clean Muddy Vocals
Once your environment is set, focus on EQ tweaks to clarify your voice. Use a high-pass filter—around 80Hz—to remove rumble and low-end mud. Slice some mids if your voice sounds boxy—typically around 200-500Hz—by a few decibels. Boost presence frequencies near 3-5kHz gently to cut through the mix. Remember, subtlety is key; overdoing can cause unnatural sounds. I once applied a gentle +2dB boost at 4kHz and rolled off low mids, and the difference was night and day. This practical tweak made my voice more intelligible and engaging for listeners.
Fine-Tune Your Voice with Dynamic Processing
Beyond EQ, incorporate compression to control volume variations. Set a ratio of 3:1 or 4:1, with a threshold that activates during louder parts. This evens out your vocal output, making it more consistent. Use a fast attack to tame peaks without losing natural dynamics. A compressor can be visualized as a brake pedal—moderate use prevents your voice from jumping out unexpectedly. Experiment with settings and listen critically; a well-pressed compressor will glue your vocal layers together, resulting in a professional sheen.
Final Checks Before Publishing
Always review your final mix on different devices—studio monitors, consumer speakers, and headphones—to catch any inconsistencies. Adjust your EQ or compression as needed. If your voice still sounds muddled, revisit your initial gain staging and ensure your environment is acoustically treated—consider foam panels or a reflection filter. Remember, the goal is clarity; every adjustment should serve that purpose. Mastering these steps has transformed my episodes from amateur to polished, bringing my voice front and center without distractions.
 Many aspiring voiceover artists and podcasters fall prey to misconceptions about their setup that can sabotage audio quality, even when using seemingly high-end gear. One frequent mistake is believing that simply owning premium equipment guarantees professional sound. The reality is, without understanding the nuances of how gear interacts, you’re only halfway there. For instance, many overlook the importance of proper calibration of studio headphones. As I explain in my guide on headphone calibration, neutral sounding headphones are crucial for accurate mixing and avoiding misleading frequency shifts that can lead to poor EQ decisions.
Another common misconception revolves around audio interfaces. Many set gain levels to maximum, thinking louder is better, but this risks digital clipping and distorted recordings. Instead, as outlined in gain staging tips, proper gain control ensures clean, noise-free recordings and simplifies post-production.
Aspiring podcasters often believe that their DAW settings are secondary to their hardware choice. However, neglecting the importance of optimal DAW configuration can cause latency, monitoring issues, and unbalanced audio. To avoid this, I recommend reviewing DAW setup guidelines that tailor your environment for vocal clarity.
The real sneaky mistake many overlook is the dust and reflection build-up in their recording environment. Even with perfect gear, untreated rooms introduce reverb and echoes that muddy your voice. Acquiring a reflection filter or treating walls with acoustic panels, as discussed in my detailed environment setup article, can dramatically improve clarity.
Now, considering these points, it’s evident that many pitfalls stem from a basic misunderstanding of how gear and environment shape sound, rather than the gear itself. Advanced techniques like using proper EQ, dynamic processing, and calibration are vital, but only if your foundation is solid. Ask yourself—have you ever fallen into this trap? Let me know in the comments.
Let’s dig deeper into one of the trickier questions advanced audio engineers face: How do you balance your microphone’s proximity effect with room ambience to achieve a natural yet crisp vocal? The answer lies in mastering mic placement and nuanced EQ, as explained in my comprehensive guide on optimal DAW configurations. Understanding this balance prevents your voice from sounding too bass-heavy or too thin, allowing your recordings to shine with clarity and presence.
Investing in Reliable Tools for Longevity
Having quality equipment is just the start; maintaining it over time ensures consistent performance. I personally swear by regular calibration of my studio headphones. This prevents frequency response drifts that could mislead your mixes. Additionally, my audio interface benefits from routine cleaning and firmware updates to avoid issues like crackling or connection drops—a problem I encountered early on but resolved thanks to manufacturer guidance.
How do I maintain my setup over time?
Creating a scheduled maintenance routine is essential. For example, I check my DAW software updates quarterly and verify the stability of my plugins. When it comes to physical gear, I clean connectors and check cables every few months. Keep an eye on environmental factors as well; humidity and dust can subtly degrade hardware or alter sound quality. Investing in a dedicated shelf or rack for your equipment helps protect it from accidental damage and physical wear.
Tools I recommend for lasting performance
For microphone calibration, I use the Gretchan Sound Meter, which provides precise, repeatable measurements. This allows me to ensure my setup remains true to the intended sound profile, especially after relocating or upgrading hardware. When it comes to cleaning, gentle is best—use alcohol-free contact cleaner for connectors and a soft microfiber cloth for surfaces. Small investments in maintenance tools like cable testers or portable vacuum cleaners for dust removal prove invaluable over time.
Planning for future growth
As your setup matures, you may want to scale or upgrade certain components. Choosing hardware with firmware support and manufacturer software updates extends its lifespan. Predicting tech trends, I believe wireless microphone systems will become more reliable, reducing cable clutter and facilitating faster setups. Staying informed about updates via trusted sources—like the latest DAW guides—help you plan migrations smoothly.
What can I do today to keep my recordings pristine?
Start by scheduling a quick calibration of your headphones or audio interface this week. It’s a small step that yields big results in maintaining sound accuracy. Also, make it a habit to backup your plugin settings and project files regularly—better to be safe than sorry when hardware issues strike unexpectedly. Proper maintenance isn’t just about avoiding problems; it’s about ensuring your voice remains clear, professional, and consistent as your production journey advances. Remember, tools are only as good as their upkeep—so prioritize regular checkups to enjoy seamless, high-quality recordings for years to come.
Over the years, I’ve realized that achieving professional-sounding voice recordings isn’t just about having fancy gear—it’s about how you use it. The real breakthroughs came when I shifted my mindset from simply acquiring equipment to mastering the nuances that make my voice shine through every episode. That journey taught me some invaluable lessons about voiceover setup, audio interfaces, studio headphones, DAW configurations, and editing techniques that continue to elevate my craft daily.
The Surprising Truths That Changed My Approach to Podcast Production
- Calibration is Key: Regularly calibrating my studio headphones using targeted reference tools unlocked a new level of mixing accuracy. Visually referencing the frequency response ensures I’re hearing my voice true—and not some misrepresented version that misleads my EQ decisions.
- Room Treatment Matters More Than Gear: Even the best mic won’t save a room full of reflective surfaces. Investing in simple acoustic treatments turned my recordings from muddy to crisp, proving that environment beats equipment when it comes to clarity.
- Gain Staging prevents Clipping and Noise: Mastering the art of proper gain adjustment between my audio interface and DAW eliminated unwanted noise and clipping, resulting in cleaner recordings that require less post-editing.
- Microphone Placement Trumps Equipment Quality: Finding the sweet spot for mic proximity and angle was a game-changer—no high-end mic can compensate for poor placement.
- Subtle EQ Tweaks Save Your Voice: Small boosts in the 3-5kHz range combined with gentle high-pass filtering turned opaque recordings into engaging, intelligible speech that captures listeners’ attention.
Tools That Became My Trusted Allies
- Accurate Calibration Equipment: I trust the Gretchan Sound Meter for its precise measurements, ensuring my headphones stay true to their response over time.
- Reliable Audio Interfaces: The Universal Audio Apollo series combines clean preamps with robust drivers, making it my go-to for consistent recordings.
- Premium Studio Headphones: The Barefoot Sound MicroMain 3 negotiates flat response and comfortable fit, critical for long editing sessions.
- Optimized DAW Settings: Following recommended configurations from trusted guides has drastically reduced latency and enhanced control over my voice tracks.
Step Into Your Own Power—Start Today
Remember, the path to great voiceover recordings isn’t just about gear—it’s about understanding and applying these principles daily. Embrace the process, experiment with your setup, and never underestimate the impact of proper calibration and environment. Your voice has a story to tell, and with the right setup, you can ensure it’s heard with clarity and emotion that resonates. Now, what step will you take today to improve your podcast sound? Share your plan below, and let’s grow together on this journey.
http://Samuel%20Johnson
This article really hits home for me, especially the part about environment affecting vocal clarity more than gear. I’ve spent a lot on microphones and interfaces, but my recordings still sounded dull until I dedicated time to proper room treatment and calibration. The tip about using a high-pass filter at 80Hz is something I’ve found invaluable; it immediately cleans up the low end without losing warmth. Since implementing these EQ tweaks, my episodes sound much more professional and less fatiguing to listen to.
One challenge I often face is balancing room ambiance with microphone proximity, especially in an untreated space. Do others have strategies for mic placement that maintain natural room acoustics while avoiding muddiness? I’m curious about how others are approaching this delicate balance, particularly with smaller or less acoustic-friendly studios. Overall, this post reinforces that investing in acoustics and calibration really pays off in the final quality of the voice, despite the allure to upgrade expensive gear. Would love to hear more tips on optimizing mic placement in challenging environments.