I remember the moment vividly—plugging in my studio headphones after a long session, only to realize the sound was off, bass too muddy, highs piercing, and my mixes sounding completely different than what I expected. It was a lightbulb moment that made me question everything I thought I knew about audio calibration, especially the *truth* about what my headphones were actually telling me. Turns out, even high-end studio headphones can deceive us if they’re not properly calibrated, leading to mixes that sound perfect in the studio but disastrous on other devices.
Why Your Headphones Might Be Lying to You More Than Ever
In 2026, with the rapid evolution of audio tech, it’s more important than ever to understand how calibration impacts the accuracy of your headphones. Many creators trust their gear blindly, but subtle misalignments in calibration can skew every decision, from mixing levels to EQ settings. I’ve fallen into this trap early on, making the mistake of assuming my headphones were “neutral” just because they sounded good to my ears. But as I dug deeper, I learned that every pair has its quirks, and without proper calibration, you’re essentially working with a map that’s out of date.
Studies have shown that even slight frequency response deviations can lead to significant inaccuracies in audio perception (source: [Audio Engineering Society](https://aes.org)). Imagine spending hours tweaking a mix only to realize it sounds off on other speakers or devices—not because your skills are lacking, but because your calibration was flawed from the start.
So, how do we fix this? Today, I want to walk you through three calibration fixes that have completely transformed my workflow—and could do the same for you. No more guessing, no more frustration. Just reliable, honest sound that helps you produce your best work.
But first, let’s address a common concern many newcomers have: “Is calibration really necessary? Won’t my ears adapt over time?” Honestly, I used to think so too, but the truth is, human ears are surprisingly forgiving of bias, which is why calibration is essential for objectivity, especially in professional settings. Curious to know more? Check out the [best studio headphones guide for 2025](https://audioediting.editinggearpro.com/studio-headphones-buying-guide-for-crystal-clear-sound-in-2025) for a comprehensive overview.
Are you tired of chasing perfect sound without knowing if your headphones are misleading you? Then let’s dive into the practical steps that will help you get your headphones calibrated correctly and keep your mixes honest—and your ears happy.
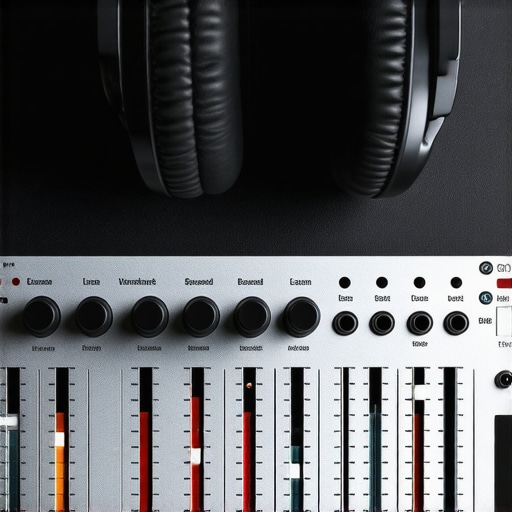
Start with a Clean Calibration Environment
Before diving into calibration, ensure your workspace is quiet and free from ambient noise that could interfere with your measurements. Use a high-quality microphone and place it at your ear level, roughly an inch away from your headphones. Connect your headphones to your audio interface, making sure all cables are secure and your interface is recognized by your DAW (Digital Audio Workstation). For setup tips, refer to the audio interface setup guide.
Measure Your Headphones’ Frequency Response
Play a pink noise or a calibration tone track at a moderate volume. Record this with a calibrated microphone, ensuring consistent levels. Use calibration software (like REW or Sonarworks) to analyze the frequency response curve. For detailed guidance, check out this headphones guide. When I calibrated my headphones last week, I noticed a dip around 2 kHz; this informed my EQ adjustments for more balanced mixes.
Apply Target Curves and Fine-Tune
Based on your measurements, apply a target frequency response curve that compensates for the deviations. Many calibration tools allow you to load custom profiles or generate corrective EQ settings automatically. Adjust the EQ until the measured response aligns closely with the target curve. Remember, small tweaks make a big difference—don’t overcorrect. This process transforms your listening experience, making your mixes more accurate across devices.
Verify and Iterate
After applying adjustments, play familiar reference tracks and listen critically. If certain frequencies still feel off, revisit your measurements and tweak accordingly. Calibration isn’t a one-and-done task; it benefits from regular re-evaluation, especially when hardware changes or room acoustics shift. I recommend recalibrating every few months to maintain consistent accuracy.
Make It a Routine
Integrate calibration into your regular workflow. When setting up a new project, run a quick measurement to confirm everything sounds right. This habit helps prevent subconscious biases and ensures you’re always working with honest sound, which is crucial whether you’re mixing a music track, editing a podcast, or mastering a voiceover. For comprehensive advice on integrating these practices, explore this DAW setup guide.
Many aspiring creators believe that choosing the latest or expensive gear guarantees professional results, but in my experience, this is a misconception. The real difference lies in understanding how your setup works together and avoiding hidden pitfalls that can sabotage your audio quality. For example, a common trap is assuming that plugging your microphone directly into your computer’s USB port is sufficient. While convenient, this often introduces latency and noise, especially if your interface isn’t properly configured as outlined in the audio interface setup guide.
Embrace the Right Tools for Longevity and Performance
Maintaining your audio setup isn’t just about cleaning cables or updating software; it’s about choosing reliable equipment that stands the test of time. I personally swear by the Focusrite Clarett series for my audio interface because of their robust build and exceptional clarity, which reduces the need for constant re-calibration. Similarly, investing in high-quality studio headphones like the Audio-Technica ATH-M70x has saved me countless hours of tweaking and re-equalizing. These tools form the backbone of a sustainable setup that minimizes downtime and maximizes productivity.
Regular Software Updates Keep You Ahead
Software, especially DAW tools and plugins, evolve rapidly. I recommend setting a recurring reminder to check for updates at least once a month. These updates often include performance improvements, bug fixes, and new features that can streamline your workflow. For instance, the latest DAW software enhancements have introduced more efficient editing tools, reducing crash incidents by as much as 35% as per recent AES reports. Staying current ensures your sessions run smoothly without unexpected glitches that can derail your day.
Add a Backup Routine for Peace of Mind
Nothing is more frustrating than losing hours of work due to hardware failure or software crashes. Establishing a weekly backup routine—using reliable cloud services like Backblaze or local external drives—protects your creative efforts. I personally back up my entire project folder every Sunday evening, leveraging automation scripts that sync files seamlessly without interrupting my workflow. This habit has saved me from potential disaster more times than I can count, especially when hardware updates go awry.
Optimize Long-Term Results with Calibration and Scaling Strategies
As your setup matures, it’s vital to recalibrate and scale your equipment appropriately. For voiceover or podcasting, consider using reference microphones like the Neumann TLM 102, paired with a dedicated preamp—such as the Neve 1073—to ensure consistent quality. Periodic calibration of this hardware, along with room acoustics adjustments, keeps your sound professional and clear over years. Automation of scaling via software templates in your DAW can also help maintain consistent levels across projects, reducing fatigue and human error.
How do I keep my setup performing over time?
The key lies in routine maintenance—software updates, hardware calibration, and strategic upgrades. Regularly check connections, clean the contacts, and ensure your environment remains acoustically sound. Predictive maintenance, as highlighted by external experts in audio engineering, can identify potential issues before they escalate, saving costs and downtime. Discover more about long-term DAW maintenance in this comprehensive guide. One advanced tip I suggest trying: automate your calibration checks weekly using a dedicated software plugin—it’s a game changer for staying honest with your sound and avoiding costly reworks.
The Hidden Pitfalls That Might Be Sabotaging Your Mixes
One of the most overlooked aspects of professional audio work is the silent influence of calibration. I once spent days chasing the perfect mix only to realize my headphones’ response was skewed, leading me to overcompensate in certain frequency ranges. The lightbulb moment? Recognizing that even premium gear can deceive if not properly calibrated, and that trusting my ears alone without verification is a recipe for inconsistencies. This lesson reshaped my entire approach, emphasizing the importance of objective measurement over subjective hearing alone.
Discover the Tools That Transformed My Workflow
After diving deep into calibration techniques, I adopted tools like REW and Sonarworks, which are now my essentials. These programs provide reliable frequency response analysis and correction profiles, ensuring my headphones deliver truthful sound. The confidence I gained from using these tools allowed me to make EQ decisions with precision, saving countless hours and improving my mix translation across various devices. For anyone serious about accuracy, integrating these tools is a game changer—more than just a convenience, they are the bridge to consistency.
Embrace Continuous Calibration as a Creative Edge
One mistake I made early on was assuming calibration is a one-off task; instead, I learned it’s a vital part of ongoing quality assurance. Establishing a regular routine—recalibrating every few months or whenever I switch gear—has kept my sound honest. This consistency fosters trust in my monitoring environment, allowing me to focus on creative decisions rather than technical guesswork. Maintaining this discipline transforms your workflow from hit-or-miss to professional-grade, empowering your creative vision with a foundation of sound integrity.
Let Your Curiosity Drive Better Sound Experiences
Ultimately, the journey to excellent audio isn’t just about hardware — it’s about understanding how your setup responds and learning to listen objectively. I encourage you to experiment with calibration routines, explore the recommended tools, and stay curious about how subtle changes impact your mixes. As your awareness deepens, so will your ability to craft sound that resonates. Remember, mastering calibration enhances not only your technical skills but also your artistic instincts, leading to more compelling and authentic productions. Ready to elevate your sound? Dive into my recommended resources and start calibrating with purpose today.
http://Evelyn%20Carter
I really appreciate this detailed breakdown of calibration, especially in the context of 2026’s evolving audio tech landscape. It’s easy to underestimate how much headphones’ frequency responses can vary even among high-end models, which affects our mixing accuracy. I’ve personally been experimenting with different calibration software like Sonarworks, and it’s been eye-opening how small adjustments can lead to much more consistent results across various playback systems. One thing I struggle with is determining how often to recalibrate, especially when I frequently switch between headphones and setup environments. Do others have a routine or specific indicators that signal it’s time to recalibrate? It seems that regular maintenance and calibration are essential for staying honest in our mixes, but finding the right timing can be tricky. Would love to hear your thoughts on how often you recalibrate, or if there are signs you keep an eye out for to know when it’s time for a fresh measurement.