There was a moment in my home studio, headphones on, voiceover mic in front of me, when I realized I’d spent over an hour just trying to remove a single unwanted noise. Frustration was mounting—I knew there had to be a better way. That lightbulb moment led me to discover five classic workflows that haven’t changed much since the dawn of digital editing, yet they can drastically cut down your post-production hours—no AI needed.
Why Are These Workflows Still Relevant in 2026?
In an era flooded with AI tools promising to automate everything, I found that relying solely on artificial intelligence can sometimes backfire, especially with nuanced audio editing. Early in my journey, I made the mistake of trusting an AI noise reduction plugin to fix a problematic recording. The result? Unnatural artifacts that required even more editing. It was a lesson that timeless, human-centered workflows still hold immense value. These tried-and-true techniques not only preserve audio quality but also keep your editing process grounded and predictable.
Is Relying on Old-School Methods Actually Worth the Hype?
It’s a common skepticism. Will manual workflows outdo AI, especially when the latter promises to save so much time? I grappled with this myself. My advice? Don’t dismiss these methods as outdated. They offer precision and control that machines can’t—yet. Plus, mastering these skills ensures you’re never completely at the mercy of software updates or AI biases. If you’re interested, check out my detailed guide on Daw software for precise editing.
By honing these workflows, you’ll find yourself cutting hours off your editing sessions, improving your sound quality, and gaining more creative freedom. Ready to dive into these time-tested methods? Let’s get started with the fundamentals that will transform your editing routine and keep you ahead in 2026.
Calibrate Your Microphone and Recording Space
Start by placing your microphone at mouth level, about an inch away, to ensure consistent sound capture. Use a pop filter to reduce plosive sounds and keep distance steady. I once spent an afternoon adjusting mic height and found that small tweaks eliminated a distracting thump. Take time to acoustically treat your space with foam panels or diffusers; this minimizes echoes and background noise, giving you a clean signal. Remember, a quiet environment with proper positioning outweighs fancy gear.
Choose the Right Headphones for Accurate Monitoring
Select studio headphones that reveal the true tonal balance of your recordings. A good pair should be neutral, without exaggerated bass, so you hear your voice accurately. I tested several and was surprised how much a pair like these improved my editing precision ( ). When I finally upgraded to headphones suited for mixing and mastering, my noise reduction became more effective, and editing faster. Check out the studio headphone guide for detailed picks.
Set Up Your Audio Interface Correctly
Your audio interface acts as the bridge between microphone and DAW. Connect it via USB or Thunderbolt to your computer; then, install the latest drivers. Use the interface’s gain knobs to set input levels, avoiding distortion or hiss. During a recent session, I initially recorded with gain too high, causing clipping. After adjustments following a quick tutorial (), I achieved clean, consistent audio. For optimal results, follow the interface setup tips.
Configure Your Digital Audio Workstation for Voiceover
Choose a DAW that suits your workflow—options like Adobe Audition or Reaper work well. Set your sample rate to 48kHz for professional clarity. Create a dedicated track for recording; set the input to your interface. Always check input monitoring to avoid latency or feedback. During my first recording, I almost recorded into my desktop mic, which caused a muddled sound. A quick review of the DAW setup guide saved me hours of post-processing.
Record with Purpose and Precision
Maintain consistent distance from the mic, speak directly into it, and record multiple takes if needed. Use a metronome or count-in to keep timing steady. After a messy first attempt, I realized that maintaining a fixed distance and controlling breath drastically improved my recording quality. Always save raw files before editing, so you can revert if needed. Remember, good raw recordings minimize editing and ensure clarity in the final product.
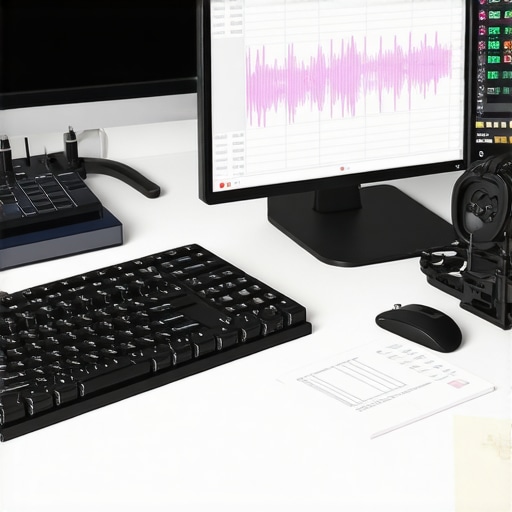
Review and Optimize Your Sound
Listen critically with your studio headphones, identify background noises, plosives, or sibilance. Use editing tools: apply gentle noise reduction, EQ to remove unnecessary low frequencies, and compression to control dynamics. I recommend doing this in your DAW with dedicated plugins rather than relying solely on AI-based processes. For detailed editing hacks, check the podcast editing resources. Over time, consistent practice with these steps will markedly improve your workflow and production quality.Many enthusiasts assume that simply purchasing high-end gear guarantees professional results, but in reality, missteps in setup can sabotage your audio quality before you even hit record. For instance, a frequent misconception is that expensive headphones alone can solve monitoring issues. However, even the priciest studio headphones won’t compensate for improper calibration or poor acoustics. Achieving clarity requires understanding the nuances of headphone response—a neutral profile is essential for accurate mixing, a detail many overlook. To elevate your setup, refer to the comprehensive studio headphone guide.
Stay Ahead with Reliable Equipment and Upkeep
Consistency in your voiceover setup hinges on choosing the right tools and maintaining them properly. I personally swear by the best DAW software for precise editing because it offers stability and a seamless workflow—crucial for avoiding crashes during recording sessions. Regularly updating your audio interface drivers ensures compatibility and reduces glitches, which is vital for long-term reliability. Moreover, cleaning and inspecting cables and connectors prevents unexpected signal loss, a lesson I learned the hard way during a crucial recording.
Investing in quality studio headphones, like those highlighted in my studio headphone guide, pays off by providing consistent sound monitoring, reducing fatigue, and ensuring your mixes translate well across platforms. Remember, a well-kept setup isn’t just about hardware—it includes managing software plugins and calibrations. Regularly audit your plugin licenses and settings to avoid compatibility issues that can silently degrade audio quality over time.
Prediction-wise, as voiceover and podcasting continue their boom, the integration of smarter, more durable hardware with maintenance-friendly features will become essential. Keeping your setup in top shape allows you to pivot quickly when new trends or tools emerge, like AI-assisted editing, which I discussed in my recent podcast editing resources.
So, my tip? Schedule a quarterly inspection—and don’t overlook the importance of firmware updates—it’s a game-changer for uninterrupted productivity. Test your entire chain, from mic to DAW, following this professional setup guide. This proactive approach will save you from costly surprises and keep your voiceover work seamless.
Lessons No One Tells You About Setting Up Voiceover Studios
- Embrace the Power of Consistent Environment Calibration: I learned that regular calibration of my mic and room acoustics keeps my recordings crisp and predictable, preventing hours of re-editing. Taking time to fine-tune your space can save you time and frustration in the long run.
- Don’t Overlook the Subtle Differences in Headphone Tones: Switching to neutral studio headphones revealed nuances in my recordings I never noticed before. Recognizing these differences can dramatically improve your monitoring accuracy, making your edits more precise.
- Upgrade Your Interface, Not Just Your Gear: A reliable audio interface with proper driver updates has transformed my recording stability. Sometimes, the smallest hardware tweaks lead to the biggest quality leaps.
- Focus on Raw Recordings—The Foundation of Quality: Good raw audio minimizes editing time. Speaking deliberately into your mic and controlling your breath can make a huge difference in post-production efficiency.
- Balance Speed with Precision in Your Workflow: I found that classic workflows, like gentle noise reduction and proper EQ, outperform shortcuts. Cultivating patience with these steps yields professional results you can be proud of.
Tools That Elevate My Voiceover Process
- Best DAW software for accuracy: This foundation provides stability and detailed control, ensuring your edits are seamless and professional.
- Audio interface setup tips: Proper configuration reduces latency and noise, key for capturing your best voice.
- Studio headphones guide: Understanding the importance of neutral response helps you monitor audio accurately, making your edits more reliable.
- Podcast editing hacks: Streamlining your workflow with proven techniques can free up your creative energy for content, rather than technical fixes.
Don’t Let the Technical Grind Hold You Back
Remember, the secret to stellar voiceover and podcast production isn’t just high-end equipment—it’s mastering the setup, consistent maintenance, and workflow discipline. Investing time in these fundamental yet often overlooked steps will yield higher quality, more professional results that stand out in 2026 and beyond. The foundation you build today will support your creative ambitions for years to come.
What’s the Biggest Setup Challenge You’ve Faced?
Drop your experiences below! Whether it’s choosing the right headphones, calibrating your space, or configuring your DAW, sharing your story can help others accelerate their journey in voiceover and podcast production.
http://Liam%20Peterson
Reading through the post, I completely relate to the frustration of spending hours trying to fix a single noise issue—I’ve been there myself. What I’ve found effective is investing a good amount of time early on in setting up a treated space and calibrating my mic, which pays off in cleaner raw recordings. It’s amazing how small adjustments, like mic positioning and room acoustics, can reduce the need for extensive editing later. Regarding the headphone choice, I switched to a pair with a flat response, and the difference in monitoring accuracy was startling; it made me realize how critical good headphones are for efficient editing and noise reduction. Also, setting up your DAW properly from the start saves a lot of headaches. For anyone just starting, I’d recommend dedicating time to these foundational steps—what has been your biggest challenge in optimizing your workspace or setup, and how did you overcome it?