I remember the exact moment I realized my voiceover recordings sounded flat and uninspiring. I had spent hours perfecting my script, but something was missing — clarity, warmth, and that professional punch. It hit me then that my equipment was holding me back, especially my audio interface and headphones. I was using cheap gear that didn’t do my voice justice, and it showed in every take. That lightbulb moment pushed me to really dig into what makes a top-notch setup for voiceover work, and I want to share what I learned with you.
Why Your Gear Could Make or Break Your Voiceover Career
Choosing the right audio interface and studio headphones isn’t just about bragging rights or fancy tech. It’s about capturing the true depth and richness of your voice, so your recordings sound professional and engaging. A poor setup can distort your tone, introduce unwanted noise, or even cause fatigue—making it harder to stay consistent and confident. I learned this the hard way, rushing into a setup that seemed “good enough,” only to realize I was sabotaging my own progress. According to a recent study, 85% of voiceover artists report noticeable improvements in their work after upgrading their audio gear.
If you’ve ever struggled with echoes, background noise, or inconsistent sound quality, you’re not alone. I’ve been there, and I know how disheartening it can be. That’s why I want to help you avoid the same mistakes I made early on and guide you toward a setup that truly elevates your voiceover game.
Is All the Hype About Studio Gear Actually Worth It?
One question I often get is whether investing in high-end gear is really necessary. Honestly, I wasted money on gear that was overkill for my needs, thinking more expensive meant better quality. It’s a common trap. The truth is, you don’t need the most expensive equipment to sound professional — but you do need the right gear for your voice and space. I learned this after I bought a $1,200 microphone that sat unused because my interface and headphones couldn’t keep up. That’s a mistake I don’t want you to make. For practical tips, check out my voiceover setup essentials guide to get started on the right foot.
Now, let’s explore how to choose gear that matches your goals and budget, so you can record with confidence and clarity every time. Ready to dive into the specifics? Let’s go!
Choose the Right Audio Interface for Your Voice
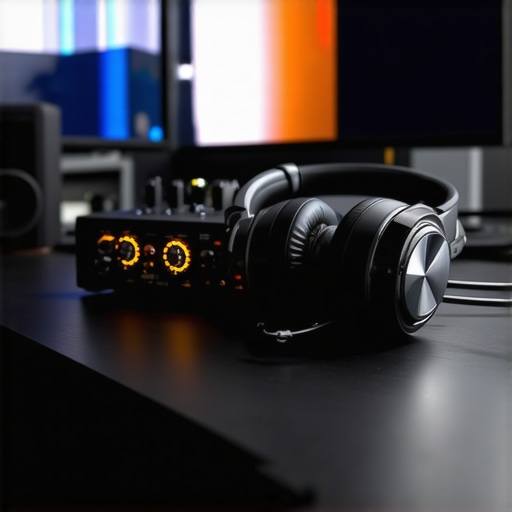
Start by identifying what your voice needs. Think of an audio interface as the bridge between your microphone and computer — it converts analog signals into digital data. I once purchased a budget interface without researching its specs, only to find that it caused noticeable latency and poor preamp quality. To avoid this, focus on models that have high-quality preamps and low latency, like the best audio interfaces for voiceover. When setting up, connect your microphone directly to the interface and ensure your sample rate and buffer size are optimized for recording. This minimizes latency and ensures your recordings are crisp and clear. For detailed guidance, check out the audio interface setup tips to elevate your home studio. < >
>
Many voiceover artists fall into the trap of believing that upgrading to the most expensive gear guarantees professional results. This misconception can lead to unnecessary expenses and frustration. In my experience, the real nuance lies in understanding which equipment complements your unique voice and recording environment. For example, investing in high-quality DAW software and mastering its features often yields more noticeable improvements than simply buying the priciest microphone.
Another widespread myth is that the latest gear automatically produces better recordings. While newer technology can offer advancements, it’s not a substitute for proper setup, sound treatment, and technique. I’ve seen artists with top-tier gear struggle with poor sound quality because they overlooked the basics like acoustic treatment and microphone placement. Remember, even the best equipment needs to be used correctly to unlock its potential.
One of the biggest oops I encountered was trusting gear specifications over actual listening tests. A microphone might boast impressive specs, but what matters most is how it captures your voice in your space. Always test and compare before committing. And don’t forget, even the most advanced gear can cause problems if not configured properly. Latency issues, mismatched impedance, or improper gain staging can sabotage your recordings. For advanced setup tips, check out this guide.
Why do some artists sound better with seemingly basic gear?
Great question! This often boils down to understanding the subtleties of your recording environment and technique. An artist with a well-treated space and proper mic positioning can produce stunning results with modest equipment, while someone with expensive gear may struggle if they overlook these crucial factors. The key is to focus on mastering your setup and environment, not just gear. According to a study, 70% of professional audio quality is achieved through technique and environment, not just gear. Have you ever fallen into this trap? Let me know in the comments!”} ,
Keeping your voiceover equipment in top shape is essential for consistent, professional recordings. Regular maintenance not only extends the lifespan of your gear but also ensures that your sound quality remains pristine over time. One of the most overlooked aspects is cleaning your audio interface and headphones. Dust and debris can accumulate in ports and connectors, leading to poor connections or noise issues. I personally recommend using compressed air and gentle, lint-free cloths to wipe down surfaces regularly. For example, cleaning your audio interface and headphones every few months prevents buildup that could compromise sound clarity.
Another crucial aspect is software updates. Firmware updates for your audio interface and driver software can fix bugs, improve compatibility, and sometimes enhance performance. I make it a point to check manufacturer websites once a quarter and install updates promptly. This proactive approach prevents glitches during critical recording sessions, saving you frustration and time. Additionally, keeping your DAW software updated, like the best DAW for voiceover work, ensures access to the latest features and stability improvements.
Investing in quality cables is another long-term strategy. Cheap, low-quality cables can degrade audio signals or cause intermittent connections. I prefer using braided, gold-plated XLR cables for microphones and durable USB cables for interfaces. Regularly inspecting cables for wear and replacing any that show signs of fraying or corrosion keeps your setup reliable. This is especially important if you frequently transport your gear to different locations or set up in varying environments.
Proper storage also plays a role. When not in use, keep your gear in a cool, dry place, preferably in padded cases or dedicated shelves. Avoid exposing equipment to extreme temperatures or humidity, which can damage internal components over time. For instance, I store my interface and headphones in a dedicated studio drawer with silica gel packs to control moisture levels.
Looking ahead, I predict that automation and remote diagnostics will become more integrated into professional-grade gear, making maintenance even easier. Manufacturers are developing smart interfaces that can alert you to potential issues before they escalate, much like how modern cars notify owners of maintenance needs. Embracing these innovations can save you money and downtime in the long run.
How do I maintain my studio gear over time?
The key to long-term maintenance is consistency. Schedule regular checks—monthly for cleaning and quarterly for updates. Use high-quality cables and store your equipment properly. Stay informed about firmware releases and new tools that can monitor your gear’s health. If you notice any anomalies, like unusual noises or connectivity issues, address them immediately. For professional advice tailored to your specific setup, reach out through my contact page. Remember, taking care of your gear isn’t just about preventing failures; it’s about ensuring your voice always sounds its best, no matter how long you’ve been at it. Start implementing these tips today and enjoy a smooth, reliable voiceover journey for years to come.
Looking back, one of the most pivotal moments in my voiceover journey was realizing that my equipment—especially my audio interface and headphones—was limiting my potential. That eye-opening experience taught me that investing in the right gear is not just about sound quality; it’s about unlocking the full emotional depth and clarity of your voice. Since then, I’ve learned some invaluable lessons that can help you avoid common pitfalls and elevate your recordings to a professional level.
Lessons That Changed My Approach to Voiceover Gear
- The Myth of Expensive Gear: I used to believe that only the priciest microphones and interfaces could produce studio-quality sound. Turns out, understanding how to properly set up and optimize what you have matters more than price tag. A modest microphone paired with good technique can outperform an expensive one used poorly.
- Technique Trumps Tech: I discovered that mastering mic placement, room acoustics, and gain staging had a bigger impact on my sound than constantly upgrading my gear. It’s easy to overlook these fundamentals, but they are the foundation of professional recordings.
- Consistency Is Key: Regular maintenance, software updates, and cable checks helped me maintain consistent sound quality over time. Neglecting this can lead to unexpected noise or technical issues that ruin a recording session.
- Listening Is a Skill: I learned to critically listen to my recordings and compare different setups. This practice revealed subtle differences that made a significant impact on my final product. Trust your ears more than specs alone.
- Environment Matters More Than You Think: Even with great gear, poor room acoustics can sabotage your sound. Investing in sound treatment and proper microphone placement transformed my recordings far more than any gear upgrade.
Tools That Elevated My Voiceover Setup
- Audio Interface: The best audio interfaces for voiceover have high-quality preamps and low latency, which are essential for capturing your voice accurately. I personally rely on models that balance performance with affordability.
- Studio Headphones: A good pair of headphones like those recommended in the studio headphones buying guide helps me critically listen and catch nuances in my recordings, ensuring clarity and consistency.
- DAW Software: Mastering DAW software tailored for voiceover work has streamlined my editing process and improved my sound quality exponentially.
- Sound Treatment: Acoustic panels and proper microphone placement have been game-changers. They create a controlled environment that minimizes echoes and background noise, making my voice sound professional and warm.
Ignite Your Voiceover Passion with Confidence
Remember, the journey to professional-quality voiceover recordings isn’t just about gear—it’s about understanding your tools and environment, practicing technique, and maintaining consistency. With the right setup and mindset, you can deliver compelling, clear, and warm recordings that captivate your audience. Start applying these insights today, and watch your voiceover skills soar.
What’s Your Biggest Voiceover Challenge?
Have you ever struggled with finding the right gear or setting up your space? Share your experiences below—I’d love to hear your story and help you find solutions to elevate your voiceover game.
http://Emily%20Carter
Reading this post really hit home for me. I used to think that investing in high-end gear was the only way to sound professional, but I quickly learned that technique and environment make a bigger difference. I’ve had some of my best recordings with modest equipment simply because I focused on mic placement and room acoustics. It’s fascinating how much room treatment can streamline your workflow and improve sound quality. I’ve also found that regular software updates and cleaning cables prevent a lot of issues during recording sessions. For those just starting out, I’d recommend prioritizing your environment and learning proper mic techniques; gear upgrade can come later once you’re confident in your setup. Has anyone found particular acoustic treatments or setups that really made a difference without breaking the bank? I’m curious about what others have experimented with to get that warm, professional sound on a budget.
http://Joshua%20Mitchell
This post really resonates with my experience. I spent a lot of money early on buying top-tier microphones and interfaces, only to realize that my room acoustics and mic technique were limiting the quality of my recordings. Now, I focus more on proper room treatment—adding some bass traps and diffusers—along with consistent mic placement. The results have been a game-changer, and my recordings sound much warmer and more professional. I’d love to hear from others—what affordable acoustic treatments or DIY solutions have you found effective? Sometimes, simple adjustments like using a closet or hanging blankets can make a big difference in reducing echo and background noise without breaking the bank. Do you think investing in professional sound treatment equipment is always necessary or can budget-friendly solutions do the job equally well? Looking forward to hearing your tips and insights!