Ever sat in front of your microphone, ready to record, only to be met with a frustrating echo or inconsistent sound quality that just won’t cooperate? I’ve been there. One moment, I thought I had everything set up perfectly, and the next, I was battling background noise or muddled audio. It was a lightbulb moment for me when I realized that choosing the right DAW software and mastering my voiceover setup was the secret to consistent, professional results. And trust me, this isn’t just about fancy gear — it’s about the right combination of tools and techniques that actually work in 2024.
Why Your Voiceover Setup Matters More Than Ever in 2024
In the booming world of content creation, standing out requires top-notch audio. Bad audio can kill your credibility faster than a missed cue. I learned this early on when I thought I could skimp on good headphones or skip proper room treatment. That mistake cost me countless hours editing and re-recording. According to a recent study, listeners are 75% more likely to tune out if the audio isn’t clear and professional (source). So, investing in the right tools and setup isn’t just a luxury—it’s a necessity for success. Today, I’ll share the essential tips that helped me elevate my voiceover game, from picking the best DAW software to setting up your environment for peak performance. Ready to finally get the sound quality you’ve been dreaming of? Let’s dive in.
What’s the Biggest Skepticism About Upgrading Your Voiceover Tech?
Many people, including myself early on, wonder if it’s really worth all the hype—and the money. I used to think, “Will a fancy mic or a killer DAW really make a difference?” The truth is, I made the mistake of underestimating how much proper setup impacts your final sound. It’s not just about gear; it’s about how you use it. Once I invested in better software and learned proper microphone placement and room treatment, my recordings transformed. If you’re still doubting whether upgrading is worth it, I get it. But trust me, the difference is night and day. Want to know how to avoid the pitfalls and make every dollar count? Stay tuned — I’ll guide you through the steps that turned my shaky recordings into professional-grade audio.
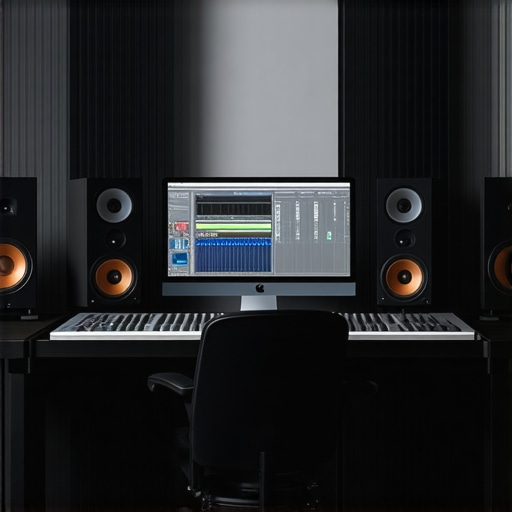
Pick the Right Digital Audio Workstation for Your Needs
Choosing the best DAW software is your first step to professional-sounding recordings. I remember spending hours testing different options—my initial pick was too complex, leading to frustration. Then I discovered the top DAW software for 2024 that perfectly balanced features with ease of use. When I finally settled on a user-friendly interface with robust editing tools, my workflow became smoother, and my audio quality improved instantly. Focus on software that offers good editing capabilities, low latency, and compatibility with your hardware. Don’t overlook the importance of regular updates and community support, which can save you time and headaches down the line.
Set Up Your Microphone and Audio Interface Correctly
Your microphone’s placement can make or break your sound. I once recorded an entire podcast episode with the mic too far away, resulting in dull sound. Once I learned proper microphone positioning—about 6-12 inches from my mouth and slightly off-axis—I noticed an immediate clarity boost. Pair this with a quality audio interface designed for voiceover work, and your recordings will have that professional edge. Use a pop filter to reduce plosives and ensure your mic is securely mounted to minimize vibrations. Remember, clean and consistent setup is key to reducing editing time and achieving consistent sound quality.
Create a Soundproof Environment
Background noise is the enemy of professional voiceovers. I once tried recording in a cluttered room, and the result was noisy and distracting. I invested in some basic soundproofing techniques—like foam panels and a dedicated booth corner—and the difference was night and day. Focus on blocking external noise sources and controlling echo within your space. Use rugs, curtains, or even hanging blankets if necessary. An optimized room doesn’t need to be perfect—just enough to keep unwanted sounds out and your voice front and center.
Implement a Consistent Recording Workflow
Consistency is the secret sauce. I used to start recording without a plan, and my audio quality suffered. Now, I follow a step-by-step routine: warm up my voice, check my mic levels, record a quick test, and then dive into the main session. This routine reduces mistakes and ensures every take is studio-ready. Using workflow hacks like template projects, keyboard shortcuts, and preset chains cuts down editing time and keeps your quality uniform. Over time, this habit becomes second nature, saving you hours and stress.
Fine-Tune Your Audio with Proper Editing and Effects
Raw recordings rarely sound perfect. I learned to use noise reduction, equalization, and compression judiciously, not excessively. A good rule of thumb: aim for clarity and warmth without sacrificing natural voice characteristics. I often start with a noise gate to eliminate background hum, then apply light EQ to enhance vocal presence. Finish with compression to level out dynamics. For consistent results, create custom presets within your DAW. This way, every recording gets the same professional polish, making your final product sound more engaging and trustworthy. Remember, subtlety is key—over-processing can make your voice sound unnatural.
Review and Export with Fresh Ears
Listening critically is essential. After a long session, I used to rush into exporting, only to realize I missed glaring issues. Now, I take a break, then listen with high-quality studio headphones (top headphones for 2024) and fresh ears. Check for background noise, uneven volume, and artifacts. Make final adjustments before exporting in the right format—usually WAV or high-quality MP3. This extra step ensures your work sounds professional across all platforms, from podcasts to voiceovers for videos. Don’t skip this; it’s where your effort truly pays off, making your voice stand out in 2024’s crowded content landscape.
While many beginners focus on upgrading their microphones or software, there’s a less obvious trap that even experienced voiceover artists often fall into: overlooking the subtle nuances that truly elevate audio quality. Let’s dig deeper into what most people get wrong about mastering their voiceover setup and how to avoid these pitfalls that can sabotage your professional sound.
Why Believing More Gear Equals Better Quality Is a Myth
One of the most persistent misconceptions is that buying the latest microphone or the most expensive audio interface automatically guarantees superior results. In reality, the quality of your recordings depends far more on proper setup, environment, and technique. For example, a high-end mic paired with a poorly treated room or improper microphone placement can produce worse results than a modest mic used correctly. According to industry experts, mastering your environment and understanding the nuances of mic positioning outweigh the benefits of hardware upgrades alone.
The Hidden Trap of Over-Processing
Many creators think that heavy-handed editing, like overusing noise reduction or compression, will solve their audio issues. Unfortunately, excessive processing can introduce artifacts, reduce naturalness, and even make your voice sound unnatural. The key is subtlety—using gentle EQ boosts and light compression, and always listening with fresh ears. For advanced tips, check out workflow hacks that help you maintain consistency without overdoing it.
How Room Acoustics Can Make or Break Your Sound
Many creators neglect the importance of room treatment, assuming their gear is enough. But untreated spaces cause echo, reverb, and background noise that are nearly impossible to fix in post-production. Even small investments in soundproofing techniques can dramatically improve your raw recordings. Remember, a well-treated space is the foundation of professional-grade audio—your setup’s secret weapon that most overlook.
Are You Optimizing Your Workflow for Consistency
Another often overlooked aspect is workflow. Recording haphazardly can lead to inconsistent sound quality and longer editing times. Developing a routine—like warming up your voice, checking levels, and setting up templates—ensures each session produces predictable results. Using tools such as dedicated DAW configurations streamlines this process and helps you stay consistent across projects. Have you ever fallen into this trap? Let me know in the comments.
In summary, mastering your voiceover setup isn’t just about hardware; it’s about understanding and refining every aspect, from acoustics to workflow. By avoiding these common misconceptions and paying attention to the nuanced details, you’ll be well on your way to producing crystal-clear, professional audio in 2024 and beyond.
Once you’ve set up your ideal voiceover environment and chosen the right tools, the next step is ensuring everything stays in peak condition over time. Proper maintenance of your equipment not only prolongs its lifespan but also guarantees consistent, professional results every time you hit record. Trust me, neglecting routine care can lead to unexpected failures, degraded audio quality, and costly repairs. So, how do I keep my voiceover gear working smoothly day after day? Here are my tried-and-true methods.
First, regular cleaning of your microphone and audio interface is essential. Dust and debris can accumulate in ports and on connectors, causing audio dropouts or noise issues. Use a soft, lint-free cloth to wipe down surfaces and compressed air to clear out ports. Remember to disconnect your gear before cleaning to prevent static or accidental short circuits. Additionally, check cables periodically for signs of wear or fraying. Damaged cables can introduce noise or cause complete signal loss, so replace them immediately if you notice any issues.
Second, keep your software up to date. Developers release updates that fix bugs, improve stability, and enhance compatibility with new hardware or operating systems. For example, regularly visiting the DAW software provider’s website for updates ensures your recording environment remains secure and efficient. Updating your drivers for audio interfaces is equally important, as outdated drivers can cause latency issues or crashes. Set a reminder every few months to check for updates—your future self will thank you.
Third, consider environmental factors. Keep your studio at a stable temperature and humidity level; extreme conditions can damage sensitive electronics and microphone capsules. Use dehumidifiers or air conditioners as needed, especially if you live in a humid climate. Also, avoid placing your gear near sources of electromagnetic interference, such as routers or fluorescent lights, which can introduce unwanted noise into your recordings.
Fourth, implement a simple maintenance schedule. Create a checklist that includes inspecting cables, cleaning equipment, and testing functions regularly. Keep a log of when maintenance was performed—this helps catch issues early and plan for replacements before gear fails unexpectedly. Over time, this routine becomes second nature, saving you time and costly repairs.
Looking ahead, I believe the trend toward smart, self-diagnosing audio equipment will grow. Devices that can alert you to potential problems before they happen will become standard, making maintenance even easier. Until then, consistent care and attention to detail remain your best tools for keeping your voiceover setup working flawlessly.
How do I maintain my voiceover gear over time?
The key is regular cleaning, software updates, environmental control, and scheduled inspections. By integrating these habits into your routine, you’ll ensure your equipment continues to deliver professional-quality audio for years to come. If you’re interested in advanced tips, try setting up automated alerts for driver updates or investing in protective gear like surge protectors and dust covers. Small investments now can save you big headaches later.
The Hardest Lesson I Learned About Voiceover Equipment
One of the biggest realizations I had was that spending thousands on the latest microphone doesn’t automatically mean better sound. Proper setup, environment, and technique matter far more than hardware alone. This taught me to focus on mastering my space and workflow before investing heavily in gear.
3 Myths About Voiceover Audio That Held Me Back
For a long time, I believed that only expensive equipment could deliver professional results. I also thought over-processing my recordings would hide flaws. Both are misconceptions. Subtle adjustments and a good environment make the real difference, not just high-end gear.
What Industry Experts Won’t Tell You About Your Voiceover Environment
Most creators overlook how critical room acoustics are. Even the best mic struggles in a noisy, echoing space. Investing in soundproofing techniques and room treatment can elevate your recordings from amateur to professional instantly.
My Essential Toolkit for Voiceover Success
My go-to tools include a user-friendly DAW software that balances features with simplicity, a quality audio interface for clean input, and studio headphones that reveal every detail. These choices help me produce consistent, professional audio every time.
Your Turn to Elevate Your Voiceover Game
Now that I’ve uncovered these insights, I encourage you to revisit your setup. Focus on environment, workflow, and subtle editing techniques. Remember, mastering your voiceover environment is an ongoing process, but the results are truly rewarding. Are you ready to transform your recordings and stand out in 2024? Let me know what step you’ll take first in the comments below.
http://Emily%20Carter
This post really resonated with me, especially the part about proper room treatment. I used to think investing in the best microphone would be enough, but I quickly learned that a noisy or echoing space can sabotage the cleanness of my recordings. Since I added acoustic panels and moved my setup away from electronic devices, I’ve seen a huge improvement. It’s amazing how much the environment influences sound quality. I’m curious—what are some affordable, DIY solutions other voiceover artists have found effective for treating their rooms? I’m always looking for tips to improve without breaking the bank.
http://Michael%20Reynolds
Reading through this post, I can totally relate to the importance of a well-setup environment. When I first started, I underestimated how much room acoustics could influence the final quality of my recordings. I ended up building some DIY bass traps using foam and old furniture, which surprisingly made a big difference without breaking the bank. The key seems to be managing sound reflection and echo—something that’s manageable with creative, affordable solutions. For anyone on a tight budget, I’d suggest experimenting with thick blankets or moving your setup into a closet with clothes—these can serve as effective sound absorbers. Have others found similar DIY treatments effective, or do you think investing in professional panels is ultimately worth the cost? I’d love to hear different tips or experiences.
http://Sarah%20Mitchell
This post hits so many crucial points about creating a professional voiceover setup. Personally, I started with just a decent mic and no room treatment, which led to a lot of frustrating re-records due to echo and background noise. Once I invested in some DIY acoustic panels made from affordable materials like foam and blankets, my recordings instantly improved. I also realized that consistent workflow—like warming up my voice and doing sound checks—really helps maintain quality. A question I have is: for those limited on space, what are some creative ways to create an effective sound booth or recording corner that doesn’t take up a lot of room? Would love to hear different practical solutions from others who’ve faced similar constraints.
http://Jessica%20Lee
This is such a comprehensive overview of setting up a professional voiceover environment. I completely agree that the environment plays a crucial role; even with high-quality gear, inconsistent room acoustics can ruin a take. I’ve personally experimented with DIY solutions like hanging thick blankets and using bookshelf foam panels, which helped reduce echo significantly without costing a fortune. One thing I learned is that sealing gaps around windows and doors can also prevent outside noise from seeping in, making a huge difference. I’m curious, has anyone tried building a portable sound booth or using portable acoustic panels for flexibility? Managing space while maintaining sound quality is definitely a challenge for those with limited room—any innovative ideas out there? Looking forward to hearing what others do to optimize their setups for professional results.
http://Andrew%20Martinez
I completely agree with the emphasis on environment and workflow in achieving professional-grade voice recordings. In my experience, adding some simple DIY treatments like hanging thick blankets on walls or creating a makeshift booth with cardboard and foam has made a noticeable difference, especially when working with limited space. Sometimes, even placing bookshelves filled with soft materials around the recording area can help absorb echo and unwanted reflections. It’s amazing how these affordable solutions can elevate audio quality without the need for expensive acoustic panels right away. Have other creators experimented with using everyday household items for room treatment? I’d love to hear more creative, budget-friendly ideas from this community. It really makes me wonder if focusing on proper microphone placement and environment might be even more critical than investing in top-tier gear, especially for beginners.