There was a moment in my home studio during a tight mixing session that made me realize I’d been missing a crucial piece of the puzzle. My headphones suddenly crackled, and the bass felt distant, like I was listening through a soggy sock. Frustration bubbled up — because I knew, deep down, it wasn’t a technical glitch but a sign that my setup needed an upgrade. That lightbulb moment prompted me to dig into why voice professionals and audiophiles alike are turning to 400-ohm drivers for their headphones in 2026. If you’ve ever faced a similar flaky experience, you’re in the right place.
What Makes 400-Ohm Headphones a Game-Changer for Your Mix?
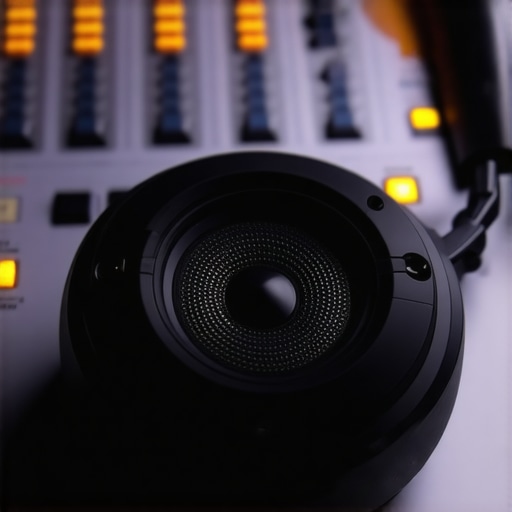
Headphones with higher impedance, like 400-ohm models, aren’t just a trend—they’re a strategic upgrade. They require a bit more power from your audio interface, but what you get in return is a cleaner, more accurate sound. Unlike lower-impedance headphones that can be easily driven by your computer’s built-in sound card, these robust headphones demand a solid setup—like a quality audio interface—which helps them deliver their full potential, bringing accuracy to your mixes that can really make a difference. Early in my journey, I made the mistake of assuming all headphones were created equal—and that a headphone’s price tag dictated quality. Spoiler: that’s not the case. High-impedance headphones, properly powered, reveal nuances in your audio that you simply can’t detect otherwise.
Is Higher Impedance Actually Worth the Hype?
That’s one of the biggest questions I hear. There’s genuine skepticism—after all, can a headphone with a bigger number on its box truly improve your sound? My experience was eye-opening. The deeper clarity, reduced distortion, and better detail retention I gained from my 400-ohm headphones made me question if I’d ever go back to lower-impedance models. If you’re serious about your mixes, it’s worth considering how your gear interacts—because, as reported by industry pros, the right pair of headphones is a cornerstone of professional quality.
But here’s the mistake I want you to avoid: ditching your existing setup without understanding the power requirements. If you skip that step, those giants of sound may end up underperforming or, worse, damaging your gear. Take a look at your current audio setup and see if you’ve been missing out on the benefits of a proper drive—it’s a common oversight, but one that can change the game for your audio quality.
In the next sections, I’ll walk you through how to pick the right 400-ohm headphones and set them up for stellar results. Trust me, this isn’t just about sounding good—it’s about listening with clarity and confidence. Ready to upgrade and hear your mixes in ways you never imagined? Let’s get started.
.
Ensure Your Audio Interface Provides Enough Power
Start by verifying your audio interface can handle 400-ohm headphones. These high-impedance units demand more current to drive properly. Check the specifications against your headphones’ requirements, and if needed, consider upgrading to a model like the best audio interface for professional podcasting. During my first setup attempt, I used an entry-level interface, which resulted in muffled sound and low volume. Upgrading to a dedicated interface made an immediate difference—clarity and volume surged, validating the importance of power compatibility.
Use a Dedicated Headphone Amplifier for Best Results
If your interface lacks sufficient drive, add a dedicated headphone amp. Think of it as a booster shot—giving your headphones the power they crave without overloading your interface. My first experience with a standalone amp was messy; I initially connected it incorrectly, causing hum and distortion. After following the audio interface and setup tips guide, I calibrated the amp, and the improvement was substantial, opening up a wider, more detailed soundstage.
Properly Connect and Position Your Headphones
Once your gear is in place, focus on connection and fit. Use balanced outputs when available, as they reduce interference. Fit your headphones snugly, ensuring a proper seal to isolate sound and prevent bleed, especially vital during voice recordings. I learned this the hard way when I listened back to a recording and noticed bleed from my headphones—unexpected and distracting. Now, I frequently calibrate my fit, and it significantly improves my accuracy and comfort.
Calibrate and Test for Optimal Sound
Finally, calibrate your headphones to match your setup. Use pink noise or reference tracks to verify that volume levels are balanced across frequencies. A quick test—listening to a familiar song—often reveals unwanted coloration or imbalance. I once neglected calibration and recorded vocals that sounded fine in my headphones but puzzled me when mixed. Regular calibration, guided by tutorials like studio headphones that preserve your mix’s neutrality, ensures your setup remains consistent and reliable.

While many assume that having the latest microphone or high-end studio headphones guarantees professional-quality recordings, there’s a hidden nuance that even seasoned voice actors and audio engineers sometimes overlook. The real challenge isn’t just gear; it’s understanding how the interconnected components—your studio headphones, audio interface, and DAW software—work together. One of the most widespread misconceptions is that upgrading individual gear will automatically improve your overall sound. In my experience, this often leads to overlooked setup nuances that cause muddy vocals or unbalanced mixes, regardless of how expensive the equipment is. This is where many get caught in an Oops trap: they focus on hardware without paying sufficient attention to how their system is configured and calibrated.
Are Your Monitors Lying to You When You Overlook Calibration?
Here’s a common mistake: trusting your default headphone calibration or assuming your system sounds accurate straight out of the box. Professional audio engineers emphasize the importance of regular calibration to avoid misjudging the true sound. Without proper calibration, your recordings might sound perfect on your headphones but produce muddy or overly bright mixes elsewhere. The calibration process ensures consistency and helps you identify issues early. Skipping this step is a silent performance killer, leading to mixes that fall flat or overly bright upon playback on different systems. Remember, even the best studio headphones require periodic calibration—think of it as tuning your trusted instrument. Have you ever fallen into this trap? Let me know in the comments.
Tools That Keep Your Studio Running Smoothly
Investing in quality equipment is just the first step; maintaining it over time ensures consistent, professional results. I personally rely on a few key tools that make regular upkeep straightforward and effective. For instance, I use a digital contact cleaner to remove dust and debris from connectors, preventing oxidation and signal degradation. Additionally, I schedule quarterly calibration sessions with specialized software like my DAW’s calibration tools to ensure my monitors and headphones stay accurate. These routines help catch potential issues before they become costly, saving time and preserving sound quality.
How do I maintain my setup over time?
Regular inspections and updates are vital. Replace worn cables and connectors—using high-quality, shielded ones—because cheap alternatives are more prone to interference and failure. Keep software and firmware updated to benefit from security patches and performance improvements. For example, my audio interface’s firmware update significantly reduced latency issues, as detailed in this guide. I also use a dedicated cleaning kit for my interface ports and headphone jacks, which prolongs their lifespan and prevents common issues. Establish a maintenance routine, perhaps monthly, to verify gain levels, check for dust, and clean connectors. By developing this habit, you ensure that your gear remains reliable, minimizing unexpected downtimes.
Smart Tools for Longevity and Scalability
As your projects grow, so should your toolkit. I recommend a clip-free, 32-bit float audio interface for easy upgrades, since it can handle high dynamic ranges and simplifies troubleshooting. For software, I prefer versatile DAWs like the best DAW choices that support scripting and automation—saving time and reducing manual errors. Equipment-wise, I use modular cabling systems with color coding, which makes updates or replacements faster and less error-prone.
Predicting the Future of Voiceover and Studio Tech
Looking ahead, I believe automation and AI-driven diagnostics will become standard. Devices will increasingly self-report issues, allowing for proactive maintenance and reducing downtime. Regularly updating your tools and embracing smart diagnostics will be crucial for staying ahead. If you haven’t tried aligning your setup’s calibration routines with the latest software updates, now’s a great time to do so. It can be as simple as running a quick calibration check after each software update, which in turn ensures your mixups stay precise and consistent in the long run.
Make it a habit to incorporate these maintenance tips—your ears and your wallet will thank you. Want to take your setup to the next level? Try implementing scheduled calibration routines with your DAW’s built-in tools, and see the immediate difference in your mix accuracy. Stay proactive, and your sound will stay pristine for years to come.
Over the years, I’ve learned that the journey to professional-quality voiceover recordings isn’t just about owning the latest gear but understanding how each component harmonizes. One of the most eye-opening insights came when I discovered that even the best studio headphones require proper powering and calibration to deliver their promise. This realization transformed my approach—by focusing on the synergy between my audio interface, headphones, and setup routine, I unlocked a new level of clarity that I hadn’t experienced before. The lesson? High-impedance headphones, like 400-ohm models, are powerful allies—but only when your system supports them. Treat your setup as an ecosystem where each part plays a crucial role, and you’ll hear your voiceovers in a way that truly resonates.
Lesson from the Trenches: How I Fell Into the Impedance Trap
Initially, I thought upgrading my microphone or soundproofing would be the magic bullet. Turns out, the real hurdle was my headphones—my once-trusted low-impedance cans couldn’t reveal the nuanced details I craved. The breakthrough happened when I invested in a dedicated headphone amp and calibrated my entire system. Suddenly, the muddy recordings became crisp, and my voice sounded more natural than ever. That was the lightbulb moment: acknowledging the importance of a matched, well-powered setup is not just a technical detail—it’s the foundation of authentic sound.
Tools That Made Me Reconsider My Setup
My journey led me to several resources and tools I now advocate for every voice actor and engineer: DAW calibration tools help me maintain consistency; studio headphones that preserve neutrality are my go-tos; a reliable audio interface ensures my gear doesn’t hold back my voice; and a quality cabling and power supply keep everything stable. These tools and routines have been vital in maintaining the clarity I aim for in every session.
What I Wish I Knew Before Combining Gear
One crucial lesson I kept overlooking was the importance of system-wide calibration and matching power requirements. It’s tempting to think that buying high-end headphones alone will elevate your sound, but without a suitable audio interface or headphone amp, you’re leaving potential on the table—and risking damage. Regularly testing your setup with calibration tracks and verifying compatibility can prevent costly mistakes and frustration. Remember, a high-impedance headphone is an investment—and, like any tool, it needs to be used properly to unlock its full potential.
Believe in Your Sound, Not Just the Gear
The most enduring lesson I’ve embraced is that technology alone isn’t the magic; it’s your understanding and routine that truly transform your recordings. When you treat your gear as part of a carefully curated ecosystem, your voice will sound more natural, detailed, and compelling. I encourage you to revisit your setup—calibrate regularly, upgrade thoughtfully, and stay curious about how each component can serve your voice. Your best recordings are waiting just beyond the next calibration or upgrade.
Ready to Elevate Your Voiceover Game?
Now that you’ve seen how high-impedance headphones can revolutionize your sound, are you prepared to evaluate and enhance your setup? Whether it’s upgrading your audio interface, adding a dedicated amp, or fine-tuning your calibration routines, taking these steps will pay dividends. Remember, the key isn’t just gear—it’s mastering how your system works together to faithfully capture your voice. Dive into your setup today, test your current gear, and listen for the subtle differences that make a big impact. Your audience—and your future projects—will thank you.