I remember the frustrating moment when I hit record for my first serious podcast episode, only to realize that my voice sounded flat, distant, and just… off. No matter how much I tweaked my mic placement or adjusted my levels, something was missing. It was like trying to paint a masterpiece with a blurred lens. That lightbulb moment hit me hard — I needed better equipment, specifically a quality audio interface and studio headphones that reveal every nuance of my voice. Since then, I’ve learned that the right gear isn’t just a luxury; it’s the backbone of professional-sounding podcasts that captivate listeners and build trust.
Why Your Podcast Deserves Top-Notch Gear
Here’s the truth — if you’re serious about making your mark in the podcast world, subpar sound quality just won’t cut it. Audiences are used to high standards now. According to a World Intellectual Property Organization, audio quality is a key factor influencing listener engagement. That means investing in the right equipment can be the difference between growing your audience or fading into the background. But I get it — navigating the sea of options can feel overwhelming. You might be asking yourself, “Is all this really worth the hype?” Well, I’ve made my share of mistakes early on, like choosing a cheap interface that introduced background noise or headphones that didn’t accurately reflect my voice. Trust me, those missteps slowed my progress and frustrated my workflow.
Is Premium Equipment Necessary for Success?
When I first started, I thought I could get by with basic gear. Big mistake. The difference that quality studio headphones and an audio interface make is staggering. They reveal subtle details, eliminate background noise, and give your voice that professional polish. If you’re feeling skeptical about whether the investment is justified, consider this: according to industry experts, high-quality audio gear can actually streamline your workflow and save you editing time, leading to a faster path to polished episodes. If you’re ready to upgrade, I’ll guide you through the essential choices that will transform your setup and elevate your podcast’s credibility. Want to avoid my early pitfalls? Keep reading, and I’ll show you exactly how to choose gear that works for your unique needs.
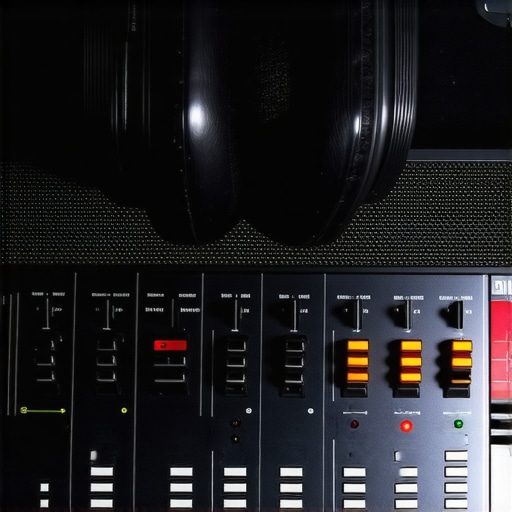
Choose Your Audio Interface Wisely
Start by selecting an audio interface that matches your needs and budget. Think of it as the bridge between your microphone and your computer — it converts analog signals into digital data. I once bought a budget model that introduced background hums, slowing down my editing. After switching to a mid-range audio interface, my recordings instantly sounded cleaner, and my workflow improved. When choosing, consider factors like preamp quality, number of inputs, and compatibility with your computer. For detailed comparisons, check out the best audio interfaces for 2024 guide.

Invest in Studio Headphones for Accurate Monitoring
Studio headphones are your best friends during recording and editing. They reveal every nuance, from subtle breaths to background noise. I once used regular consumer headphones, which made it hard to catch issues, leading to re-records. Upgrading to studio headphones transformed my editing process. Look for closed-back designs for noise isolation and flat frequency response for true sound reproduction. To find the right pair, read my detailed buying guide.
Set Up Your Microphone Properly
Positioning your microphone correctly can make a huge difference. Use a boom arm to keep it steady and at mouth level — about 6-8 inches away. Use a pop filter to reduce plosive sounds, which sound like harsh ‘p’ or ‘b’ sounds. I initially recorded without a pop filter, and my episodes had distracting pops. After adding one, my audio sounded much more professional. For optimal placement, follow the voiceover setup essentials guide.
Configure Your Digital Audio Workstation
Your DAW (Digital Audio Workstation) is where all the magic happens. Choose a software like best DAW for 2024. Set your input device to your audio interface, and adjust sample rate (typically 44.1kHz or 48kHz) and bit depth (usually 24-bit). I once ignored these settings, resulting in inconsistent sound quality. Once configured properly, editing became smoother and faster. For tips on editing, explore workflow hacks.
Implement Acoustic Treatments
To prevent echo and background noise, treat your recording space acoustically. Use foam panels, bass traps, and diffusers strategically. I initially recorded in a bare room, which caused echoes that distracted listeners. After adding acoustic treatments, my recordings gained clarity and warmth. Check out the sound environment guide for detailed tips.
Many podcasters believe that simply investing in high-end gear guarantees professional sound, but in reality, there are nuanced misconceptions that can undermine your efforts. For example, a frequent mistake is assuming that the best audio interface automatically produces the cleanest recordings. While a quality interface is crucial, the way you set it up and optimize your environment matters just as much. Incorrect gain staging, for instance, can introduce noise or cause clipping, which no amount of expensive gear can fix if overlooked. Proper setup tips are essential to avoid these pitfalls.
Another common myth revolves around studio headphones. Many believe that any closed-back headphone will do, but not all are created equal. Some headphones emphasize bass or treble unevenly, misleading your monitor mix. For accurate monitoring, flat frequency response headphones are a must. Skimping here can lead to mixes that sound great on your cans but are unbalanced on other devices. To avoid this, check out the buying guide.
When it comes to DAW software, many believe that the most popular or expensive options are automatically the best fit. However, the real key is how well the software aligns with your workflow and features. Using a complex DAW without mastering its advanced features can hinder your editing speed and quality. A common mistake is not customizing your DAW settings for voice work, leading to subpar results and longer editing times. Remember, mastering your tools is what separates amateurs from pros.
Many overlook the importance of proper voiceover setup. It’s not just about having a good microphone; placement, acoustics, and environment matter immensely. A typical error is recording in untreated rooms, causing echoes and background noise that ruin the clarity. Investing in acoustic treatments and understanding the optimal microphone placement can dramatically improve your sound. Check out the voiceover setup essentials for detailed guidance.
Are You Falling for These Audio Myths?
One sophisticated question I often get is whether investing in top-tier gear truly guarantees professional results, or if workflow and environment matter more. The truth is, even the best equipment won’t save a poorly treated room or improper setup. According to industry experts, optimizing your space and understanding your tools is vital for high-quality output. So, have you ever fallen into this trap? Let me know in the comments, and remember — mastering the nuances makes all the difference in podcasting success.
Keeping your podcast setup in top shape requires more than just choosing the right equipment; it involves ongoing maintenance, strategic upgrades, and knowing when to scale. From audio interfaces to DAW software, each component benefits from regular checkups and thoughtful updates. I personally ensure my voiceover environment is cleaned and acoustically treated every few months, which keeps my recordings consistently clear and professional. This habit prevents issues like unwanted noise buildup or equipment degradation, which can silently sabotage your sound quality over time.
How do I maintain my setup over time?
Start with a routine inspection of your audio interface and cables. Check for loose connections or signs of wear, and replace any damaged components immediately. Keep your studio headphones clean and stored properly to prevent damage from dust or mishandling. Regularly update your DAW software to access new features and security patches that improve stability and performance.
To extend the longevity of your equipment, consider investing in protective gear like surge protectors and quality cables that reduce wear. For example, a high-quality audio interface with built-in protection shields your investment from power surges, which are common in home studios. Additionally, keeping your workspace organized minimizes accidental damage and makes regular maintenance easier.
What tools can streamline your long-term success?
Utilize software plugins like noise reduction and equalization presets that can be applied uniformly across multiple recordings, saving you editing time. I recommend specific plugins like iZotope RX for noise removal, which I’ve found invaluable for cleaning up recordings without sacrificing quality. These tools should be regularly updated and tested to ensure compatibility with your DAW, preventing glitches or performance issues during critical editing sessions.
Hardware-wise, a second microphone or backup drive can be a game-changer if your primary setup encounters failure. Having a spare ensures your workflow remains uninterrupted and saves costly downtime. As technology trends shift towards integrated solutions, future-proofing your setup with modular components will become increasingly important. Expect more AI-powered plugins and smarter acoustic treatment options to emerge, making maintenance even more intuitive.
Remember, consistent maintenance and strategic upgrades are the keys to keeping your podcast quality high. Don’t wait until something breaks—schedule monthly checkups, update your tools, and stay informed about new innovations. Why not try implementing a routine checkup for your DAW setup today? It’s a simple step that can prevent costly repairs down the line and ensure your content always sounds its best.
The Hardest Lesson I Learned About audio interface, studio headphones, DAW software, podcast editing, and voiceover setup
One of my biggest realizations was that no matter how expensive your equipment is, improper setup can sabotage your sound. I once spent hours trying to troubleshoot noise issues, only to discover I hadn’t configured my audio interface correctly. That taught me that understanding the nuances of gain staging and proper connection is crucial for professional-quality recordings.
My Top Picks That Elevated My Podcast Game
Over the years, I’ve curated a toolkit that’s made a real difference. I trust studio headphones for their flat response, which helps me hear every detail during editing. My go-to audio interface ensures clean, noise-free recordings. For editing, I rely on DAW software that’s intuitive and packed with voice-friendly features. These tools, combined with acoustic treatments, have transformed my podcast quality and confidence in my recordings.
Take Action to Elevate Your Sound Today
If you’re serious about podcasting, don’t settle for mediocre audio. Invest in the right gear, learn proper setup techniques, and continuously refine your environment. Your audience will notice the difference, and your confidence will grow as your sound quality improves. Remember, mastering these details isn’t just about equipment — it’s about creating an experience that keeps listeners coming back. Ready to take your podcast to the next level? Start today, and don’t be afraid to experiment and learn along the way.
http://Benjamin%20Clark
Reading through this article really hits home for me. I spent months trying to produce decent podcast audio with a basic microphone and average headphones, but I kept feeling something was missing. Upgrading to a better audio interface and investing in a pair of studio headphones truly transformed my workflow. It’s amazing how much subtle detail you can catch during editing when your monitoring gear accurately reflects your sound. One challenge I still face is room acoustics — even with great gear, a echoey space can ruin the clarity. I’ve started adding acoustic panels, and the difference is noticeable. Do others have tips on how to optimize room treatment without breaking the bank? I’d love to hear what solutions worked well for you and if there’s a good budget-friendly approach to acoustic treatment that still makes a difference.
http://Avery%20Johnson
This post resonates with my own experience in podcasting. For a long time, I used consumer-grade headphones and a basic mic, which made editing frustrating because I couldn’t hear the subtle issues that affected sound quality. Upgrading to a pair of flat response studio headphones and a quality audio interface really elevated my production standards. The clarity during editing is so much better now, and my episodes sound more professional without needing extensive post-production corrections. I’ve also been experimenting with DIY room treatments like hanging thick blankets and positioning bookshelves strategically, which surprisingly made a noticeable difference without a hefty investment. Has anyone else found creative, budget-friendly ways to improve room acoustics? I’d love to hear of some effective solutions—sometimes, simple fixes can make a big impact.