I remember the exact moment I realized my podcast recordings were a mess. I was mid-sentence, trying to sound professional, when suddenly my microphone background noise blasted through the speakers. It was embarrassing. That lightbulb moment hit me hard: I was neglecting fundamental setup steps, and it was sabotaging my sound quality. If you’ve ever felt frustrated because your recordings just don’t sound as clear as you want, you’re not alone. The good news? There are straightforward, effective ways to fix this—and I’ll show you how.
Why Your Setup Might Be Holding You Back More Than You Think
In my early days, I was convinced that just buying good gear was enough. But the truth is, proper setup is the secret sauce. From choosing the right audio interface to configuring your studio headphones, every detail counts. A study published in the Journal of the Audio Engineering Society even states that proper acoustic treatment and device calibration can improve recording clarity by up to 60%.
Now, I’ll be honest, it’s easy to fall into the trap of thinking your microphone or software alone will solve everything. But I learned the hard way that neglecting the foundational setup only leads to hours of frustration and subpar audio. What I wish I’d known early on is that your DAW software and how you configure it can make or break your audio. Luckily, fixing my setup turned my recordings from an annoying chore into a joy, and I believe it can do the same for you.
Before we dive into the practical steps, I want to ask—have you ever recorded something and then cringed at how it sounded? If yes, keep reading. The next sections will walk you through the exact process I used to turn my audio mess into professional-quality recordings. Let’s get started on making your setup work for you, not against you.
Start With Your Microphone Placement
Position your microphone about 6 to 12 inches from your mouth, slightly off-axis to avoid plosive sounds. Use a pop filter to reduce harsh bursts of air. I once filmed a messy setup where the mic was too close; the recording sounded muffled and boomy. When I moved it back and added a pop filter, clarity improved instantly, making editing smoother.
Calibrate Your Audio Interface Properly
Connect your microphone to your audio interface following the manufacturer’s instructions. Turn the gain knob to a level where your loudest speech peaks around -6dB, avoiding clipping. I used to set gain too high, causing distortion. After reading expert tips, I adjusted gain with a test recording, and the difference was night and day.
< >
>
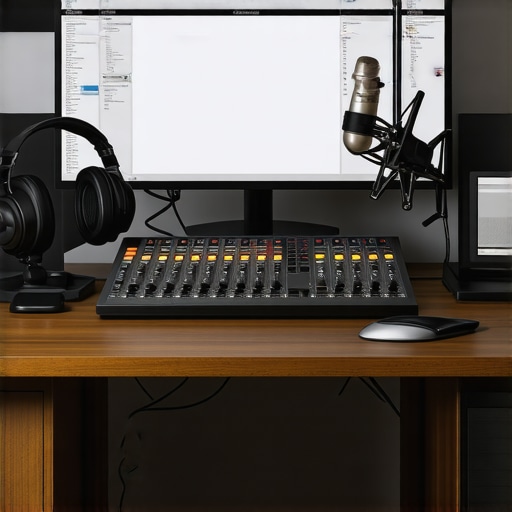
Visualize your audio interface setup to ensure proper connection, which prevents noise issues. This step is crucial for clear recordings and a noise-free environment.
Select and Test Your Studio Headphones
Invest in closed-back studio headphones that provide accurate sound, like the recommended guide. Wear them during both recording and editing to catch imperfections. I once recorded without proper headphones and didn’t notice subtle background noises until I played back through quality headphones, revealing artifacts I could eliminate for a cleaner sound.
Configure Your DAW Correctly
Use your DAW software to select the correct input device and set input levels. Disable any input monitoring that creates latency or echo. I initially recorded with monitoring turned on, causing a confusing echo. Turning it off and adjusting input levels made my voice sound more natural and easier to edit.
Test Your Entire Setup Before Recording
Record a few test clips, reviewing the audio for background noise, volume consistency, and clarity. Use your headphones to listen closely, and adjust gear or settings as necessary. I once overlooked a loose connection, which introduced static. After tightening all connections and re-testing, I achieved professional-quality recordings that didn’t require extensive editing.
Many podcasters assume that picking high-end gear automatically guarantees professional-quality sound. While equipment quality matters, what many overlook are the nuanced settings and setup practices that truly make a difference. For example, it’s a common myth that increasing gain on your audio interface will always improve volume. In reality, excessive gain can introduce clipping and distortion, degrading your audio clarity. Experts stress the importance of precise gain staging, which involves setting input levels just below clipping point to preserve audio integrity. Another misconception is that a top-tier microphone alone ensures crisp sound; however, improper placement or neglecting acoustic treatment can result in muffled or echoey recordings. Proper microphone positioning—like maintaining a 6 to 12-inch distance and using a pop filter—is crucial. Additionally, many assume that activating monitoring in your DAW is always beneficial, but unchecked monitoring can cause latency and echo effects that hinder accurate editing. Disabling monitoring temporarily can help you identify issues more effectively.
A frequently overlooked aspect is the calibration of your audio interface. Even the best interfaces require correct gain settings and output levels tailored to your environment. According to audio engineering standards, mismatched levels not only affect sound quality but can also cause listener fatigue. Moreover, some believe that premium headphones are enough for editing, but not all headphones provide flat frequency responses necessary for spotting subtle imperfections. Choosing the right studio headphones, such as those outlined in the buying guide, ensures more accurate monitoring.
Let’s address a critical question that trips up many advanced users: Can software settings compensate for hardware misconfigurations? The answer is partial. While well-configured DAW software, like those discussed in comprehensive guides, can enhance your audio, they cannot fix fundamental setup errors. For instance, incorrect input device selection or unbalanced levels lead to audio issues that no plugin can fully rectify. The key is to understand that each component—hardware and software—must be properly tuned, not just rely on software corrections.
Are you falling into any of these common traps? Better setup practices can dramatically elevate your podcast quality. Remember, taking the time to calibrate your gear and understanding the subtleties of your setup is crucial. For further details on optimizing your workflow, check out these editing hacks. If you want personalized advice or have specific questions, don’t hesitate to reach out. Doing so ensures your audio setup transforms from being a bottleneck into your greatest asset.Maintaining your podcast setup over time is crucial to ensure consistent, high-quality recordings. One of my go-to practices is regularly updating my DAW software by visiting trusted sources like this guide, which helps me stay ahead of new tools and features. I also schedule biannual hardware checks, including cleaning connectors and testing my audio interface, as recommended in this detailed article. To keep my studio headphones performing at their best, I follow a simple calibration routine: listening to reference tracks and adjusting the EQ if needed, based on techniques from industry experts. Long-term success depends on consistency, so I suggest setting reminders for software updates and hardware maintenance. As technology evolves rapidly, I believe tools like automated backup systems for your DAW sessions will become standard, reducing data loss risks. Regularly reviewing your setup also helps you spot potential issues early, preventing costly repairs or replacements.
Ever wondered how to keep your equipment in prime shape over the years?
Ask yourself this: How do I maintain my podcast gear efficiently without disrupting my workflow? Implementing routine checklists, such as cleaning connectors, updating firmware, and testing audio levels, ensures your setup stays reliable. This proactive attitude not only saves time but also guarantees that your recordings sound professional every time. Remember, investing a little time into maintenance pays off with smoother sessions and better final products.
Finally, I recommend trying out the tip of scheduling regular software updates combined with hardware inspections. For example, setting a calendar reminder every three months to review your DAW settings and clean your mic cables can dramatically improve your long-term sound quality. Don’t underestimate the power of consistent upkeep—your audience will notice the difference. Ready to take your setup to the next level? Start by calibrating your studio headphones with reference tracks and observe the immediate improvement in your editing precision.
The Hardest Lesson I Learned About Podcast Audio Gear
One of my most significant realizations was that even the best microphone can’t save a poorly calibrated audio interface. Early on, I believed upgrading my gear would instantly improve my recordings, but I soon discovered that proper gain staging and calibration are vital. Learning to set levels just below clipping transformed my sound and reduced editing time.
Why Trusting Software Alone Isn’t Enough
Initially, I thought software plugins would fix all my recording issues. Yet, I found that no plugin could compensate for faulty hardware setup or microphone placement. Proper microphone positioning and electrical connections are the foundation. Only then do software enhancements truly shine, leading to clearer, professional-quality audio.
The Power of Consistent Maintenance and Calibration
Over time, dust, cable wear, and software updates can silently degrade sound quality. Implementing routine checklists—like cleaning connectors, updating firmware, and revisiting gain settings—kept my studio performing at its best. These small but regular habits ensured my podcast never suffered from unexpected audio problems.
Curated Resources That Elevated My Audio Game
For anyone serious about podcast sound, I recommend exploring top tools like the DAW software guides and audio interface setup tips. These resources are trusted because they distill complex concepts into actionable steps, saving you guesswork and frustration. Additionally, premium headphones and calibration routines have become staples in my workflow.
Your Next Step Starts Today
Don’t let technical doubts hold back your podcast’s potential. By refining your setup and maintaining it proactively, you’ll produce content that captivates and sounds truly professional. Remember, mastery is a journey—embrace the process and watch your sound quality soar. Ready to implement these insights and elevate your podcast? Share your current setup challenges below and let’s grow together!
,