I still remember my first recording session—my heart pounding, hoping the microphones and gear would capture my voice perfectly. But when I listened back, the sound was **off**—not quite clear, with weird coloration that made my voice sound like I was recording through a tunnel. That lightbulb moment hit me hard: my studio headphones and setup were subtly coloring the sound, and I didn’t even realize it at first. Since then, I’ve been on a mission to find headphones and equipment that deliver pure, uncolored sound—especially when mixing spatial audio or doing voiceovers for podcasts.
The Problem with Traditional Headphones and Setup
Many standard studio headphones and audio gear—linking to this guide on studio headphones—tend to introduce coloration or frequency bias. It’s like looking through tinted glasses; you think you hear the truth, but you’re actually experiencing a skewed sound image. As audio professionals, we crave accuracy. But even with the best microphones and acoustic treatments, if our headphones color the sound, our mixes won’t translate across different systems or headphones.
Here’s the thing: I’ve made the mistake early on of trusting headphones that sounded fantastic in the shop—yet, when I mixed my spatial audio projects or voiceovers, the results were less than stellar. Over time, I realized I needed headphones that don’t fudge the sound—tools that let me hear the audio exactly as it is, without added warmth or harshness—especially important in 2026, as immersive audio becomes the norm.
So, why does this matter right now? Because our perception of sound shapes how we mix, edit, and produce content that will be played on everything from high-end speakers to AirPods. The quality of headphones influences accuracy and efficiency. If your setup is in the dark about how the sound truly is, you’re shooting in the dark, no matter how good your DAW or microphone is.
What We’ll Cover Today
In this post, I’ll walk you through the latest in mix spatial audio with headphones that faithfully deliver sound without coloration. We’ll explore the options that are genuinely neutral in 2026, and I’ll share practical tips to upgrade your setup. If you’ve ever struggled to make your mixes sound balanced across different devices or wanted your voiceover recordings to be as true as your microphone captures—stick around. This is about getting clarity in every iota of sound, and I promise, it’s more achievable than you think.
Is the Hype About Neutral Headphones Legit or Just Buzz?
I want to be honest: I used to think a lot of these claims were marketing fluff. I’ve fallen into the trap of believing that “more expensive” automatically meant “more accurate.” But an early mistake was choosing headphones based solely on frequency response graphs—without considering how they actually behave in real-world mixing situations. That misstep cost me time and, frankly, made my mixes less reliable. Now, I prioritize real-world neutrality and proven technology for my setup. Curious if you’ve faced similar doubts or frustrations? Let me know in the comments or [reach out](https://audioediting.editinggearpro.com/contact-us). Now, let’s dive into the options that truly keep your sound honest and transparent.
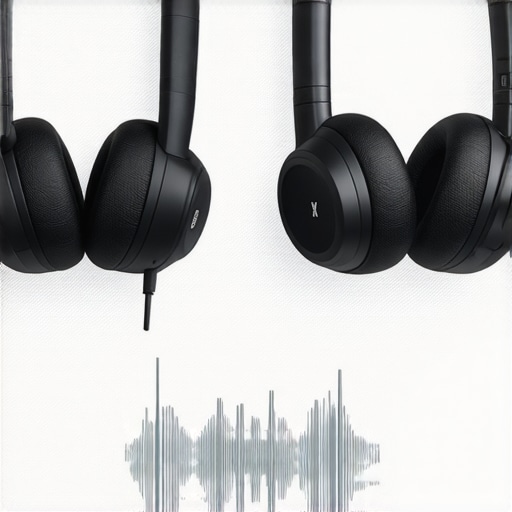
Choose the Right Studio Headphones
Begin by selecting headphones known for their flat, neutral frequency response—these are your best allies for truthful sound reproduction. I recall experimenting with a pair that claimed to be “reference” headphones; initially, they sounded good, but after testing with my reference tracks from this guide, I realized they colored the sound. To verify neutrality, use a reliable calibration tone or an audio spectrum analyzer to compare their response against industry standards. This step ensures you’re not relying solely on an opinion but on measurable accuracy.
Calibrate Your Setup Properly
Use a Sound Level Meter and Calibration Files
To prevent frequency biases, calibrate your headphones and audio interface using dedicated tools. Connect a calibration microphone or test tones to your system, then adjust your volume levels to match reference standards. When I set up my first voiceover booth, I used calibration files with my DAW, which I sourced from this resource. This approach aligned my monitoring environment close to professional standards, minimizing coloration and ensuring my mixes remained transparent across different playback systems.
Optimize Your Audio Interface Settings
Configure your audio interface for flat, uncolored output. Turn off any onboard sound processing features like digital EQ, enhancement modes, or spatial effects. Dive into your audio interface’s control panel and disable settings that alter frequency response. I once neglected this step, and my voiceovers sounded bass-heavy on some devices. After resetting these options, my recordings gained clarity. Always record a test clip and analyze it with spectrum software to confirm no unwanted frequencies dominate.
Configure Your DAW for Neutral Monitoring
Within your DAW, set the monitoring preferences to deliver the cleanest sound possible. Use a reference track with neutral tonality and compare it to your playback. If there’s a discrepancy, adjust your DAW’s output or headphone compensation settings accordingly. For detailed guidance, visit this comprehensive guide. During my setup, I noticed that my EQ plugins introduced coloration; bypassing them during critical mixing phases allowed for more accurate hearing of the raw audio. This ensures your voiceovers retain their authenticity and are free from unintended tonal shifts.
Regularly Test and Maintain Your Calibration
Set a schedule to revisit calibration and equipment checks—monthly if you work daily. Make a habit of listening to reference audio on different devices—smartphones, studio monitors, and Bluetooth earbuds—to confirm the sound remains faithful. I once ignored this advice, which led to discovering my headphones had drifted from neutrality after a few months. Investing in routine calibration maintains the integrity of your setup, leading to more consistent and professional results every time you record or mix.
By systematically selecting neutral gear, calibrating meticulously, and configuring your software environment, you remove the guesswork from your audio production. These steps form the backbone of a transparent, uncolored voiceover and spatial audio setup—tools that truly reflect the source material without added bias or coloration.
Many creators assume that investing in high-end microphones and flashy equipment guarantees professional results, but there’s a hidden nuance that often gets overlooked: the setup process itself. Failing to calibrate headphones properly or misunderstanding how audio interfaces influence sound can lead to subtle inaccuracies that compromise your recordings and mixes. For example, relying solely on default audio interface settings without calibration can introduce frequency biases, making your voice sound either dull or overly harsh. It’s a common myth that expensive gear always delivers neutrality; however, in my experience, even premium equipment can mislead you if not correctly configured.
Is Your Monitoring Environment Truly Transparent or Just Mimicking Trends?
A crucial advanced mistake is neglecting the importance of calibration. Many skip this step, thinking their gear is ‘good enough,’ but calibration ensures your headphones and interface produce a flat response. Without it, you risk making mix decisions based on skewed perception, which won’t translate well across different playback systems. Interestingly, some studies show that even slight deviations in frequency response can significantly affect perceived audio quality and clarity (see a recent publication in the Journal of Audio Engineering). This underscores that the gap between amateur and professional results often boils down to attention to such details. Additionally, many creators fall prey to the misconception that DAW software alone will fix any monitoring inaccuracies, but the truth is, software cannot compensate for hardware flaws or miscalibrations. Regular checks and using reference tracks are essential practice. Don’t assume your monitoring is accurate out of the box; instead, treat calibration as a crucial part of your workflow, just like choosing the right DAW settings or optimizing your audio interface. Remember, a well-calibrated setup leads to more consistent, professional-sounding voiceovers and podcasts.
Maintaining a reliable voiceover setup requires more than just selecting the right gear; it involves consistent upkeep, calibration, and choosing tools designed for long-term performance. One of my go-to strategies is investing in hardware calibration tools like the MiniDSP UMIK-1 measurement microphone, which allows for precise room and headphone calibration. This instrument enables you to measure your environment’s frequency response accurately, helping you identify coloration sources that might skew your mixes. Regularly running calibration checks ensures your monitoring remains neutral over time, preventing subtle changes from impacting your recordings.
On the software front, I rely heavily on professional DAWs integrated with calibration plugins—such as REAPER with its dedicated calibration tools—to keep my mix environment consistent. These DAWs support third-party calibration plugins that help compensate for hardware variations, making your monitoring as flat and accurate as possible. Additionally, I automate updates and backups for my DAW projects using reliable cloud services, which minimizes downtime and preserves session integrity, critical for ongoing projects like podcasts or voiceover series.
For long-term results, digital tools like the iZotope RX suite assist in ongoing audio repair and noise reduction. This ensures your recordings stay clean and professional, even if small issues like fan noise or room reflections creep in over time. Pairing these software solutions with routine hardware checks forms an ecosystem that sustains your setup’s performance year after year.
Scaling your setup becomes manageable when you document your calibration procedures, hardware configurations, and software workflows. I maintain a detailed checklist, including settings for my audio interface and headphones, and update it quarterly. This habit not only preserves consistency but also helps you identify when it’s time for hardware upgrades—like moving to low-latency USB-C interfaces or audio processors—to keep up with evolving project demands.
How do I keep my tools effective over time?
Regularly testing your calibration with reference tracks across different devices is vital. I do this monthly, switching between studio monitors, Bluetooth speakers, and even smartphone earbuds to gauge if my monitoring system remains accurate. An often-overlooked tip is maintaining your cables and connectors; degraded or disrupted connections can introduce noise or latency, undermining even the most expensive gear. Clean, well-maintained cables and replacing worn connectors prevent this common pitfall. Also, keep software and firmware updated—this ensures compatibility and access to the latest optimizations, like firmware updates from your audio interface manufacturer, which can significantly improve performance.
In the future, I see digital control and automation becoming even smarter, allowing for more seamless calibration and hardware integration. Hardware like the RME `TotalMix` system already offers advanced routing and calibration features, and as AI-driven audio tools evolve, they’ll enable even more precise, effortless setup maintenance. My advice is to start implementing routine calibration checks today—using tools like the UMIK-1 and calibration plugins—and stay vigilant about software updates. These practices are your best bet for consistent, professional-quality voiceover and podcast production.
Want to elevate your setup immediately? Try integrating a dedicated calibration microphone like the USB measurement mic into your routine. Regular calibration paired with software tools will significantly boost your long-term reliability. Remember, consistency is king in audio production—invest a little time now for results that sound pristine for years to come.

Lessons Only Insiders Know About Achieving True Audio Neutrality
- Trust But Verify: I learned early that even the most hyped headphones can deceive you. Relying solely on their claims without calibration and testing led me astray. Now, I always cross-reference with spectrum analyzers and calibration tones—magic in theory, but real trust in practice.
- The Power of Routine Checks: Skipping calibration checks is like ignoring a car’s oil change. I’ve found that monthly calibration, using tools like the UMIK-1, keeps my monitoring honest and my mixes consistent. Small habits, big results.
- Configuration Matters More Than Gear: A high-end audio interface is useless if misconfigured. Turning off digital FX and ensuring flat response has been a game-changer. The real upgrade wasn’t gear, but how I set it up for transparency.
- Room EQ Isn’t a One-Time Fix: Achieving neutrality isn’t only about headphones. Regularly measuring my room response revealed subtle room influence, guiding my acoustic treatment adjustments. It’s about harmonizing all elements, not just buying better gear.
- Stay Curious and Keep Testing: The audio landscape evolves, and so should your setup. I’m continually experimenting with new calibration methods and tools, reminding myself that mastery requires ongoing learning.
My Essential Arsenal to Keep Audio Honest
- MiniDSP UMIK-1 Microphone: A reliable measurement mic that provides the data needed to calibrate and verify your environment—it’s been a staple in my toolkit for years.
- REAPER with Calibration Plugins: A versatile DAW supporting advanced calibration, helping me to bypass hardware quirks and maintain flat response during critical listening.
- Acoustic Treatment Materials: Bass traps and diffusers that complement software calibration to curb room influence. Without proper treatment, even the best headphones can’t save you.
- Reference Tracks and Spectrum Software: Real-world testing is vital. I use spectrum analyzers to compare my mixes against industry standards, ensuring my sound isn’t just flat but also balanced.
Embrace the Challenge and Elevate Your Craft
Improving your voiceover setup might seem daunting, but remember, every expert was once a beginner questioning their gear. Taking these small, deliberate steps—calibration, configuration, and consistent testing—paves the way to a professional-level sound that truly reflects your voice. Don’t settle for less; your audience deserves clarity and authenticity in every word. Ready to make your voiceovers stand out? Dive into calibration routines, explore trusted tools, and keep refining your environment. The journey to sublime audio begins with a single proactive step. How confident are you in your current monitoring setup? Let’s hear your experiences below!
http://Melissa%20Carter
This article really hits home for me, especially since I’ve been on a similar journey to find truly neutral headphones for mixing. I used to trust highly-rated gear blindly, but I learned that calibration and understanding your setup are just as important as the equipment itself. I remember spending hours tweaking my interface and room acoustics based on professional guides and tools like the UMIK-1 mic you mentioned. It’s fascinating how even small deviations in frequency response can change the way you perceive your mix. I’ve also started experimenting with software calibration plugins in REAPER, which has made a noticeable difference in the consistency of my results across different devices. My question is: do you think future advances in AI could automate calibration processes further, making precise monitoring more accessible to hobbyists and small producers? I’d love to hear others’ thoughts on integrating new tech with traditional calibration routines.