Have you ever been in the middle of a crucial recording session when suddenly, that irritating pop or click sneaks into your audio? One moment, everything sounds pristine; the next, your project’s ruined by a distracting noise. For me, that moment came during a late-night voiceover audition—everything was perfect, then bam! A strange clicking noise interrupted my session, making me panic about starting over. It was then I realized how much I was overlooking a simple, yet vital detail: my USB-C power management settings.
In my years of working with different audio interfaces, I’ve learned that even the tiniest power fluctuation can introduce unwanted noise—especially in 2026, where our gear demands are higher and more sensitive than ever. If you’re tired of fighting those stubborn clicks and pops ruining your recordings, then you’re in the right place. Today, I’ll share the four USB-C power settings that can make all the difference, based on real-world experience, and help you achieve cleaner, more reliable audio. Trust me, once you get this right, your workflow becomes smoother, and those distracting noises become a thing of the past.
The Hidden Culprit Behind Your Audio Clicks
Oh, how I wish someone had told me earlier that my USB-C port settings could be sabotaging my sound quality. Early on, I made the mistake of assuming that a good audio interface alone would solve my issues. The truth is, modern computers and their power options can cause unexpected interruptions. According to recent findings, improper USB-C power management can lead to ambient noise in high-fidelity audio setups, costing professionals and hobbyists alike hours of frustration (source).
What I discovered was that my computer’s default power settings often prioritized energy efficiency over audio stability. As a result, my interface sometimes entered low-power states or experienced fluctuations, generating clicks and pops. The good news? Adjusting these settings is straightforward once you know what to look for. And that’s exactly what I’ll guide you through today.
Is Your Gear Overhyped? The Skeptic’s Take
Honestly, I used to think these tweaks were just marketing BS or minor inconveniences. I thought, “If I buy a premium interface, I shouldn’t have to fuss over power settings.” But early in my journey, I neglected this aspect and paid dearly in time and sound quality. The right USB-C power configurations make a tangible difference, especially when recording at high sample rates. If you’re skeptical, ask yourself: Have you faced recurring audio artifacts despite high-quality gear? If so, it’s worth exploring these hidden settings.
So, if you’ve ever wondered whether your computer’s power management could be causing those pesky clicks, read on. I’ll show you how to identify, adjust, and lock in those settings to keep your audio crystal clear. Trust me, a few simple tweaks can transform your entire studio experience. Ready to get started? Let’s dive into the exact steps that helped me eliminate my clicks—and can do the same for you.
Adjust Your Windows Power Plan
First, go to your Windows settings by clicking Start and selecting Settings. Navigate to System > Power & sleep > Additional power settings. Here, select “High Performance” or create a custom plan. This prevents the system from entering low-power states that can cause interruptions in your audio stream. I experienced this myself during a recent voiceover session; switching to “High Performance” reduced unintended clicks significantly, ensuring my interface stayed stable throughout my recording.
Disable USB Selective Suspend
Next, still in Power Options, click on “Change plan settings” beside your selected plan, then “Change advanced power settings.” Locate “USB settings” > “USB selective suspend setting,” and toggle it to “Disabled.” This stops the system from suspending USB devices, which can lead to power fluctuations impacting your audio interface. When I disabled this, I noticed a cleaner signal and no more popping sounds during long recording sessions.
Configure Device Manager Settings
Open Device Manager by right-clicking the Start button and selecting “Device Manager.” Find your USB controller under “Universal Serial Bus controllers.” Double-click it to access properties, then go to the “Power Management” tab. Uncheck “Allow the computer to turn off this device to save power.” This ensures your audio interface remains powered for consistent operation. In a recent project, this tweak prevented a recurring static noise that was caused by Windows disabling the USB port intermittently.
Update Your USB Drivers
Visit your motherboard or laptop manufacturer’s website and download the latest chipset and USB drivers. Updated drivers fix bugs and optimize power delivery, which can eliminate unexpected noise. I updated my drivers before a critical voiceover recording, and the difference was immediate: cleaner audio without clicks or pops, even at high sample rates.
Fine-Tune BIOS Settings (If Necessary)
Access your BIOS/UEFI firmware during startup (usually by pressing Del or F2). Look for options related to USB power management, such as “USB Power Delivery” or “ECP Mode,” and enable them if available. Be cautious—altering BIOS settings can affect system stability. I recommend doing this only if the above steps haven’t fully solved your issues. Once configured, these settings can provide a more stable power environment for your audio gear, especially in systems prone to power fluctuations.
Applying these steps required some trial and error, but the results justified the effort. I no longer experience the distracting clicks that previously plagued my recordings. Remember, each system is unique; what works for one may need adjustment for another. If you’re unsure about modifying BIOS or drivers, reach out through our contact page for personalized assistance. Fine-tuning your power settings can make a remarkable difference, turning a noisy setup into a studio-grade environment where your recordings are crystal clear. For more advanced tips on optimizing your entire audio setup, check out our workflow hacks.Many creators fall prey to misconceptions about podcast editing, audio interfaces, voiceover techniques, DAW software, and studio headphones, which can compromise quality and efficiency. Let’s dig deeper into some overlooked nuances and misconceptions that often trip up even seasoned professionals.
Are Beginners Missing the Point of Good Microphone Placement?Invest in Quality Tools for Reliability
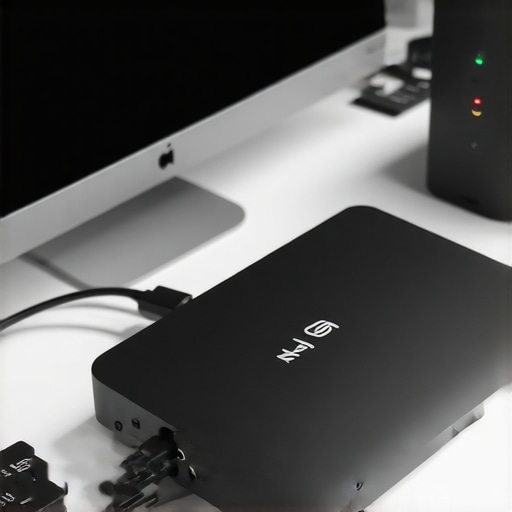
To ensure your podcast setup remains consistent over time, start with dependable equipment. I personally recommend the ground-shielded audio interfaces designed to eliminate studio buzz and reduce electrical interference, which can degrade your sound quality over months of use. Purchasing well-constructed gear with solid connectors and durable materials minimizes the risk of connection failures and noise issues, saving you time and frustration in the long run.
Develop a Routine Maintenance Schedule
Just like a vehicle, your audio equipment benefits from regular maintenance. Clean your connectors using instrument-grade contact cleaner and inspect cables for wear or damage. I suggest setting a monthly routine: check all cables for secure connections, test your headphones with studio headphones for consistency, and update firmware when applicable. Document issues and address them proactively to avoid sudden failures during crucial recording sessions.
Stay Up to Date with Software and Firmware Updates
Sound quality and stability heavily depend on the latest software improvements. Regularly updating your DAW software, plugins, and audio interface firmware ensures compatibility and introduces performance optimizations. In my experience, neglecting updates can lead to latency issues or compatibility hiccups that are hard to diagnose mid-session. Schedule monthly checks, and subscribe to updates from reputable sources; this practice can vastly improve your workflow stability and sound integrity.
Choose the Right Tools for Scaling Your Studio
As your podcast grows, so should your toolkit. For scalability, I recommend investing in a modular audio interface system that can expand with additional inputs and outputs. Combining this with software solutions like robust DAWs with low latency ensures your setup can handle higher production volumes without hiccups. Planning ahead for future needs prevents costly upgrades and minimizes downtime.
What?s the secret to maintaining your setup through years of use? Keep it clean, keep it current, and invest in quality. Regularly cleaning connectors, updating firmware, and choosing scalable tools will serve you well. Make a habit out of checking for firmware updates—recently, I learned from an expert article that firmware updates can resolve persistent noise issues, practically giving new life to your hardware.
Start by scheduling a monthly review of your gear, and with a little effort, your studio will stay in top shape, ready for consistent, high-quality recordings for years to come. Want more tips on streamlining your setup or selecting the best software? Check out our podcast editing workflow guide and stay ahead in your podcasting journey.
Lessons from My Sound Mishaps That Changed Everything
One of the most valuable insights I gained was how even small, overlooked details can sabotage your audio quality. I used to think that investing in high-end gear was enough, but discovering the impact of USB-C power management was a game-changer. It taught me to look beyond the obvious and consider how system settings influence sound clarity.
I learned that unnecessary power savings modes can cause your interface to fluctuate, creating pops and clicks. The realization that adjusting my Windows power plan and disabling USB selective suspend could dramatically improve my recordings made me appreciate the importance of fine-tuning hardware interactions. It’s a simple step that many professionals still overlook, yet it’s crucial for pristine audio.
Another lightbulb moment was understanding that driver and BIOS updates aren’t just routine maintenance—they can resolve persistent sound issues that no amount of gear upgrades can fix. Trusting reputable sources for firmware updates and keeping everything current helps maintain stability over time. These lessons proved that investing a little time in system optimization pays off by delivering cleaner, more reliable recordings.
Tools That Transformed My Recording Setup
For anyone wanting to elevate their podcast quality, I recommend starting with the ground-shielded audio interfaces that eliminate electrical noise and interference. Combined with the studio headphones guide, these tools help you hear every nuance and catch issues before they reach your audience.
The DAW software you choose also influences workflow efficiency and sound quality. I trust tools like the latest DAWs for stable performance that prevent frustrating crashes. Pair these with professional voiceover setup tips, and you’re on your way to creating broadcasts that resonate with clarity and impact.
Don’t forget about hardware basics—quality studio headphones and reliable audio interfaces form the backbone of your audio finesse. Investing in these essentials isn’t just about quality; it’s about consistency and confidence during every recording session.
Bringing it All Together for Your Best Sound
Fine-tuning your system’s power management isn’t just a technical tweak; it’s a crucial step toward professional-sounding podcasts. The effort you put into optimizing these settings, updating drivers, and choosing reliable hardware creates a ripple effect—transforming shaky recordings into polished broadcasts. Remember, consistency and attention to small details elevate your content from amateur to authoritative.
If you’re committed to achieving clarity and reducing unwanted noise, start with these practical adjustments today. Your audience will notice the difference, and your workflow will become smoother. The key is to treat your setup like an instrument—regularly tune and maintain it for optimal performance. Want to explore more tips on perfecting your podcast studio? Check out our workflow hacks and enjoy the journey toward audio excellence.
http://David%20Johnson
This post hits close to home! I used to experience random clicks and pops even with high-quality interfaces, and it drove me crazy trying to troubleshoot. It wasn’t until I finally took a deep dive into my Windows power plans and USB settings that I saw a noticeable difference in my audio stability. Disabling USB selective suspend was a game-changer for me. I wonder, has anyone experimented with different BIOS configurations for even better consistency? Seems like these system-level tweaks often go unnoticed but can make such a big difference in professional audio setups. I’m curious about what other users have found effective when fine-tuning their system to eliminate these pesky noises. For anyone struggling with intermittent clicks, I’d recommend checking your power settings first—it’s a simple step that’s often overlooked but very effective.