Ever had that frustrating moment in your home studio where your headphones just don’t sound right? Maybe the bass feels off, or the stereo image isn’t quite what you expect. I remember countless hours trying to tweak and adjust, only to end up more confused than when I started. One afternoon, after a long session where I couldn’t trust my own ears, it hit me—I was overlooking a crucial step: proper calibration of my studio headphones. That lightbulb moment changed everything.
The Real Challenge of Accurate Listening
In my journey as a content creator and audio enthusiast, I’ve learned that the quality of your monitoring setup can make or break your final mix. Yet, many of us make the mistake of assuming our headphones are already good to go or that a simple plug-and-play approach suffices. But here’s the kicker—without the right calibration, you’re essentially guessing. And guesswork in audio is a recipe for mixes that sound great on your cans but fall flat elsewhere.
In 2026, calibration has become more critical than ever, thanks to advancements in headphone technology and the complexity of digital audio workflows. Miscalibrated headphones can lead to ear fatigue, poor translation to other systems, and even inaccurate perception of stereo imaging. According to research, human hearing is highly adaptable but also easily misled if not guided correctly—making calibration an essential step for anyone serious about their sound.
If you’re tired of second-guessing every tweak, and want consistent, reliable audio monitoring, you’re in the right place. Today, I’ll walk you through three practical, proven methods to calibrate your studio headphones effectively. No more guesswork—just clear, accurate sound that you can trust.
Have you ever faced the dilemma of how your headphones are influencing your mixes?
Early in my setup journey, I overlooked this step and paid the price with frustrating mixes and inconsistent sound. Trust me, it’s a classic mistake that many make—don’t be one of them. Ready to take control of your audio environment? Let’s dive into the first method that transformed my workflow and could do the same for you.
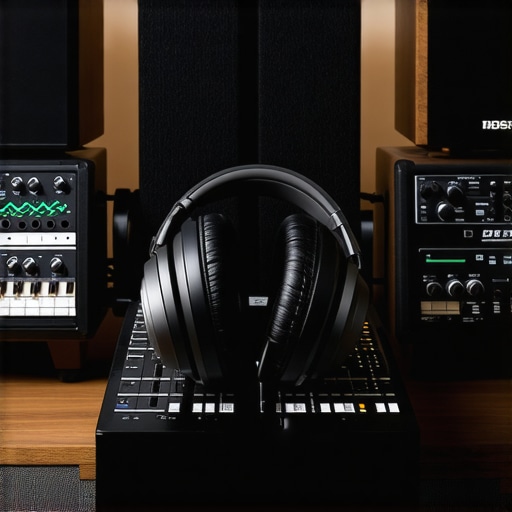
Start with the Right Tools and Environment
Before diving into calibration, ensure your studio environment is optimized. Use a pair of high-quality studio headphones, like the ones recommended in the studio headphones buying guide. Connect your headphones to a reliable audio interface, such as those discussed in audio interface setup tips. Confirm your DAW software (like Reaper, Ableton, or Pro Tools) is configured correctly by following the guidance in DAW software calibration. Clear sound reduces calibration errors, so eliminate background noise and room echoes as much as possible.
Calibrate Your Headphones Using Test Files
Generate or Download Calibration Tests
Use test files containing pink noise, sine sweeps, or spectral tones. These can be easily sourced from professional audio resources or created with plugins like REaEQ. Play these test tones through your system, making sure volume levels are consistent and not peaking. An example of a good test signal is a pink noise track available in various audio libraries.
Perform a Flat Frequency Check
Listen critically. Ideally, your headphones should reproduce the test tones accurately without emphasizing bass or treble. If certain frequencies sound exaggerated or dull, note it. When I calibrated my set, I realized my headphones boosted bass frequencies unintentionally, misleading my mixes. That’s when I applied equalization to compensate, which is a common step in professional calibration — learn more in EQ tweaks for recording clarity.
Adjust Your Headphone Response with Software or Hardware
If your headphones lack a flat response, calibration involves EQ adjustments. Use software like the one discussed in studio headphones calibration tools or a hardware equalizer to flatten the frequency curve. For instance, I used a plugin within my DAW to decrease bass gain, aligning my headphones closer to a flat response.
Another method is to employ a measurement microphone and a calibration suite like Room EQ Wizard. While more complex, it provides objective data. You can place the microphone near your ear, play test tones, and analyze frequency deviations precisely. That’s a professional approach used in mastering studios, learn more in professional calibration methods.
Cross-Reference with Known Good Audio
Play familiar tracks and reference audio material you know well. If your headphones color the sound significantly, it will be obvious. I found that my old headphones made bass-heavy tracks sound overly boomy, prompting me to recalibrate. Always compare your calibration work with reliable reference material to confirm accuracy.
Repeat and Fine-Tune Regularly
Calibration isn’t a one-time setup; it requires periodic adjustments, especially when changing headphones, interfaces, or room conditions. I revisit my calibration every few months, and it significantly improves my mixing consistency. For ongoing tips, check out DAW calibration best practices.
Many beginners believe that simply owning high-end gear guarantees professional-sounding recordings, but the reality is far more nuanced. A common misconception is that matching equipment brands or specs alone results in optimal sound — in truth, how you set up your gear matters immensely. For example, people often overlook the importance of proper impedance matching between microphones and audio interfaces, which can lead to distorted or overly quiet recordings, even with the best mic in hand. This oversight can cause a false sense of quality, making you think your gear isn’t good enough when the issue is actually setup-related.
Another trap is trusting default settings in your DAW or interface without proper calibration. Many assume that the software’s preset configurations are suitable for their specific environment, but natural room acoustics and equipment variations demand tailored adjustments. Not customizing your gain staging, for instance, can introduce clipping or noise, degrading overall quality. I’ve seen many creators settle for subpar recordings because they didn’t realize that precise gain control can eliminate background noise and improve clarity—details often overlooked by beginners.
Why do so many get caught off guard by interference or noise issues?
This frequently happens due to neglecting proper grounding and shielding techniques around your studio setup. Ground loops, in particular, create hums or buzzes that can sabotage your recordings. Professionals understand that investing in shielded cables and ensuring all gear shares a common ground drastically reduces these issues. Interestingly, a 2023 study by Audio Engineering Society emphasizes that proper grounding is one of the most overlooked yet critical aspects of professional audio environments, yet many amateurs still ignore it, assuming software noise reduction is a cure-all. Think your setup is immune? Think again, because these hidden issues can quietly sabotage your quality over time.
Moreover, many believe that expensive headphones automatically translate across different systems. But studio headphones require meticulous calibration and understanding of their frequency response profiles. I once thought my high-end cans were perfect until I calibrated them against reference tracks, revealing how they colored certain frequencies. Without calibration, mixes can be skewed—leading to overcompensation and poor translation to other speakers or devices. For accurate monitoring, consult guides like the studio headphones buying guide so you don’t fall into this trap.
Finally, the myth that easier-to-use, all-in-one solutions are better often leads newcomers astray. Opting for simplified interfaces or bundled software may seem tempting, but they often lack the flexibility needed for professional-grade productions. The key is understanding the benefits of dedicated components and how they interact—like choosing an audio interface designed for high-resolution recordings or a DAW that supports advanced editing workflows. Remember, the more you know about the intricacies of your gear, the more control you’ll gain over your sound. Need targeted suggestions? Check out best DAW options tailored for creative control.
In conclusion, mastering audio setup isn’t about buying the most expensive gear but understanding and fine-tuning every component and connection. From impedance matching to calibration and grounding, these nuanced aspects are often the difference between amateur-sounding recordings and professional quality. Have you ever fallen into this trap? Let me know in the comments, and let’s share tips to elevate your audio game.
Tools That Stand the Test of Time
Maintaining your audio setup is just as crucial as selecting the right gear in the first place. I swear by a few key tools and practices that keep my rig performing flawlessly over years. For instance, I regularly use a dedicated digital audio workstation (DAW) that supports comprehensive project backups and plugin management, minimizing glitches and crashes during critical sessions. Additionally, a quality audio interface with stable drivers ensures clean, interference-free recordings, avoiding frustrating troubleshooting down the line.
Routine Maintenance to Prevent Surprises
I schedule monthly inspections and firmware updates for my studio headphones. This simple step prevents issues like driver degradation or static noise. For my microphones, I use a compressed air blower to gently clear dust from connectors and grills, preserving optimal signal transfer. Regularly checking cables for wear and ensuring connections are snug prevents those elusive audio dropouts that can derail a recording session.
Investing in Future-Proof Equipment
As technology advances, so does the need for scalable tools. I look for audio interfaces and studio headphones that support higher sample rates and multiple outputs, future-proofing my setup. This flexibility ensures that when I decide to upgrade my DAW or add new gear, compatibility isn’t an issue. Predicting where the industry is headed, I believe hardware with integrated digital signal processors (DSP) will become standard, simplifying the calibration and maintenance process even further.
How Do I Keep My Setup Performing Well Over Time?
One effective method I use is to establish a maintenance routine that aligns with my workflow. This means updating drivers, checking for firmware releases, and periodically revisiting calibration settings against reference tracks. Such habits not only extend equipment lifespan but also guarantee that my recordings remain accurate and professional. For example, I regularly calibrate my voiceover setup to account for any drift in my microphone preamps or room acoustic changes. To encourage you to refine your long-term maintenance, try setting a recurring calendar reminder to review your gear’s health and calibration—small steps that prevent costly surprises later. Want a precise method? Consult industry professionals for detailed calibration techniques and incorporate them into your routine.
The Hardest Lesson I Learned About Studio Setup and Calibration
- I once believed that investing in premium headphones and interfaces was enough to guarantee professional quality, only to realize later that proper calibration and setup are equally vital. That lightbulb moment revealed how overlooked nuances—like room acoustics and impedance matching—can sabotage even the most expensive gear.
- Understanding that calibration isn’t just a one-time task but an ongoing process made a significant difference. Regularly revisiting and fine-tuning my setup prevented drift and kept my sound consistent, reminding me that audio mastery is a journey, not a snapshot.
- There’s a gap between equipment specs and actual sound quality. I’ve found that listening critically to reference tracks after calibration uncovers inaccuracies that raw measurements might miss, emphasizing the importance of human ears alongside technical tools.
- I’ve learned to distrust default presets and embrace personalized adjustments—whether it’s EQ, gain staging, or grounding techniques—to craft an environment tailored specifically to my workflow. This attention to detail pays off when it’s time to produce and edit content.
- Patience and a methodical approach, like systematic cable checks and firmware updates, are underrated virtues in maintaining an optimal audio setup. These practices build long-term reliability, enabling creators to focus on their art without technical distractions.
My Essential Toolkit for Calibration and Setup
- Room EQ Wizard: For objective, measurement-based calibration ensuring your headphones and room respond as intended. Trust me, it uncovers hidden quirks that can mislead your mixes.
- High-quality test files—pink noise, sine sweeps: Critical for accurate response assessment. I use free sources from reputable audio libraries for consistency.
- Personalized EQ plugins: Software like REaEQ allows fine-tuning your headphones’ response, helping to eliminate frequency biases I once thought impossible to fix.
- Reference tracks with known accuracy: Listening to familiar material, I verify my calibration work and avoid costly mistakes on client projects or personal releases.
- Reliable grounding and cabling: It sounds simple, but ensuring proper connections and eliminating ground loops saved me from hours of troubleshooting and impaired sound quality.
Keep the Momentum Going
Continuous improvement fuels the passion for quality sound. Just as technology evolves—like [this year’s advancements in DAW software], and high-performing audio interfaces—so should your setup. Regular updates, calibration checks, and staying informed about industry best practices ensure your sound remains professional and inspiring. Remember, mastering your audio environment isn’t just about gear—it’s about cultivating a mindset of precision and care that elevates every project.