Have you ever been in the middle of a crucial mixing session, only to realize your ears are betraying you? Maybe you spend hours tweakingEQ, only to come back later and wonder whether the sound was just your imagination. I vividly remember those frustrating moments—my ears fatigued, my judgment clouded, and me questioning everything I’ve worked on. It hit me one day during a late-night editing session: my studio headphones might be part of the problem.
Why Headphones Can Make or Break Your Mix
Needing clarity and neutrality in our monitoring isn’t just a luxury—it’s a necessity. But as I discovered, not all headphones are created equal. Over time, I learned that some models subtly color the sound, leading to what’s known as “mixing fatigue.” It’s that sneaky fatigue where your ears start to deceive you, causing you to overcompensate or, worse, ruin a perfectly balanced track. Recognizing this was a lightbulb moment. According to audio expert Ethan Winer, “monitoring with inaccurate headphones can cause your mixes to sound off on other systems, undermining your entire workflow” (source).
My mistake early on was choosing headphones based solely on comfort or brand reputation, ignoring their tonal accuracy. I thought I could get away with it, but my ears knew better. That’s why I started searching for a solution—neutral headphones that wouldn’t lie or fatigue my ears after hours of work. And I have to say, the right pair made a world of difference.
Do you find yourself second-guessing your mixes after a long session?
If you’ve experienced that nagging doubt, stay tuned. We’re about to explore the top 5 neutral studio headphones for 2026 and how they can transform your audio projects. Whether you’re crafting podcasts, mixing music, or doing voice-over work, having accurate, fatigue-free monitoring can elevate your entire production process. Ready to say goodbye to mix fatigue and hello to precision? Let’s dive in.
.
Set Up Your Digital Audio Workstation Correctly
Start by choosing a DAW that suits your needs; for example, consider the best DAW options for music production. Install it on a dedicated machine if possible, and ensure all plugins are updated to prevent compatibility issues. Open your project and organize your tracks logically—layer vocals, instruments, and effects in the order you plan to mix them, avoiding clutter that hampers workflow.
Configure Your Audio Interface for Optimal Performance
Next, connect your audio interface following the manufacturer’s instructions. Use a high-quality USB or Thunderbolt connection to reduce latency, and set your buffer size low enough for real-time monitoring without glitches. Assign your input and output channels properly in your DAW’s audio settings to match your interface’s configuration.
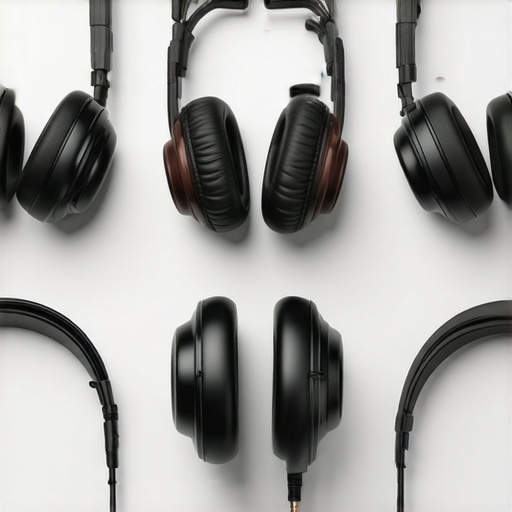
Choose Studio Headphones for Accurate Monitoring
Select a pair of neutral studio headphones that don’t color the sound. For example, models that deliver flat frequency responses help you hear your mix as it truly is, avoiding misjudgments that cause later adjustments. Once you have your headphones, calibrate them: play pink noise and compare the output with reference tracks to ensure consistent soundstage and frequency response. Avoid mixing with headphones that induce fatigue; your ears need to stay sharp during long sessions.
Optimize Your Microphone and Voiceover Setup
If recording voiceovers, position your microphone correctly—around 6–12 inches from the mouth with a pop filter. Use a suitable microphone and appropriate preamp for clarity. Set input gain to avoid clipping, and record in a quiet environment with sound absorption panels to tame echoes. Monitor your recordings through your calibrated headphones, and adjust your microphone placement until the voice sounds natural and free of plosives.
Refine Your Workflow with Efficient Editing Tools
Utilize specialized editing tools like silence trimming, noise reduction, and batch processing to speed up post-production. Create macros or presets for recurring tasks, and organize your files systematically in folders labeled by session, takes, and edits. This minimizes clutter and saves time during the editing phase.
Test and Calibrate Regularly
Perform routine calibration of your headphones and audio interface to maintain accuracy. Use reference tracks on a familiar playlist to compare your mix and detect any colorations or inconsistencies. Remember, maintaining your gear via firmware updates and proper cleaning ensures consistent performance. For more detailed calibration techniques, see the calibration guide linked above.
Applying these concrete steps diligently will fine-tune your entire audio workflow, ensuring each component—from software to hardware—works harmoniously to produce professional-quality results.
When diving deeper into audio production, many professionals operate under assumptions that can limit their growth or even sabotage their results. Let’s explore some prevalent misconceptions and subtle nuances that often go unnoticed, ensuring your workflow is as refined as your ears should be.
Are You Falling for the Myths About DAW Latency and Hooked on Free Plugins?
Many believe that free plugins or lower-priced DAWs inherently compromise quality. In reality, studies, such as those compiled by industry experts, show that the perceived difference often comes down to familiarity and workflow optimization. Over-relying on free tools may cause you to overlook essential features or latency issues that can be mitigated with proper buffer settings, like those discussed in hardware upgrades. Avoid the trap of equating cost with capability; instead, focus on how well the software integrates into your specific project needs.
#IMAGE_PLACEHOLDER_C#
Understanding the realities of audio interface latency and plugin performance is key. Many assume that hardware quality directly correlates with sound quality, but the truth lies in proper configurations and driver optimizations. For example, setting your buffer size too low can cause glitches, or too high can introduce latency that hampers real-time monitoring. Proper calibration and understanding of these nuances can elevate your work, making you less susceptible to common pitfalls.
Switching gears, let’s bust a common myth in podcast editing: that automating every process guarantees perfect sound. While automation is powerful, overdoing it or relying solely on AI can dilute authenticity and introduce strange artifacts, especially if your editing tools aren’t properly calibrated. Check out top podcast editing hacks to understand how balanced manual adjustments combined with automation produce natural results.
#IMAGE_PLACEHOLDER_C#
Moreover, many underestimate the importance of microphone placement and room acoustics. A common mistake is focusing only on gear and neglecting the environment. Using a high-quality mic with poor placement yields worse results than a modest mic in a treated room. For voiceover setups, incorporating diffusion panels or bass traps can drastically improve clarity and reduce echo, as discussed extensively in voiceover setup guides.
While hardware plays a crucial role, it’s essential to recognize the impact of monitoring accuracy. Many users select headphones based on comfort or flashy features, neglecting the flat response needed for mixing to translate well across systems. The misconception that expensive gear automatically equals better results often leads to overspending on flashy equipment while ignoring calibration. Calibrating studio headphones regularly using pink noise and reference tracks—detailed in calibration techniques—can save money and improve accuracy.
In conclusion, the landscape of digital audio workstations, podcast editing, and studio gear is riddled with myths and overlooked details. Understanding these subtleties allows you to avoid costly mistakes and develop a truly professional setup. Have you ever fallen into this trap? Let me know in the comments.
Invest in Reliable Hardware and Stay Updated
For long-term success, choosing sturdy, high-quality equipment is paramount. I personally swear by the best audio interfaces and studio headphones recommended for professionals. Regular firmware updates for your audio interface, such as those detailed in their driver update guide, help prevent compatibility issues and ensure optimal performance. Keeping your gear clean and well-maintained reduces wear and potential failure, translating to fewer disruptions during critical recording or editing sessions.
Implement Routine Calibration Checks
Calibration is often overlooked but vital for maintaining accuracy over time. Using reference tracks, periodically listen on your studio headphones and compare against calibrated monitors or speakers. This practice catches subtle shifts in frequency response caused by wear or environmental changes. Ethan Winer emphasizes that “regular calibration ensures your monitoring environment remains trustworthy,” which is crucial when fine-tuning mixes or voice recordings (source).
Stay Ahead with Tool Maintenance and Software Optimization
Tools like your DAW, plugins, and editing scripts need regular checks for updates and compatibility. As software evolves rapidly, tools such as smart podcast editing hacks can streamline your workflow, but they require current versions to work effectively. I recommend setting a weekly routine to back up your sessions, verify plugin compatibility, and clear temporary files that can bog down your system. These small steps prevent crashes or lag, especially when working on tight deadlines.
How can you maintain your voiceover setup for longevity?
Proper maintenance extends beyond hardware to include environmental factors. Keep your microphone and preamp in a clean, temperature-controlled space, and perform periodic checks for dust or corrosion, especially if your gear is stored long-term. Monitoring your environment with a simple hygrometer can prevent moisture build-up that degrades gear performance. Also, treat your room acoustically—a well-absorbed space reduces strain on your equipment and improves sound clarity. For detailed setup tips, explore this comprehensive guide.
Conclusion
Maintaining your equipment and tools isn’t glamorous, but it’s the backbone of consistent, professional-quality audio. By investing in durable gear, performing routine calibration, and staying current with software updates, you’ll keep your studio running like a well-oiled machine. Remember, small daily habits prevent big problems down the line. Pick one tip today—perhaps your calibration routine—and make it part of your regular workflow. Ready to dive deeper? Consider exploring the ultimate guides on DAW setup and optimization to take your setup further.
Lessons I Wish I Learned Sooner
- Investing in neutral, accurate headphones transformed my mixing experience, saving countless hours of second-guessing and rework. I realized that comfort isn’t enough; clarity and response accuracy are essential for professional results.
- Routine calibration of my gear wasn’t just a technical task—it became a vital part of maintaining trust in my monitoring environment. Recognizing subtle shifts early prevented me from making compounding mistakes in my mixes.
- Understanding that software and hardware are interconnected, I wish I had prioritized learning about buffer settings and driver optimizations earlier. Small tweaks here dramatically reduced latency issues and improved my workflow efficiency.
- Being skeptical of myths surrounding expensive gear or free plugins pushed me to focus on proper setup and environment, ultimately producing better audio quality than just throwing money at the problem.
- My biggest breakthrough was realizing that environmental influences—room acoustics and microphone placement—are just as crucial as high-end gear. A well-treated space and thoughtful mic positioning amplified my recordings’ clarity and warmth.
Tools That Changed My Workflow
- Reference Tracks: Consistently using well-known tracks as benchmarks helped me judge my mixes objectively. I trust them because they reflect industry-standard sound profiles and push me toward accuracy.
- Calibration Software: Apps like calibration guides provide step-by-step procedures that I follow regularly. They ensure my gear remains true to its specifications and my mixes translate well across systems.
- Quality Monitoring Equipment: I rely on flat-response studio headphones and calibrated monitors, which I selected after thorough research—these tools keep my listening environment honest and my decisions dependable.
- Efficient Editing Tools: Utilizing specialized plugins and macros from post-production shortcuts has slashed editing time, allowing me more focus on creative aspects rather than technical drudgery.
Keep the Momentum Going
Embarking on this journey of audio mastery is an ongoing process. Embrace the learning curve, invest wisely in your gear, and stay curious about best practices. Your dedication today will pay off in the clarity, punch, and professional polish of your recordings tomorrow. Remember, the right tools combined with consistent habits can elevate your sound in ways you’ve never imagined.
What’s the first step you’re excited to implement to improve your audio setup? Share your plans below—I’d love to hear how you’re taking your studio to the next level!
,