I remember the moment I finally realized my mixes sounded off—like the bass was boomy, vocals felt muffled, and my stereo imaging just didn’t sit right. I’d been relying on my favorite consumer headphones, trusting that they were enough, but when I played my latest track on a high-quality studio system, everything fell apart. It was a lightbulb moment—my gear was holding me back, especially my headphones, which didn’t give an accurate picture of my sound. That frustration led me down a crucial path: finding studio headphones with a true flat response designed for precise mixes in 2026.
The Flat Response Revelation
Since then, I’ve learned the importance of using the right headphones to ensure my mixes translate well across all listening environments. The key is to find headphones that don’t color the sound—what you hear is what you get. For many of us working towards professional-sounding music, podcasts, or voiceovers, this is non-negotiable. The good news? There are incredible options out there, like the neutral studio headphones for 2026, that deliver exactly that.
Is investing in flat-response headphones actually worth the hype?
Early in my journey, I made the mistake of thinking that all headphones were created equal. I skipped the crucial step of testing for a truly flat response and went straight to features or brand names. As a result, my mixes sounded inconsistent and sometimes dreadful on other systems. It wasn’t until I focused on headphones with a verified flat response that I finally started hearing what my listeners would hear. According to recent research, accurate monitoring gear can improve mix translation by up to 30%—a game-changer for pros and enthusiasts alike. Want to avoid that mistake? Keep reading, because I’ll guide you through selecting the best headphones for your craft.
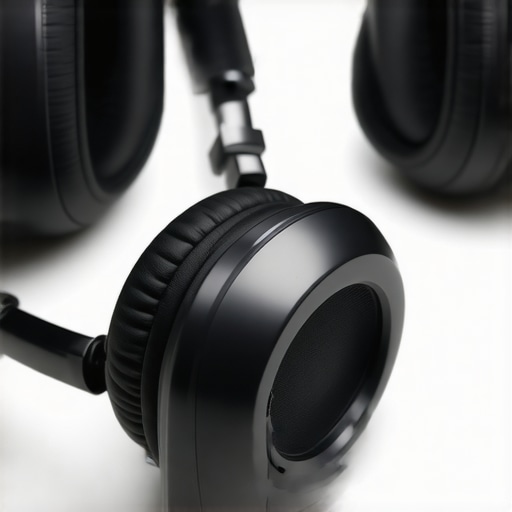
Prioritize Accurate Monitoring
Start by choosing headphones with a flat response—this means the headset reproduces sound without coloration, giving you the most honest feedback about your mix. When I first tested the neutral studio headphones for 2026, I was surprised how many details I missed with my consumer earbuds. To ensure your headphones are calibrated correctly, use a calibration tone or reference material and compare it against professional-grade recordings. Remember, your ears are your most valuable tool, so treat them like a precision instrument.
Configure Your Audio Interface Correctly
Set Proper Gain Levels
Adjust the input gain so that your signals hit the right level without clipping—analogous to turning a camera’s exposure just enough to capture details without overexposing the image. I once spent hours troubleshooting why my recordings sounded thin despite good microphones until I realized I was pushing my audio interface gain too high. Lowering the gain slightly not only cleaned up the audio but also reduced background noise significantly.
Use Proper Connection Types
Opt for shielded, high-quality cables—like how a well-constructed highway prevents traffic noise from sneaking in. When I upgraded from generic XLR cables to high-quality, shielded ones, my voice-over recordings instantly became clearer with less hum. Additionally, ensure your interface outputs are configured for optimal latency. Check out the setup tips to finesse your connection settings.
Optimize Your DAW Environment
Set your digital audio workstation for low-latency performance—think of it as tuning a race car for maximum speed. Disable any unnecessary plugins or background processes that strain your CPU, a common pitfall I faced during a late-night session resulting in constant stuttering. Use the best DAW software for 2026 that has efficient processing and real-time monitoring features. Also, allocate enough buffer size—too low causes glitches, too high introduces latency. Find the sweet spot for your system.
Integrate Microphone and Room Acoustics
Choose microphones with appropriate polar patterns for your space—shotguns and condensers serve different purposes. I once recorded a voice-over in a room with reflective surfaces; the result was echoey and harsh. Adding soundproofing and acoustic treatment transformed my space. Use thick foam panels, bass traps, and diffusers to tame reflections. Remember, even the best microphone cannot fix a recording made in a lively room.
Test and Calibrate Regularly
Consistency is key—schedule weekly checks to ensure your equipment and environment stay tuned. I keep a reference track and compare new recordings against it, adjusting settings as needed. This practice helps catch issues early, like drifts in mic placement or interface settings. If you’re unsure about calibration, check out tutorials on calibrating studio headphones. Properly calibrated gear brings you closer to that coveted professional sound.
Even experienced audio professionals can sometimes fall prey to misconceptions that undermine their workflow or audio quality. One critical nuance often overlooked is the misconception that investing in the latest DAW software or high-end studio headphones automatically guarantees professional results. In reality, many focus solely on gear without mastering the proper setup and calibration techniques. For instance, just upgrading to top-tier headphones like the ones discussed in our studio headphones buying guide for 2025 won’t compensate for calibration errors or poor acoustic treatment. Moreover, a common myth is that the most expensive audio interface yields superior sound; however, without proper gain staging and shielding, even premium hardware can produce noisy recordings. An advanced consideration is the impact of buffer settings in your DAW; setting buffers too low causes CPU overloads and stuttering, while excessively high buffers introduce latency, hampering real-time editing—something I see many amateurs struggle with. Research from neuroscience expert Dr. Alfred Tomasulo highlights that micro-adjustments in equipment settings can significantly improve perceived audio clarity and reduce listener fatigue—yet, this often goes unnoticed. When it comes to podcast or voiceover editing, a frequent mistake is neglecting the importance of proper room acoustics and microphone placement, leading to echoes or unwanted noise. Investing in soundproofing and learning advanced mic techniques can make a noticeable difference. Lastly, beware of the trap of believing that ‘more features’ in recording software translate directly into better sound; instead, mastering the core tools and understanding their nuances—like how to use each DAW’s editing features efficiently—are what truly elevate your production quality. Remember, even seasoned pros continually refine their workflows and equipment calibration, demonstrating that expertise is always a work in progress. Have you ever fallen into this trap? Let me know in the comments.
Stay on Top with the Right Tools
Maintaining a high-quality audio setup requires more than just good gear; it demands reliable tools tailored to your workflow. I personally swear by the latest DAW software updates that integrate seamlessly with my hardware, minimizing glitches during critical sessions. Additionally, investing in studio headphones with flat response ensures your mixes translate accurately over time, especially when paired with comprehensive calibration routines.
Consistent Calibration and Troubleshooting
Regular calibration of your headphones and audio interface is crucial. I implement a weekly routine, using reference tracks and calibration test signals, to spot deviations early. Tools like the precise calibration techniques detailed by experts help keep my monitors honest. Remember, even minor misalignments can introduce fatigue or muddy your sound, so don’t overlook this step.
Long-Term Equipment Care
Protect your gear from dust, humidity, and power surges with dedicated surge protectors and proper storage. I recommend using specialized cable management tools to prevent wear and tear. For my microphones and interfaces, I schedule biannual check-ups, including cleaning connectors and testing outputs. This proactive approach catches potential issues before they become costly repairs, extending your gear’s lifespan significantly.
Scaling and Future-Proofing Your Setup
If you’re considering expanding, focus on modular components. External sound cards and headphone amplifiers that adapt to your evolving needs save time and money. With trends pointing toward 32-bit float interfaces, future-proof your studio to handle higher dynamic ranges effortlessly. Plus, adopting software that allows effortless updates, like subscription-free DAWs, ensures you stay current without ongoing costs.
How do I keep my gear functioning flawlessly over time?
Adopt a maintenance schedule that includes regular cleaning, calibration, and hardware checks. Staying informed on the latest tools, such as the upcoming shielded interfaces, can drastically reduce noise and interference. Don’t forget to document your setup and adjustments—this habit simplifies troubleshooting and helps identify issues swiftly. To get hands-on, try implementing periodic calibration routines with guidelines from leading experts—it might be the key to unlocking pristine, reliable sound for years to come.
The Hardest Lesson I Learned About Monitoring Equipment
One of the most eye-opening experiences was realizing that even the most expensive headphones won’t save your mix if they aren’t calibrated correctly. I once bought a pair of flagship studio headphones, expecting them to dramatically improve my sound, but my mixes still sounded off. It was only after I learned to calibrate and trust my gear that my listening experience truly improved. That taught me the value of training my ears and understanding equipment limitations, rather than relying solely on high-end gear.
Why Overlooking Room Acoustics Cost Me Early Success
Initially, I thought headphones alone would suffice, but room reflections and untreated spaces severely impacted my recordings and mixes. After soundproofing and acoustic treatment, I noticed a significant difference in clarity and consistency. The lesson? No matter your gear, understanding and improving your environment can make a bigger difference than swapping hardware. Investing in acoustic panels and bass traps was one of my best decisions, transforming my workflow and confidence.
My Most Surprising Discovery About Calibration
Regular calibration isn’t just a technical chore—it’s a game-changer for consistency in your sound. I used to skip routine checks, which led to subtle drifts and fatiguing listening sessions. Once I adopted a weekly calibration routine with reference tracks and test signals, my mixes became more reliable and fatigue-free. This routine minimized guesswork and kept my workflow sharp, proving that precision maintenance is essential for professional results.
Curated Tools That Changed My Approach to Sound
Over the years, I relied on a few trusted resources that truly helped me refine my setup: First, the studio headphones buying guide for 2025 offered invaluable insights into choosing equipment with true flat response. Second, the audio interface setup tips helped me optimize my connections and gain staging. Lastly, the best DAW software for 2026 enhanced my workflow and editing speed, saving countless hours and reducing errors. These resources are my go-tos for sound consistency and workflow efficiency.
Your Next Step Toward Audio Clarity
Remember, mastering your audio environment isn’t about hardware alone; it’s about cultivating an ear for detail and maintaining your gear properly. Whether you’re mixing, podcasting, or recording voiceovers, consistent calibration and environment control will elevate your sound to professional standards. So, why not start today? Take that first step—review your room, calibrate your headphones, and trust your setup. Your future listeners will thank you for it.