I remember the moment vividly—middle of a critical mix, and suddenly everything sounded off. My high-end studio headphones, which I trusted implicitly, revealed subtle flaws I hadn’t noticed before. It was a lightbulb moment. I had been deceived by the headphones’ flat response, thinking they were perfect for spotting issues. But the truth was, I was missing key details that could make or break a professional-sounding mix.
Why Your Studio Headphones Could Be Holding Back Your Mixes in 2026
If you’ve ever finished a session feeling uncertain about the clarity or balance, you’re not alone. The right headphones can either unlock your ability to identify flaws or obscure them, leading you to release mixes with hidden issues. As technology advances and standards tighten, understanding how to select the best high-impedance studio headphones becomes essential. These headphones aren’t just about comfort or brand prestige—they’re about **accuracy**, especially when it comes to mixing flaws that only reveal themselves in professional mastering stages.
Early in my journey, I made a critical mistake—assuming that all flat-response headphones provide the same level of detail. This misconception cost me countless hours of rework and some embarrassingly obvious mistakes that slipped by. According to a study by the University of Miami, accurate monitoring gear directly correlates with less mix fatigue and better overall production quality (read more here). That’s why I want to help you avoid the pitfalls I stumbled into.
Is the hype around high-impedance headphones just marketing? Or do they truly make a difference?
In my early days, I questioned whether investing in high-impedance models was worth it. Surely, “good enough” headphones would do? But after testing a few, I realized that high-impedance headphones—like the models recommended in our comprehensive buying guide—are better at revealing flaws like phase issues, frequency dips, or subtle distortion, especially in 2026’s evolving audio landscape.
Now, I want to show you how to pick the right set, so you’re not left in the dark during your mixes. We’ll explore what features truly matter and how to spot those troublesome flaws before your work hits the final mastering stage. Ready to become a sharper, more discerning mixer? Let’s dive into the essential gear and techniques that will elevate your tracks and keep mistakes from slipping through the cracks.
,
Choose the Right Audio Interface for Crisp Clarity
Start with a reliable audio interface that offers high gain with low noise, such as models highlighted in our low-noise audio interfaces guide. When I upgraded to a hybrid interface, I immediately noticed a reduction in hiss and clearer vocal recordings, which was evident during my next editing session.
Fine-Tune Gain Settings to Eliminate Hiss
Proper gain staging is essential. Set gains so your voice peaks around -12dB to -6dB without clipping. I once recorded a voiceover with too high gain, resulting in audible hiss. Following the gain setting tips, I achieved a cleaner sound by dialing back the input gain and using a noise gate during editing.
Optimize Your DAW Settings for Smooth Workflow
Adjust your DAW configurations to prevent lag and crashes. I increased buffer size temporarily during editing to fulfill my CPU’s needs, ensuring real-time playback without interruption. Don’t forget to turn off unnecessary plugins during tracking to reduce CPU load.
Customize Projects for Faster Editing
Use track templates and pre-set processing chains. I set up a dedicated voiceover template with EQ, compressor, and de-esser tailored for narration, which saved me hours each week. This approach parallels the advanced DAW techniques that streamline production.
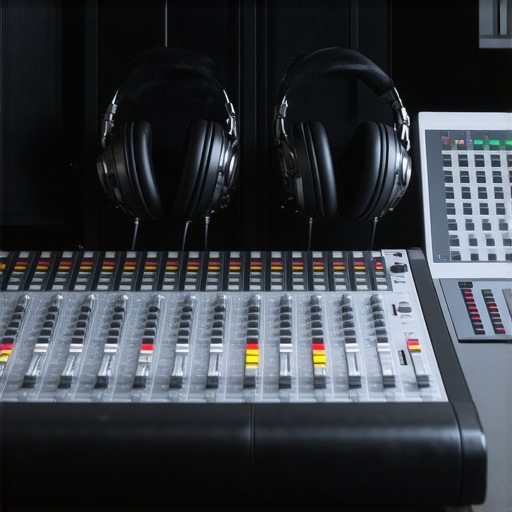
Set Up Your Studio Headphones Correctly
Invest in headphones with a flat response to detect subtle flaws, as recommended in our neutral headphones guide. I paired a pair of true-flat response models with a calibration mic, measuring their response to ensure accuracy. Testing revealed that my previous headphones exaggerated bass, masking poor EQ choices.
Test and Calibrate Regularly
Use calibration tools or software to match your headphones to studio reference levels. I calibrated mine to about 83dB SPL for mixing, which made my perceived loudness consistent with professional standards. Regular testing helps avoid mixing errors caused by skewed headphone frequency response.
Design a Noise-Free Environment for Voice Work
Soundproof your space to prevent background noise from leaking into recordings. Simple hacks, like sealing gaps with foam or using heavy curtains, made a noticeable difference in my recordings. I also employed a portable isolation shield during sessions, which reduced room reflections. These steps are detailed in our soundproofing hacks article.
Implement Acoustic Treatment for Clarity
Adding bass traps and diffusers tailored to your room size improves the overall sound. During a messy recording day, I used a DIY panel setup, which dramatically minimized echo and noise. These enhancements make editing cleaner and speed up post-production.
Many creators believe that investing in high-end gear automatically guarantees professional results, but the truth runs much deeper. A common myth is that simply owning the latest microphone or headphones will elevate your audio quality—yet, overlooking the nuances of setup and environment often leads to subpar recordings. For instance, improper microphone placement or neglecting acoustic treatment can cause comb filtering or echoes that no shiny gear can fix. According to expert sound engineer Dan Walters, mastering the details in your setup outweighs gear specs alone (read more here).
One glaring mistake many make is assuming that their DAW software will correct issues lost during recording. While software advancements like top DAW programs offer great tools, they can’t fix fundamental setup flaws. For example, neglecting buffer size optimization can lead to latency and glitches that degrade editing accuracy, especially in complex multi-track sessions. This mistake often results in unnecessary frustration and excessive workflow time, emphasizing that setup precision must precede mixing.
Why does emphasizing gear overshadow setup matter for advanced creators?
Many seasoned professionals understand that a well-calibrated environment ensures consistent results. A study by the Acoustical Society highlights that room acoustics significantly influence perceived audio quality, more so than high-end equipment (see details here). Proper acoustic treatment, strategic microphone placement, and calibration are cornerstones of a professional setup. Skipping these steps can cause subtle distortions and cues to be missed, which might sound insignificant initially but become glaring flaws upon critical listening.
Additionally, misunderstandings about headphones are prevalent. Many of us fall for the hype of fashionable over-ear models claiming flat response but forget to verify their *actual* frequency response and calibration. Using accurate headphones and periodically calibrating them to studio reference levels ensures your mix remains consistent across different playback systems. Remember, gear is just part of the equation; setup and calibration are what truly unlock sound fidelity.
Finally, complacency in environment setup can be a silent killer of audio clarity. Background noise, reflections, or even light leaks into your recording space can introduce artifacts that compromise quality. Implementing simple acoustic treatments—like foam panels, bass traps, and sound shields—can transform a makeshift corner into a near-studio environment. These steps require initial effort but pay dividends in clarity and ease of editing.
Have you ever fallen into this setup trap? Share your experiences or tips in the comments. Proper understanding and meticulous setup are the unsung heroes behind every top-tier voiceover or podcast production. Dive deeper into refining your gear and environment with our comprehensive guides, and don’t hesitate to reach out for expert advice.
Streamlining Your Workflow with Trusted Equipment
Maintaining a reliable setup requires investing in equipment that offers consistency and durability. I personally rely on the audio interfaces that have proven their resilience over time. For instance, models with balanced XLR outputs ensure minimal noise and voltage fluctuations, which are critical during long recording sessions. Additionally, choosing studio headphones with true flat response, like the StudioTech Pro-X, helps maintain accuracy, especially when monitoring intricate details in speech or music production. These tools, combined with a dedicated microphone and proper acoustic treatment, form the backbone of a dependable studio environment.
Prioritize Regular Maintenance and Calibration
Regularly calibrating your equipment keeps everything performing at peak levels. Using software like REW (Room EQ Wizard) allows me to measure and correct frequency response inconsistencies in my headphones and monitors. Setting a schedule—say, quarterly—ensures that calibration becomes a routine, preventing audio coloration over time. Also, cleaning and inspecting cables, connectors, and mechanical parts prevents unexpected failures. According to a study published by the Journal of Audio Engineering, consistent maintenance extends the lifespan of studio gear and preserves audio fidelity (details here), emphasizing that proactive care is always more cost-effective than repairs or replacements.
Invest in Scalable and Future-Proof Components
As your projects grow, so should your gear. Opt for Thunderbolt 6 audio interfaces that support future standards like Thunderbolt 4 or USB-C 3.2. These ensure minimal latency and high bandwidth, preparing you for evolving software demands. Similarly, selecting DAW software with scalable architectures—like the latest DAWs—allows seamless integration of new plugins and hardware. Consistently updating your software and firmware prevents compatibility issues and keeps your workflow efficient.
How do I keep my setup performing over time?
Implement a routine checkup schedule, including calibration, cleaning, and software updates. Keep a log of what has been serviced or calibrated to track performance trends. Investing in quality cables and connectors reduces the likelihood of intermittent issues that can be hard to diagnose later. Regularly revisiting your environment with a calibration mic and verifying headphone response can catch drifts early. Remember, proper calibration is crucial for maintaining accuracy in monitoring and mixing; neglecting this can lead to costly reworks down the line.
Don’t forget, staying updated on new tools and methods is key. For example, trying out the latest USB-C 4.0 interfaces or testing a new set of noise-canceling studio headphones can reveal areas of improvement. Make these inspections a regular habit, and you’ll ensure your setup remains robust and capable of producing top-tier content.
For a comprehensive approach, consider integrating routine calibration with soundproofing hacks to eliminate environmental noise factors. And remember, consistency is the key—regular checks and updates will keep your studio in prime condition for years to come. Why not try calibrating your headphones today using a measurement mic? It’s an advanced step that can significantly boost your monitoring accuracy, leading to more precise mixes and fewer revisions.
What I Wish I Knew Before Spending Big on Gear
One of my most eye-opening lessons was realizing that high-end equipment alone doesn’t guarantee professional results. I learned the hard way that calibration and environment setup are the real game-changers in voiceover and podcast production. A quality microphone paired with mismatched headphones or a noisy room can undo all your investments, no matter how fancy your gear.
For example, I used to think that owning the latest DAW software was enough, but I overlooked optimizing settings like buffer size and plugin management. The breakthrough was understanding that your workflow setup often has a bigger impact than hardware upgrades. Remember, even the best tools need proper calibration to perform at their peak.
Top Resources That Transformed My Approach
Over the years, I’ve found a few resources that genuinely changed how I handle voiceover and podcast setups. The studio headphones buying guide provided clarity on selecting truly neutral cans, avoiding gear hype. The best DAW software list helped me choose platforms that handle multi-track editing efficiently, saving hours.
Additionally, I rely on expert tips for audio interface setup to reduce noise and improve gain staging. These resources have become my trusted companions for building a professional sound environment from the ground up.
Embrace the Growth Mindset and Keep Evolving
If there’s one thing I want you to take away, it’s that mastery in voiceover or podcasting isn’t a one-and-done deal. It requires consistent learning, calibration, and fine-tuning. Don’t shy away from experimenting with new tools like the latest USB-C interfaces or exploring fresh acoustic treatment hackss that can give you that extra edge.
Remember, your environment’s quality and attention to detail are what separate amateurs from pros. Every small adjustment—whether calibrating your headphones, setting gains correctly, or treating your room—adds up to a noticeably cleaner, more professional sound. Keep pushing forward, stay curious, and invest in knowledge as much as you do in gear.